
The AT&T International Plan Scam and Your Exit Strategy
Let's be blunt: AT&T's international roaming plans are a rip-off. They'll tell you it's for 'convenience', but the price tag is anything but convenient for a budget traveler. I just got back from an 8-day sprint through Colombia, hitting Medellín, Guatapé, and Cartagena, and my data cost me exactly €28. That's for about 2GB of data, which for me is plenty when I'm hopping hostel Wi-Fi. If I'd stuck with AT&T's International Day Pass at $10 a day, that would have been $80, or roughly €74. That's a €46 difference for a single trip, and that's being generous with data usage. If you're a heavy user, the difference explodes.
The real scam is how easily you can get sucked into it. A quick text from AT&T saying 'welcome to [country], here's our great daily rate!' and boom, you're on the hook. It's designed to be too easy, too tempting when you're tired and just landed. But your iPhone, especially any model from the iPhone XS onward, has dual SIM capabilities, meaning it can handle both your AT&T eSIM and a separate travel eSIM simultaneously. This is the key to escaping their clutches.
Breaking Down the Costs: AT&T vs. Travel eSIM
Consider a typical two-week trip to Europe. AT&T's International Day Pass costs $10/day. That's $140 for 14 days. For that same period, I can grab a Cellesim regional Europe eSIM with 10GB of data for maybe €25-€30. That's enough data for 14 days if you're smart about Wi-Fi, easily hitting 0.7GB/day. Even if you needed 20GB, you're looking at under €50. The savings are not just significant, they're foundational to a budget traveler's existence. That extra €90-€100? That's easily three nights in a decent hostel like Selina or two epic street food tours.
| Scenario | AT&T International Day Pass (USD) | Travel eSIM (EUR, approx.) | Savings (EUR, approx.) |
|---|---|---|---|
| 8-day trip to Colombia (2GB data) | $80 | €28 | €46 |
| 14-day trip to Europe (10GB data) | $140 | €30 | €100 |
| 30-day trip to Mexico (20GB data) | $300 | €55 | €245 |
Keeping Your AT&T Number Active Without the Roaming Price Tag
The beauty of the eSIM setup is that your AT&T number stays active. You'll set it to primarily handle calls and texts, but critically, you'll disable its data roaming. Your travel eSIM then takes over for all your internet needs. This means your friends and family can still reach you on your regular number, and you won't miss important verification codes. It's the best of both worlds: connectivity and cash in your pocket.
Is Your iPhone AT&T eSIM Compatible? A Quick Check
Not all iPhones are created equal, especially when it comes to eSIM. If you're rocking an older model, you might be out of luck for dual eSIM support. But for most travelers with a relatively recent iPhone, you're good to go.
iPhone Models That Support eSIM and Dual SIM
Generally, if you have an iPhone XS, XR, or newer, you're set. This includes all iPhone 11, 12, 13, 14, and 15 models (including Pro, Pro Max, and Mini versions). The crucial part is that these phones support Dual SIM with eSIM. What does that mean for us budget travelers? It means your phone can have two active cellular plans at once: one physical SIM or eSIM for your AT&T number and another eSIM for your travel data. Newer iPhones (14 and 15 series in the US) are eSIM-only, meaning your AT&T line is already on an eSIM, making the process even smoother.

Checking Your iPhone Software Version
Make sure your iPhone is running iOS 12.1 or later. To check, go to Settings > General > About and look for 'Software Version'. If you're on an older version, update it before you travel. Trust me, you don't want to be stuck trying to download a massive iOS update on dodgy hostel Wi-Fi in the middle of nowhere. I learned that the hard way trying to update my phone in a remote mountain hostel near Salento, Colombia, with Wi-Fi slower than a sloth on a coffee break. Never again.
Activating Your AT&T eSIM on iPhone, Before You Go
This is the crucial first step. You want your AT&T line on an eSIM before you even think about leaving your home country. Why? Because dealing with AT&T customer service from a different time zone with language barriers is a special kind of hell. Do it now, from your couch.
Converting Your Physical AT&T SIM to eSIM
If your AT&T line is currently on a physical SIM card, you'll need to convert it to an eSIM. This is usually a straightforward process. You can do it through the My AT&T app, by calling customer service, or by visiting an AT&T store. I recommend calling. Explain that you need to convert your physical SIM to an eSIM for international travel. They'll walk you through it. Make sure you're on Wi-Fi when you do this, as your service will temporarily drop during the conversion.
- Open the My AT&T App or Call Support: The app often has an option under your plan details to manage your SIM/eSIM. If not, dial 611 from your AT&T phone or +1.800.331.0500.
- Request eSIM Conversion: Clearly state you want to convert your physical SIM to an eSIM for your current number.
- Follow Prompts: They might send you a QR code via email or text, or guide you through adding it directly in your iPhone's settings.
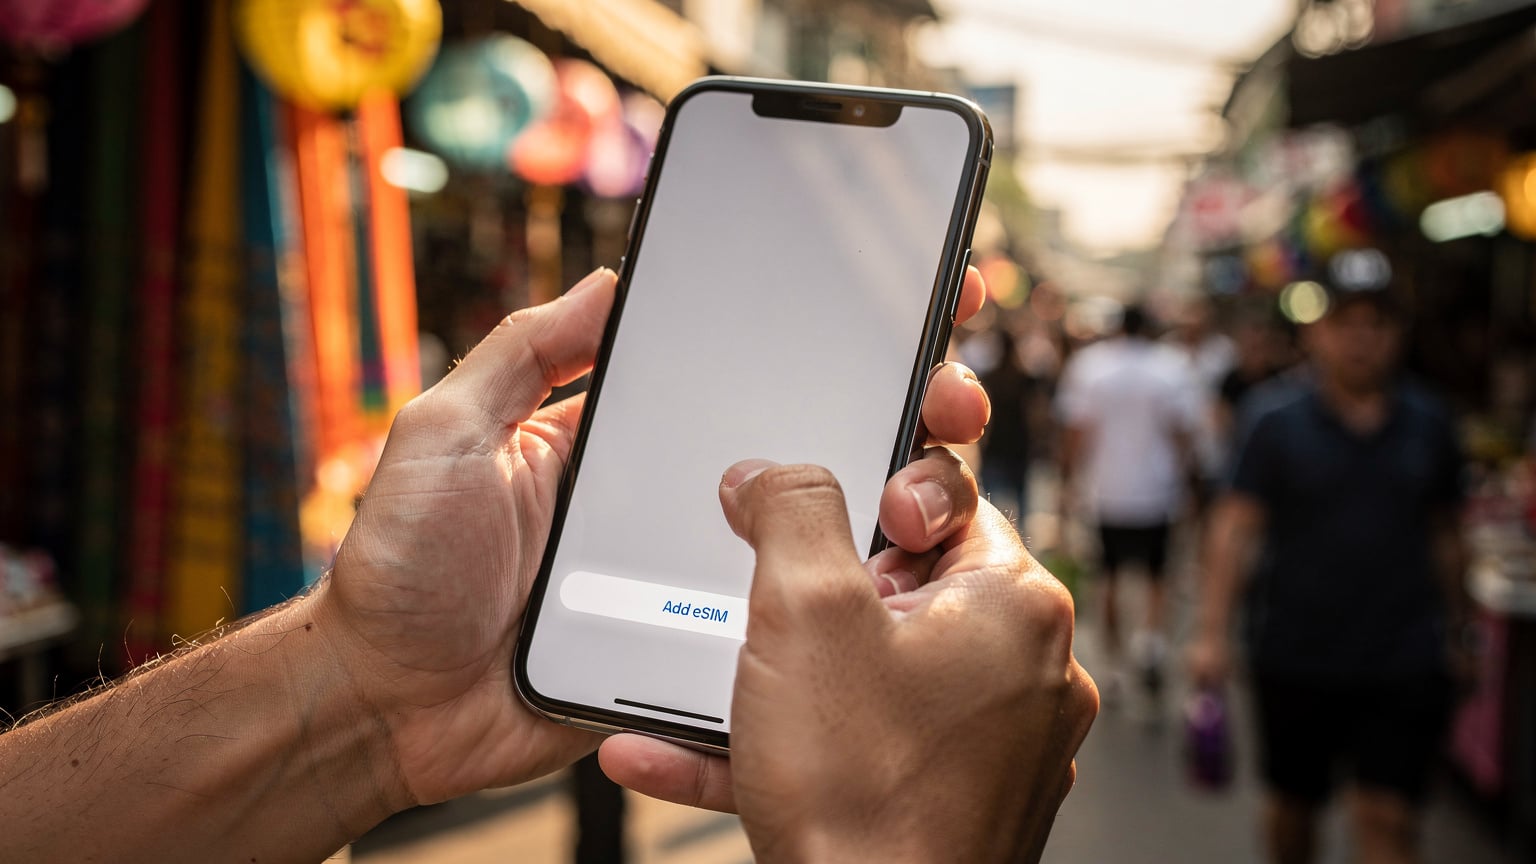
- Install the eSIM: On your iPhone, go to Settings > Cellular > Add eSIM and follow the instructions. If you received a QR code, scan it.
- Verify Activation: Once installed, ensure your AT&T line is active and working. Make a test call or send a text.
Getting a New AT&T eSIM If You Don't Have a Physical SIM
If you're a new AT&T customer or getting a new line, you can simply request an eSIM from the start. This bypasses the conversion step. Just tell them you want an eSIM for your new service, and they'll provision it directly. This is often the easiest route if you're upgrading or switching carriers.
Why a Travel eSIM is Your Best Friend Abroad
Once your AT&T line is on an eSIM, your iPhone has an empty 'slot' for a second eSIM. This is where the magic happens. A travel eSIM, like those from Cellesim, gives you local data rates without the hassle of hunting down a physical SIM card or dealing with language barriers.
The Benefits of a Travel eSIM Over Physical SIMs
- Instant Activation: Buy online, scan a QR code, and you're connected. No waiting in line at the airport or searching for a phone store. This is especially useful when you're crossing borders. I've gone from Colombia to Ecuador, and then to Peru, without ever missing a beat of connectivity.
- Cost-Effective: Significantly cheaper than roaming. As I showed with the Colombia example, the savings add up fast.
- Keep Your Primary Number: Your AT&T number remains active for calls and texts (just remember to turn off data roaming for it).
- Flexibility: Easily switch between different eSIMs if you're visiting multiple countries or need more data. You can store several eSIM profiles on your iPhone and activate them as needed. This is brilliant for multi-country trips, like when I was backpacking through the Baltics and needed a new data plan for each country.
- No Physical Card Swapping: No fumbling with tiny SIM trays or losing your home SIM card.
Comparing Travel eSIM Providers and Plans
There are many travel eSIM providers out there. Cellesim is a solid choice for its global coverage and competitive pricing. But it's always worth doing a quick comparison for your specific destination and data needs.
| Provider | Pros | Cons | Typical 10GB Europe Plan (approx.) |
|---|---|---|---|
| Cellesim | Excellent coverage, competitive pricing, easy activation, regional plans | No free trials for all regions | €25-€30 |
| Airalo | Wide range of plans, easy UI, good for single countries | Can be slightly more expensive for regional plans | €28-€35 |
| Holafly | Unlimited data plans for some regions | Often more expensive, data speeds can be throttled after a certain usage threshold | N/A (often unlimited, higher price) |
| Nomad | Good for long-term travel, flexible plans | Can be confusing UI, customer support can be slow, for more details see our Nomad eSIM vs. Cellesim comparison. | €27-€32 |
How to Set Up Dual SIM with AT&T and a Travel eSIM on Your iPhone
This is where it all comes together. Setting up dual SIM is straightforward once you know the steps. Do this at home, or at least with reliable Wi-Fi, before you hit the airport.
Step-by-Step Installation of Your Travel eSIM
- Purchase Your Travel eSIM: Go to the Cellesim website (or your chosen provider), select your destination and data package, and complete the purchase. You'll receive a QR code via email.
- Add eSIM on iPhone: Go to Settings > Cellular > Add eSIM.
- Scan the QR Code: Choose 'Use QR Code' and scan the code from your email. If scanning isn't an option (e.g., you're viewing the QR on the same phone), you can often choose 'Enter Details Manually' and input the SM-DP+ Address and Activation Code provided.
- Label Your Cellular Plans: Your iPhone will prompt you to label your plans. Label your AT&T line 'Primary' or 'My US Number' and your travel eSIM 'Travel Data' or 'Destination Name'. This makes it much easier to manage.
- Set Default Line: When prompted, select your AT&T line as your 'Default Voice Line' and 'Default SMS Line'.
- Choose Cellular Data Line: This is critical. Select your 'Travel Data' eSIM as your 'Cellular Data' line.
- Disable AT&T Data Roaming: For your AT&T line, go to Settings > Cellular > [Your AT&T Line Label] > Data Roaming and turn it OFF. This is how you avoid those nasty roaming charges while keeping your number active.
Managing Your Cellular Settings for Optimal Savings
Once set up, a quick glance at your iPhone's Cellular settings (Settings > Cellular) will show both lines. You can toggle data roaming on/off for each, switch your cellular data source, and manage which line is used for calls/texts. I always double-check these settings the moment I land. Seriously, a quick five-second check can save you $10.
Data Usage Hacks to Keep Your Budget Intact
Even with a cheap travel eSIM, data isn't infinite. Especially if you're aiming for that €40/day budget, every megabyte counts. Here's how I stretch my data on the road.
App-Specific Data Saving Tips
- Maps: Download offline maps for Google Maps or Maps.me before you leave Wi-Fi. This is a lifesaver. I never navigate a new city without it.
- Streaming: Download movies/shows on Netflix, Spotify playlists, and podcasts before leaving the hostel Wi-Fi. Don't stream on mobile data unless it's an emergency.
- Social Media: Restrict background app refresh for data-hungry apps like Instagram, TikTok, and Facebook. Go to Settings > General > Background App Refresh.
- Messaging: Stick to Wi-Fi for sending photos/videos on WhatsApp or Signal. Text-only uses minimal data.
Tracking Your Data Consumption
Your iPhone tracks your cellular data usage under Settings > Cellular. Scroll down to 'Cellular Data Usage'. I reset these statistics at the start of each trip to get an accurate picture. If your travel eSIM provider has an app, use that too, as it often shows real-time usage for that specific plan. On my last Europe trip, I budgeted 0.5GB/day. My phone's usage showed 7GB over 14 days, perfectly matching my Cellesim 10GB plan. It's all about the numbers.

Border-Crossing Data Strategy: Seamless Transitions
This is where eSIMs truly shine for the multi-country backpacker. No more frantic searches for SIM cards at dodgy border towns.
Managing Multiple eSIM Profiles for Regional Travel
Your iPhone can store several eSIM profiles, even if only two can be active at once (your AT&T and one travel eSIM). If you're traveling through Europe, a regional eSIM (like a Europe-wide plan) is your best bet, covering multiple countries under one plan. If you're bouncing between continents, say from Peru to Brazil, you'd simply purchase a new Cellesim eSIM for Brazil and activate it when you cross the border, deactivating the Peru one. It's a game-changer for avoiding the 'no data' panic at a new border.
What to Do at Land Borders and Airports
At land borders, especially notorious ones like the Ipiales-Tulcán crossing between Colombia and Ecuador, you want your data active. You'll need it for ride-sharing apps, checking bus schedules, or translating with border officials. I've seen travelers stuck because their data cut out the moment they stepped into a new country. With an eSIM, I activate my new country's plan while still on Wi-Fi at the last hostel, so by the time I'm through customs, I'm already connected. This saved my skin at the La Quiaca-Villazón border between Argentina and Bolivia, where things can get a bit wild.
For air travel, similar logic applies. Activate your eSIM for the destination country while you're still in the departure lounge with Wi-Fi. As soon as you land, your phone connects. No scrambling for airport Wi-Fi passwords or dealing with pushy SIM card vendors.
When is an AT&T Travel Pass Actually Worth It? (Rarely)
Let's be clear, for 99% of budget travelers, the AT&T International Day Pass is a bad deal. But there are tiny, niche scenarios where it *might* make sense. Very tiny.
Edge Cases Where AT&T Roaming Might Make Sense
- Emergency, Short-Term Business Trip: If your company is footing the bill and you're only abroad for a day or two, and literally don't have time to mess with an eSIM. This is rare.
- Absolutely Zero Tech-Savvy: If you're so terrified of phone settings that the thought of adding an eSIM gives you hives. Even then, I'd say it's worth learning.
- Remote, Obscure Destinations: If you're going somewhere so off-grid that no travel eSIM provider or local carrier offers coverage, and AT&T somehow does (highly unlikely, but theoretically possible). Even in remote areas of Mexico, you'll find local SIMs that outperform AT&T roaming prices.

Understanding AT&T International Rates
Without a Travel Pass, AT&T's pay-per-use international rates are truly astronomical. We're talking dollars per MB. A single photo upload could cost you more than an entire week's worth of travel eSIM data. Don't even think about it. If you accidentally leave data roaming on for your AT&T line, you will get a bill that will make your eyes water. I heard a horror story about a guy who racked up $500 in data charges from a few hours of Instagram in Peru before he realized his mistake. Don't be that guy.
Troubleshooting Common AT&T eSIM and Travel eSIM Issues
Even for experienced backpackers, sometimes things go sideways. Here are common problems and how to fix them.
No Service or Slow Data on Your Travel eSIM
- Check Data Roaming: Make sure data roaming is ON for your travel eSIM (yes, for travel eSIMs, it needs to be on).
- Check APN Settings: Sometimes the Access Point Name (APN) settings need to be manually configured. Your eSIM provider (like Cellesim) will have instructions for this. Go to Settings > Cellular > [Your Travel eSIM Label] > Cellular Data Network.
- Restart Your Phone: The classic IT fix, but it often works.
- Network Selection: Try manually selecting a network operator. Go to Settings > Cellular > [Your Travel eSIM Label] > Network Selection and turn off 'Automatic'. Try connecting to different available networks.
- Contact Support: If all else fails, reach out to your eSIM provider's customer support. They can often diagnose issues remotely.
AT&T Line Not Working After eSIM Conversion
If your AT&T line isn't working after converting to eSIM, it's usually one of two things:
- Activation Issue: The eSIM might not have fully activated on AT&T's end. Re-contact AT&T support.
- Incorrect Settings: Double-check that your AT&T line is set as the 'Default Voice Line' and that its 'Cellular Data' is set to OFF (if you're using the travel eSIM for data).
The Best Alternatives to eSIMs: Local SIM Cards
While I'm a huge fan of eSIMs for their convenience, I'm also a budget traveler at heart. And sometimes, just sometimes, a local physical SIM card might be marginally cheaper or offer a specific perk. It's rare, but it happens.
When to Consider a Physical Local SIM
If you're staying in one country for an extended period (say, a month or more) and you're a heavy data user (think 50GB+), a local physical SIM might offer better value. For example, in Brazil, you can often find Claro or Vivo SIM cards for R$30-R$50 (€5-€9) with generous data packages for 30 days. You'll need to register it with your passport, which can be a hassle, but for a long stay, the slight savings might be worth it. The main downside is that you have to take out your AT&T physical SIM, which means you lose your primary number unless you transfer it to an eSIM before you go.
Another case is if you're traveling in a region where eSIM coverage is still developing, or where local providers offer unique deals. For instance, in some parts of Southeast Asia, you might find specific tourist SIM packages at the airport that are incredibly cheap for voice and data, sometimes for less than a Cellesim regional eSIM. But you'll always have to weigh the cost against the convenience factor.
Ultimately, eSIMs are the superior choice for most travelers due to their flexibility and ease of use. If you've got an iPhone and an AT&T plan, leveraging that dual eSIM capability is the smartest move you can make for your wallet while exploring the world. Don't let AT&T nickel and dime you. Travel smart, stay connected, and keep those euros for more empanadas.
Frequently Asked Questions
Can I use my AT&T eSIM for international data without extra cost?
No, using your AT&T eSIM for international data without a Travel Pass will incur expensive pay-per-use roaming charges, often several dollars per megabyte. To avoid these costs, disable data roaming for your AT&T line and use a separate travel eSIM for data.
How do I keep my AT&T phone number active while using a travel eSIM for data?
After converting your AT&T line to an eSIM, set it as your 'Default Voice Line' and 'Default SMS Line' in your iPhone's Cellular settings. Then, choose your travel eSIM as your 'Cellular Data' line and ensure data roaming is turned OFF for your AT&T line. This lets you receive calls and texts on your AT&T number while using the travel eSIM for internet.
Which iPhone models support AT&T eSIM and a travel eSIM simultaneously?
Most iPhone models from the iPhone XS, XR, and newer support Dual SIM with eSIM, allowing you to use your AT&T eSIM and a separate travel eSIM concurrently. This includes all iPhone 11, 12, 13, 14, and 15 series phones.
Is it possible to convert my physical AT&T SIM to an eSIM before my trip?
Yes, you can convert your physical AT&T SIM to an eSIM. This can typically be done through the My AT&T app, by calling AT&T customer service, or by visiting an AT&T store. It's highly recommended to do this before you travel to avoid complications abroad.
What is the primary benefit of using a travel eSIM over an AT&T International Day Pass?
The primary benefit is significant cost savings. A travel eSIM provides local data rates, making it far cheaper than AT&T's $10/day International Day Pass. For an 8-day trip, a travel eSIM could save you over €40, allowing you to allocate more of your budget to experiences.
What should I do if my travel eSIM isn't connecting to the internet?
First, check that data roaming is enabled for your travel eSIM in your iPhone settings. Then, try restarting your phone. If still no connection, verify the APN settings (provided by your eSIM vendor) or try manually selecting a network operator. If issues persist, contact your eSIM provider's support.