
Why eSIM is Your iPhone's Best Travel Friend
Remember those days of frantically searching for a local SIM card vendor right after landing, juggling tiny trays and hoping you bought the right size? I sure do. My most memorable scramble was in Chiang Mai, Thailand, trying to find a DTAC store that was actually open past 5 PM in the Old City's Thapae Gate area. Half the time, the street vendors were out of the micro-SIMs I needed, or their English was non-existent. With an eSIM, those frantic first few hours are gone. It's a digital revolution for connectivity, particularly for us iPhone users.
For anyone with an iPhone 13 or newer, the eSIM capability fundamentally changes how you approach international data. No more physical SIM swaps, no more fumbling with a paperclip in a cramped airplane seat. You can have a local data plan ready to go before you even step off the plane at Athens International Airport (ATH), letting you immediately hail a taxi via the FREE NOW app or check the public transport schedules for the Athens Metro, specifically the blue line to Syntagma Square, without a moment of data anxiety. It's about seamless transition, which, after years of travel, I've come to value more than anything.
Think about it: you land in Seville, Spain, grab your bags, and instead of hunting for an Orange or Movistar shop in the Santa Cruz district, your iPhone 15 Pro Max already has a working data plan. You can instantly check the hours for the Alcázar, which typically opens at 9:30 AM, or navigate the narrow streets to your Airbnb. This isn't just about convenience, it's about reclaiming precious travel time. I’ve wasted too many hours in the past trying to sort out phone issues, hours I could have spent sipping coffee in a charming plaza or exploring a hidden alleyway.
The End of Physical SIM Card Scrambles
Gone are the days when my first task after landing at Cairo International was to find a Vodafone Egypt store in Terminal 3, negotiate a data plan, and then pray the activation went smoothly. The last time I did that, it took nearly an hour, and I missed my pre-booked Uber to Zamalek. With an eSIM, that entire ordeal is sidestepped. You can purchase your plan online days or even weeks before your trip, activate it with a few taps, and be connected as soon as you land. It’s particularly useful in countries like Turkey, where the process of registering a foreign phone with a physical SIM can be a bureaucratic headache that often involves multiple trips to official offices and can take days, or even weeks, if you aren't a Turkish citizen. My last experience with a Turkcell physical SIM in İzmir taught me that lesson the hard way. The ability to bypass this entirely with an eSIM is a blessing.
Cost Savings Over Traditional Roaming
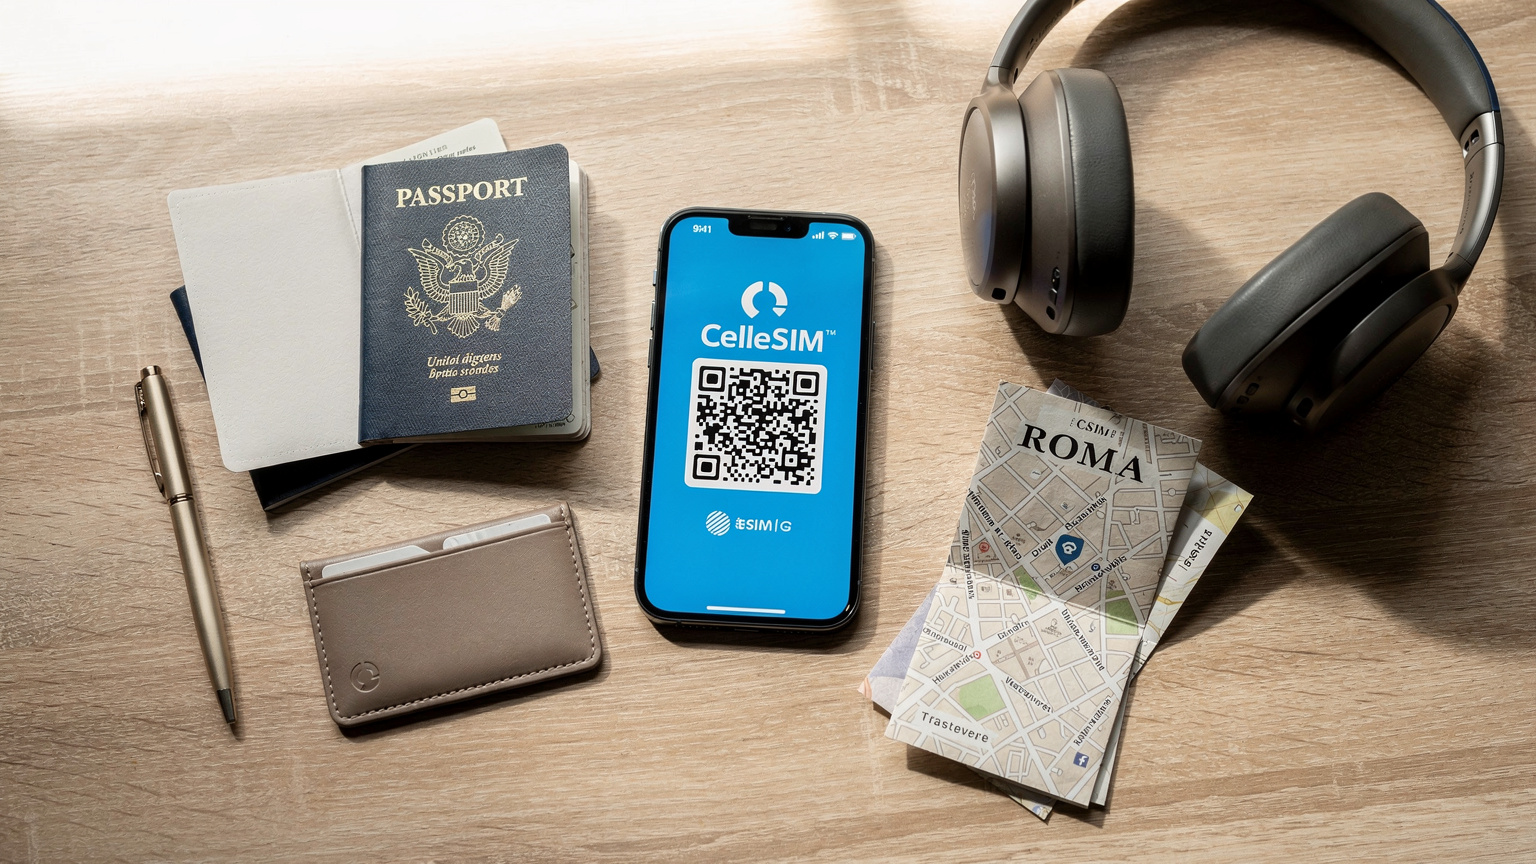
Let's be blunt: home carrier international roaming plans are often exorbitant. I remember paying upwards of $10 per MB back in the early 2010s while reporting from Azerbaijan, a mistake that cost me a small fortune on a single video upload from the Old City in Baku. Fast forward to 2026, and while prices have come down, they're still nowhere near as competitive as dedicated travel eSIM plans. A 20GB plan from your home carrier might cost you $100 for a month, whereas a similar eSIM plan for Europe, covering multiple countries, could be half that, or even less. Providers like Cellesim offer regional plans, so you're not just buying data for France, but for most of the Schengen Area, making multi-country trips incredibly economical.
Checking iPhone eSIM Compatibility
Not all iPhones are created equal when it comes to eSIM. While the technology has been around for a few years, its widespread adoption and support for multiple eSIMs is more prevalent in recent models. If you're planning a trip, the first thing to confirm is that your trusty device is ready for the digital revolution.
Generally speaking, if you own an iPhone 13, iPhone 14, iPhone 15, or any iPhone 16 or iPhone 17 model, you are absolutely good to go. These devices not only support eSIM but can often hold multiple eSIM profiles, which is a lifesaver for frequent travelers hopping between different regions. For example, my iPhone 14 Pro currently has a European eSIM for my work in Berlin's Mitte district, and a separate one for Southeast Asia, ready for an upcoming trip to Vietnam's An Hoi Islet. The trickier part is if you're holding onto an older model.
| iPhone Model | eSIM Support | Notes |
|---|---|---|
| iPhone XS, XS Max, XR | Yes | Supports one eSIM, plus one physical SIM. |
| iPhone 11 series | Yes | Supports one eSIM, plus one physical SIM. |
| iPhone 12 series | Yes | Supports one eSIM, plus one physical SIM. |
| iPhone 13 series | Yes (Dual eSIM) | Supports two active eSIMs simultaneously, or one eSIM and one physical SIM. |
| iPhone 14 series (US models) | eSIM only | US models do not have a physical SIM tray. All other regions support dual eSIM + physical SIM. |
| iPhone 15 series and newer | eSIM only (US models), Dual eSIM (global) | US models are eSIM only. Global models support two active eSIMs simultaneously, or one eSIM and one physical SIM. |
How to Check Your iPhone's eSIM Readiness
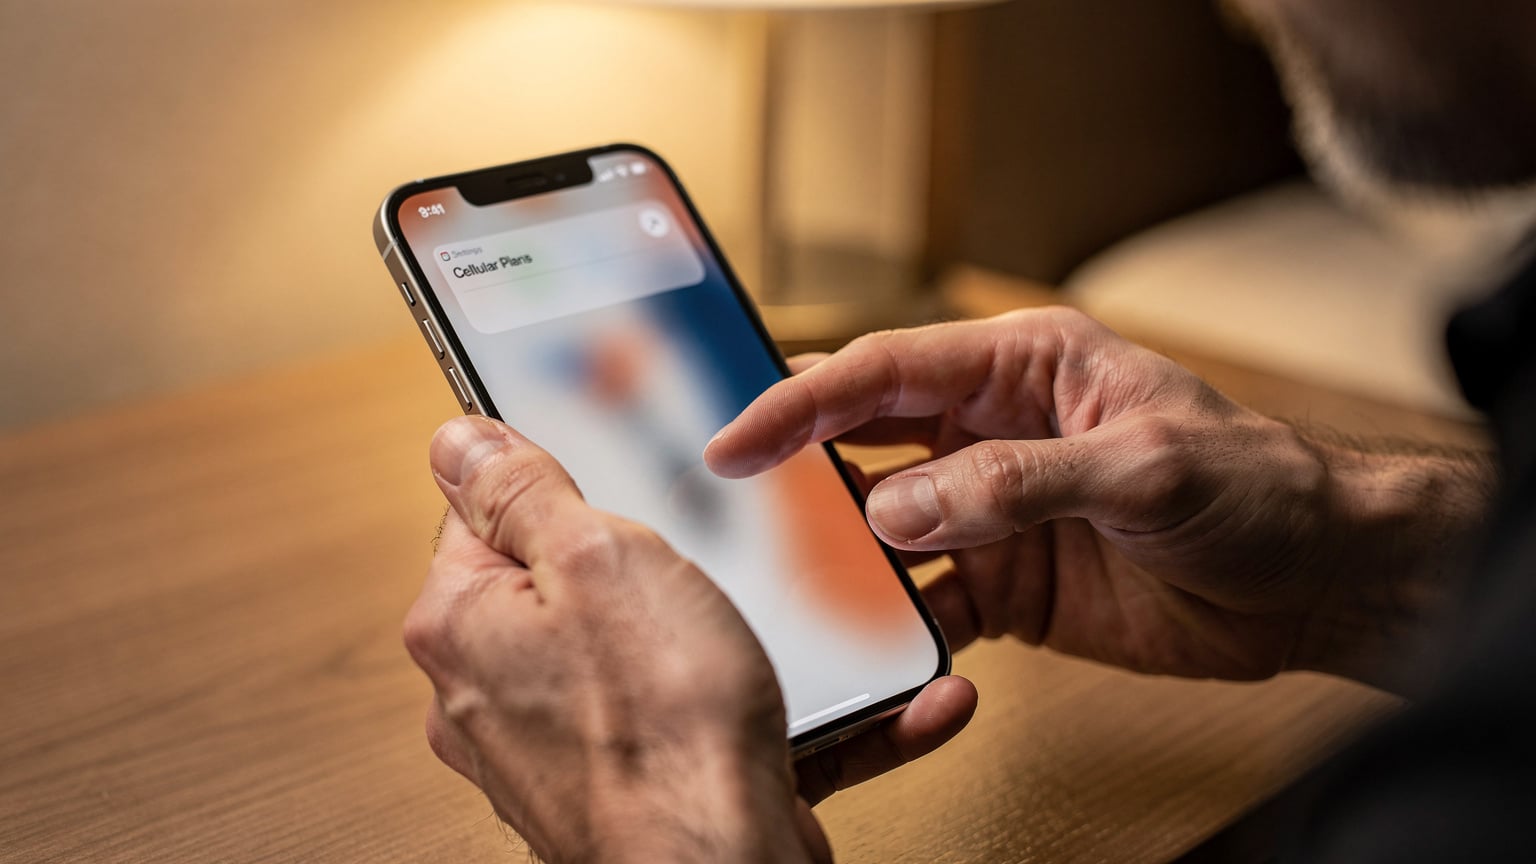
The simplest way to confirm is to check your iPhone's settings. Go to Settings > Cellular (or Mobile Data). If you see an option like 'Add eSIM' or 'Add Data Plan', your iPhone is ready. If you're still unsure, check the model number on the back of your device or in Settings > General > About and then cross-reference it with Apple's official support pages. It's a quick check that saves a lot of potential headaches down the line.
Pro TipIf you bought your iPhone in the US after the iPhone 14, it likely has no physical SIM tray at all. This means eSIM is your only option, and it's something I wish I'd known before trying to get a physical SIM in Morocco during a family trip. This is crucial for planning your connectivity.
How to Activate an eSIM on Your iPhone
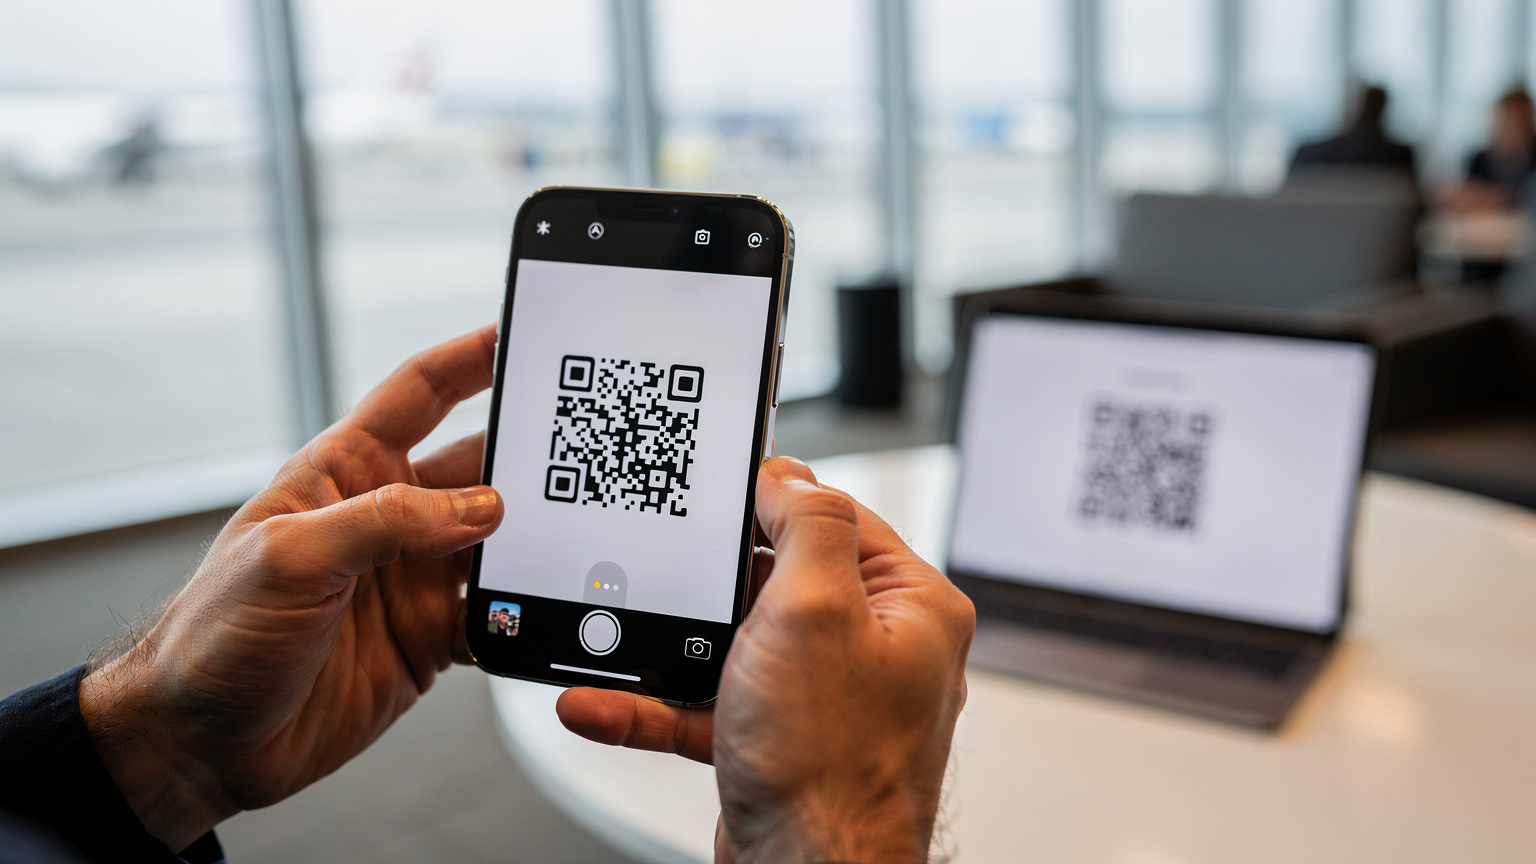
Activating an eSIM is remarkably straightforward, usually taking only a few minutes. Most eSIM providers, including Cellesim, offer two primary activation methods: scanning a QR code or manual entry. I've used both extensively, from a bustling cafe in Lisbon's Chiado district to a quiet hotel room in Kyoto, and both work reliably. The key is to have a stable Wi-Fi connection during the initial setup.
QR Code Activation
This is by far the easiest method. When you purchase an eSIM plan, your provider will typically email you a QR code. Here's how to get it going:
- Connect to Wi-Fi: Ensure your iPhone is connected to a stable Wi-Fi network. You can't download the eSIM profile without an internet connection.
- Open Settings: Go to Settings > Cellular (or Mobile Data).
- Add eSIM: Tap on 'Add eSIM' or 'Add Data Plan'.
- Scan QR Code: Choose 'Use QR Code' and scan the QR code provided by your eSIM carrier. Your iPhone's camera will open automatically.
- Confirm & Label: Follow the on-screen prompts to confirm the cellular plan. You'll then be asked to label your new eSIM, which is incredibly useful for distinguishing it from your primary line. I usually label mine by country or region, like 'Greece Travel' or 'Southeast Asia Data'.
- Set Default Line: Decide which line you want to be your primary for calls, messages, and cellular data. For travel, you'll likely want your new eSIM for data and potentially leave your home number active for calls (if desired, and if your plan allows).
Manual Entry Activation
Sometimes, you might not have another device to display the QR code, or the QR code simply isn't working for some reason. This is where manual entry comes in handy. It's a bit more tedious, but just as effective.
- Connect to Wi-Fi: Again, ensure you have a stable Wi-Fi connection.
- Open Settings: Go to Settings > Cellular (or Mobile Data).
- Add eSIM: Tap on 'Add eSIM' or 'Add Data Plan'.
- Enter Details Manually: Choose 'Enter Details Manually'. You'll need the SM-DP+ Address, Activation Code, and sometimes a Confirmation Code from your eSIM provider. Copy these precisely, as any typo will prevent activation.
- Confirm & Label: Follow the prompts to confirm and label your new eSIM.
- Set Default Line: Just like with QR code activation, set your preferred default lines.
Managing Multiple eSIMs on Your iPhone
One of the true superpowers of newer iPhones (iPhone 13 and up) is the ability to store and manage multiple eSIM profiles. This is a game-changer for someone like me who often travels to several different countries in a single trip. I once had to carry three physical SIM cards for a multi-leg journey through Europe, switching them out like a magician's trick every time I crossed a border. Now, with a few taps in iOS, I can instantly switch between my Azerbaijan eSIM for reporting from Baku's Flame Towers and my Greek eSIM for exploring the Plaka district in Athens.
Switching Between eSIM Profiles
Your iPhone makes it easy to switch which eSIM is active for cellular data. This is particularly useful if you have a regional eSIM (e.g., a Europe-wide plan) and a specific country eSIM (e.g., for Turkey, where regional EU plans might not apply). You can even have your home number active for calls and texts, while using a travel eSIM for all your data needs. Navigate to Settings > Cellular (or Mobile Data). Under the 'Cellular Plans' section, you'll see all your installed eSIMs. Tap on the one you want to use for data and select 'Turn On This Line' and 'Cellular Data'. You can also choose which line is your 'Default Voice Line' and 'Default Data Line' here.
Labeling and Organizing Your eSIMs
With several eSIMs, good labeling is essential. When you activate a new eSIM, your iPhone prompts you to label it. I recommend using descriptive names like 'USA Primary', 'Europe Travel', 'Asia Data', or even 'Spain Movistar' if you've bought a specific carrier plan like Movistar eSIM Spain. This clarity prevents accidental data usage on the wrong plan, which can quickly lead to unexpected charges. You can always rename an eSIM by going to Settings > Cellular > [eSIM Name] > Cellular Plan Label.
Data Roaming with eSIM: The Smart Approach
Data roaming has long been the bane of international travelers, a black hole for wallets. But with eSIMs, you can navigate the world of international connectivity far more intelligently. The goal is to minimize, or even eliminate, expensive roaming charges from your home carrier by using a local or regional eSIM for data, while keeping your home number active for important calls or texts.
Preventing Unwanted Roaming Charges
This is crucial. Before you leave your home country, or as soon as you activate your travel eSIM, make sure your primary (home) SIM is set NOT to roam for data. Go to Settings > Cellular > [Your Home SIM] > Data Roaming and turn it OFF. Then, ensure your travel eSIM is selected as your 'Cellular Data' line. This guarantees that all your internet usage goes through your travel eSIM, protecting you from nasty surprises when you get your next bill. I learned this lesson the hard way once, landing in Tokyo and forgetting to switch, only to find my home carrier had charged me for a few minutes of background data sync. Not a huge sum, but a frustrating oversight.
Dual SIM Functionality for Calls and Data
Your iPhone, particularly models from iPhone 13 onwards, excels at Dual SIM functionality. This means you can use your home number for calls and texts (keeping it active for two-factor authentication or urgent contacts) while simultaneously using your travel eSIM for all your data needs. In Settings > Cellular, you can specify which line is used for 'Cellular Data' and which is your 'Default Voice Line'. For instance, I keep my US number as my default voice line for receiving calls, but my 'Europe Travel' eSIM as my data line when I'm in countries like Germany, helping me navigate the BVG U-Bahn in Berlin or find a specific Biergarten in Munich's Schwabing neighborhood.
Troubleshooting Common eSIM Issues on iPhone
While eSIMs are largely reliable, sometimes things don't go exactly as planned. I've been there, staring at a 'No Service' message in a foreign country, heart sinking a little. Most issues are minor and easily fixable, often stemming from incorrect settings or a momentary network glitch. Don't panic, usually it's not a dead-end.
No Service or No Data
This is the most common hiccup. Here's a checklist:
- Check Data Roaming: For your travel eSIM, ensure 'Data Roaming' is turned ON in Settings > Cellular > [Your eSIM] > Data Roaming. This is counter-intuitive if you're used to turning it OFF for your home SIM, but for a travel eSIM, it often needs to be active as you're technically 'roaming' on a partner network.
- Toggle Airplane Mode: A classic fix. Turn Airplane Mode on for 30 seconds, then off again. This forces your iPhone to re-search for networks.
- Restart Your iPhone: The oldest trick in the book, but often effective.
- Check APN Settings: Rarely needed for eSIMs, but if data isn't working, compare the APN settings in Settings > Cellular > [Your eSIM] > Cellular Data Network with what your eSIM provider recommends.
- Manual Network Selection: Sometimes, your iPhone struggles to automatically pick the best network. Go to Settings > Cellular > [Your eSIM] > Network Selection and turn 'Automatic' off. Then, manually select one of the available networks. For example, if your eSIM is for Italy, you might see Vodafone IT, TIM, or WindTre. Try each one until you get a signal.
eSIM Not Activating
If your eSIM isn't activating after scanning the QR code or manual entry:
- Stable Wi-Fi: Double-check you have a strong, stable Wi-Fi connection during the activation process.
- Correct QR Code/Manual Details: Ensure the QR code is clear, not wrinkled, and correctly scanned. If doing manual entry, meticulously re-check every character of the SM-DP+ Address and Activation Code. Typos are common culprits.
- Provider Support: If all else fails, contact your eSIM provider's support. They can often re-send the QR code or provide direct assistance. I've had to do this a few times, especially when dealing with slightly less tech-savvy local carriers in countries like Egypt, where I once spent an hour trying to get a local data plan working only to find it was a backend issue.
eSIM Disappearing or Deleting Itself
This is rare but can happen if you're factory resetting your phone or experiencing a software glitch. Always ensure you don't delete an eSIM profile unless you are absolutely certain you won't need it again, as some QR codes are single-use. If it's gone, you'll need a new one from your provider.
Choosing the Right eSIM Plan for Your Trip
With so many eSIM providers and plans available, picking the right one can feel a bit overwhelming. It boils down to understanding your travel patterns, data needs, and budget. It's not about finding the 'cheapest', but the 'best value' for your specific journey.
Local, Regional, or Global eSIMs
- Local eSIMs: Best if you're staying in one country for an extended period. They often offer the most data for your money and can sometimes include local calls/texts. For instance, if you're spending a month in Istanbul, a local Turkish eSIM would be more cost-effective than a regional plan.
- Regional eSIMs: Ideal for multi-country trips within a specific region, like a backpacking trip through Southeast Asia or a Euro trip. These plans cover multiple countries under one umbrella, saving you the hassle of buying a new eSIM for each border crossing.
- Global eSIMs: Great for round-the-world trips or very frequent international travel across many continents. They offer convenience but usually at a higher per-GB cost compared to local or regional plans.
Data Allowance and Validity Periods
Consider how much data you actually need. Are you a heavy streamer, or just checking maps and messages? A 5GB plan for 15 days might be perfect for a two-week holiday in Greece, where I mostly use data for Google Maps to navigate the narrow streets of Anafiotika, and Whatsapp to coordinate with travel companions. For digital nomads, a 20GB or 30GB plan might be more appropriate. Also, pay attention to the validity period. A plan with 30GB but only valid for 7 days might not be suitable if you're traveling for a month. Always align the validity with your trip duration.
| Plan Type | Best For | Typical Data Range | Validity |
|---|---|---|---|
| Local eSIM | Single-country, long stays | 10GB - Unlimited | 7-30 days+ |
| Regional eSIM | Multi-country trips (e.g., Europe, Asia) | 5GB - 50GB | 7-30 days |
| Global eSIM | Frequent, worldwide travel | 1GB - 10GB | 7-30 days |
Comparing eSIM Providers
Don't just jump on the first deal you see. Compare providers based on: coverage in your destination (some are stronger in rural areas, others in urban centers like the Ginza district in Tokyo), data allowance, price per GB, validity, and customer support. Look for transparent pricing with no hidden fees. Cellesim, for example, prides itself on clear pricing and robust regional coverage, leveraging partnerships with major local operators worldwide.
eSIM Security and Privacy Considerations
In our increasingly connected world, security and privacy are paramount, especially when traveling. eSIMs, by their very nature, offer several advantages over physical SIMs in this regard, but it's still wise to be informed about the nuances. Losing a physical SIM card, for example, could be a real hassle, but a digital eSIM is much harder to physically 'lose'.
Enhanced Security Features
One of the key benefits of eSIMs is their inherent security. Since an eSIM profile is embedded directly into your iPhone's hardware and activated digitally, it's far more difficult for unauthorized individuals to tamper with it or clone it. Unlike physical SIMs, which can be easily removed and swapped into another device, an eSIM is tied to your phone's hardware and secured by your device's passcode and biometrics. This significantly reduces the risk of SIM-swapping fraud, a common tactic used by criminals to gain access to your accounts. Imagine someone swiping your phone at a bustling market in Marrakech's Jemaa el-Fna square, it's a comfort to know your digital identity is harder to compromise.
Privacy and Data Handling
When you use an eSIM from a travel provider, you're essentially using their network. It's important to choose providers with clear privacy policies. Reputable companies will outline how they handle your data, what information they collect, and how they protect it. While your data traffic is generally encrypted through standard cellular protocols, understanding the provider's stance on data retention and sharing is always a good idea. Always read the fine print, even if it's a few paragraphs in a terms of service agreement. This vigilance is just as important as knowing the local transit rules, like validating your ATM ticket before boarding the tram in Milan's Brera district.
Myths vs. Facts About iPhone eSIMs
As with any relatively new technology, especially in the fast-paced world of mobile connectivity, several myths and misconceptions tend to swirl around eSIMs. Let's clear up some common misunderstandings about using eSIMs on your iPhone, especially for travel.
eSIMs Are Less Reliable Than Physical SIMs: Myth
This is a common concern, but it's simply not true. eSIM technology is built to industry standards and is just as, if not more, reliable than physical SIMs. The 'chip' itself is integrated into your iPhone's secure enclave, meaning it's less prone to physical damage, wear and tear, or accidental loss than a tiny piece of plastic. The reliability comes down to the network quality of the underlying carrier, not the eSIM technology itself. I've had more physical SIMs fail on me over the years (usually due to improper insertion or just plain old age) than I have had issues with eSIMs.
You Can Only Have One eSIM on Your iPhone: Myth
For newer iPhones (iPhone 13 and later), this is absolutely false. You can store multiple eSIM profiles on your device and have two active simultaneously (e.g., one for calls/texts, one for data). My iPhone 15 Pro can hold eight or more eSIMs, though only two can be active at any given moment. This flexibility is a huge advantage for travelers who might visit several regions or want a backup plan. I usually keep my home eSIM, an EU-wide data eSIM, and an Asian data eSIM loaded up, ready for immediate activation depending on where I land.
eSIMs Drain Battery Faster: Myth
There's no scientific evidence to support this. The power consumption of an eSIM module is negligible and comparable to, if not less than, a traditional physical SIM card. Any perceived battery drain is likely due to other factors, such as increased data usage while traveling (e.g., using navigation apps more frequently), searching for a signal in remote areas, or running multiple apps in the background. Your iPhone's battery life is far more impacted by screen brightness, app usage, and network signal strength than by whether you're using a physical or digital SIM.
eSIMs Are Only for Tech-Savvy Travelers: Myth
While the concept might sound technical, the actual process of buying and activating an eSIM is designed to be user-friendly. If you can download an app or scan a QR code, you can use an eSIM. Most providers, including Cellesim, have streamlined the process to be as intuitive as possible, often with step-by-step guides and customer support available. It's far less intimidating than trying to communicate with a local vendor in a language you don't speak, just to buy a physical SIM that might not even work with your phone. Believe me, after navigating the complexities of Japan's JR East ticket machines, activating an eSIM is a breeze.
Frequently Asked Questions
Which iPhone models support eSIM for international travel?
All iPhone models from iPhone XS, XS Max, and XR onwards support eSIM. For optimal travel experience, iPhone 13 models and newer support Dual eSIM, meaning you can have two eSIMs active simultaneously, which is fantastic for managing home and travel lines.
Can I keep my home phone number active while using an eSIM for data abroad?
Yes, absolutely. This is one of the biggest advantages of eSIMs on iPhones. You can set your home line as your 'Default Voice Line' to receive calls and texts, and your travel eSIM as your 'Cellular Data' line to access the internet, effectively avoiding expensive roaming charges from your primary carrier.
What if my iPhone is locked to a specific carrier?
If your iPhone is carrier-locked, you will not be able to use an eSIM from another provider, just as you couldn't use a physical SIM from another provider. You must contact your home carrier to unlock your device before attempting to use a travel eSIM. This is a crucial step I've seen many travelers overlook.
How do I avoid accidental roaming charges with my home SIM while using an eSIM?
To prevent accidental roaming charges, navigate to 'Settings' > 'Cellular' (or 'Mobile Data') > [Your Home SIM] and ensure 'Data Roaming' is toggled OFF. Then, select your travel eSIM as the primary line for 'Cellular Data'. This ensures all your data usage goes through your travel plan.
Is an eSIM secure for banking and sensitive transactions while traveling?
Yes, eSIMs are generally very secure. Since the eSIM profile is embedded in your iPhone's hardware, it's less susceptible to physical theft or tampering than a traditional SIM card. Your data transactions are encrypted, and reputable eSIM providers adhere to strict security protocols. Always use secure Wi-Fi or your cellular data for sensitive transactions.
Can I top up my eSIM plan if I run out of data?
Most eSIM providers, including Cellesim, offer top-up options. If you find yourself needing more data during your trip, you can usually purchase an add-on or extend your plan's validity directly through the provider's website or app. This flexibility is a lifesaver, especially when unexpected delays mean you're using more data than planned.