Destination Guides

Japan eSIM Guide 2026: Navigating Data Plans and Connectivity

Advanced TroubleshootingCarrier Unlock GuidesManual Activation CodesNetwork Frequency BandsHardware Support

Reporting from the tech hub of Seattle, David 'Dave' Miller is the Technical Support Lead for Cellesim. With a background in mobile hardware repair, Dave focuses on the nitty-gritty of connectivity. He creates deep-dive troubleshooting guides for 'Sim Not Supported' errors, locked devices, and manual activation codes. Dave is the go-to expert when the QR code doesn't work and you need a technical fix fast.

This article was created with AI assistance and reviewed by our editorial team for accuracy.

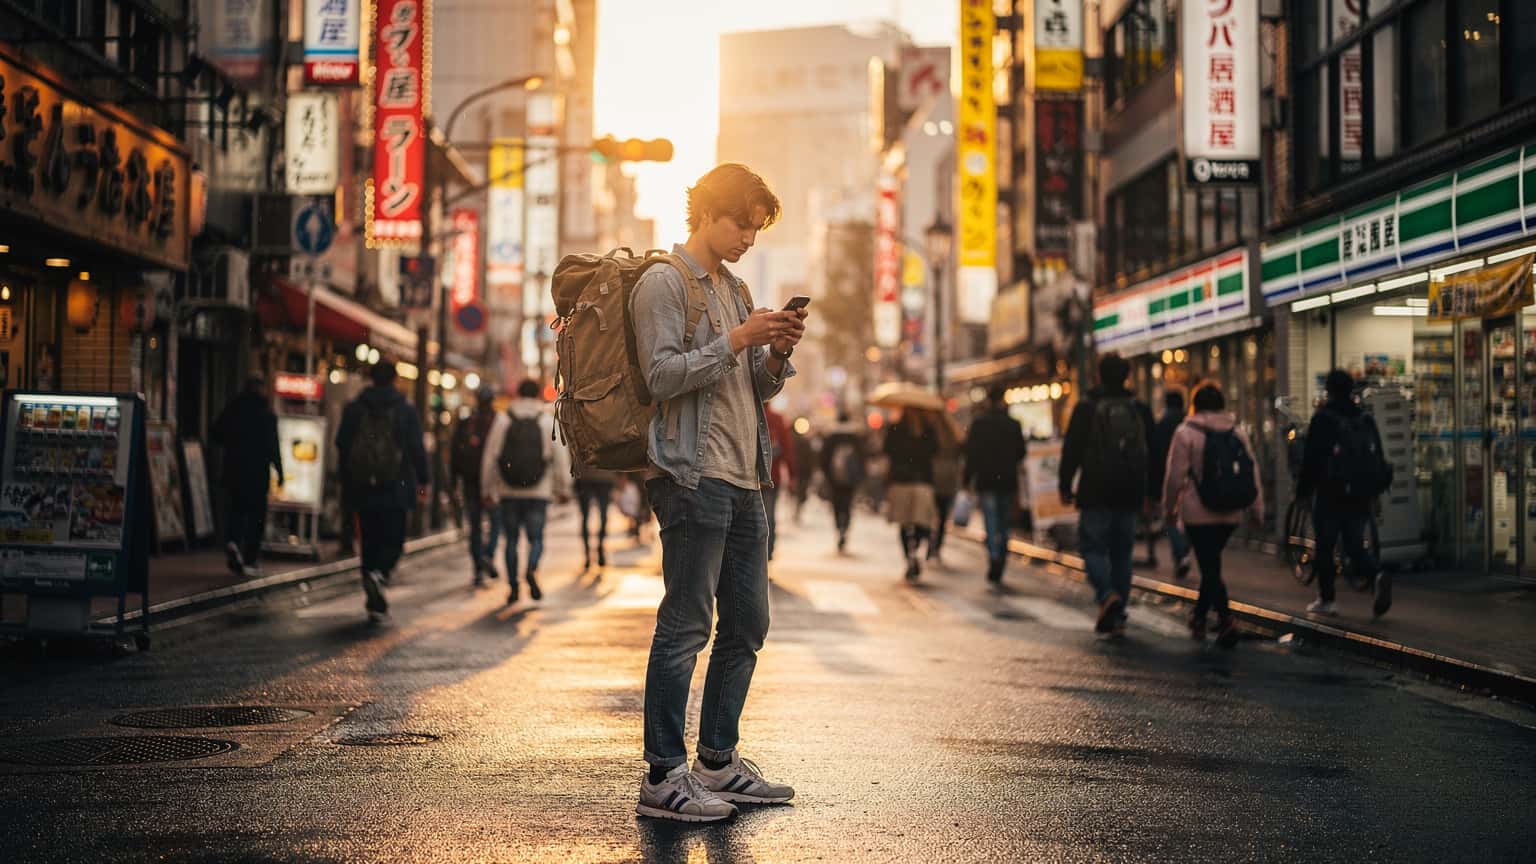
A traveler holding a smartphone, looking at a digital map while standing on a busy street in Tokyo's Shinjuku district, surrounded by neon signs and modern buildings at dusk.
Japan eSIMs make getting mobile data a breeze for travelers. Forget hunting for physical SIM cards or paying crazy roaming fees. Cellesim offers a bunch of flexible data plans, so you can get online the second you land and stay connected across Japan's big cities and even some quieter spots.

Why Japan is a 5G Powerhouse and Why it Matters for Your eSIM

Japan is seriously ahead of the curve when it comes to mobile tech. They've got some of the most advanced and widely available 5G networks in the world. For you, the traveler, this means a fantastic mobile data experience, as long as your phone and eSIM plan are set up to use it.

When we talk about 5G, it's not just about raw speed. It's also about how quickly data responds (low latency) and how much data the network can handle (capacity). Japan's main carriers, NTT Docomo, au (KDDI), and SoftBank, have poured a ton of money into building out both sub-6 GHz and super-fast mmWave systems. You might hit crazy multi-gigabit speeds with mmWave (like band n257) in busy city centers such as Shinjuku or Shibuya. But for most places, you'll be on the more common sub-6 GHz 5G bands, especially n77 (3.7 GHz) and n78 (3.5 GHz). These give you a huge boost over older LTE, with typical download speeds of 150 Mbps to 600 Mbps and uploads often between 30 Mbps and 80 Mbps. Even at busy spots like Tokyo Station during rush hour, it's impressive.

Knowing about these frequency bands is important because your phone's compatibility and your eSIM provider's network access will dictate your actual performance. A Cellesim eSIM connects you to one of Japan's major carriers, so you're plugged right into this powerful infrastructure. This means you can stream videos, load maps in a flash, and make reliable video calls, whether you're figuring out the Tokyo Metro or sharing photos from a peaceful garden in Kyoto.

The Japanese Approach to Network Density

Japan's big cities have incredibly dense networks. This isn't just about having more cell towers. It's about having smaller cell coverage areas and using smart antenna tech like Massive MIMO. This setup helps stop signals from getting weak in crowded places and inside buildings, which is often a problem in dense cities like Osaka. The result? Fewer dropped calls and more consistent speeds, even if you're in an underground shopping mall or on a bullet train (though high-speed trains have their own unique challenges when switching between cell towers).

Understanding Japan's Mobile Network Operators

Three main carriers dominate Japan's mobile scene: NTT Docomo, au (KDDI), and SoftBank. Rakuten Mobile is a newer player, but its network is still growing, often relying on roaming agreements with au outside the major cities.

CarrierPrimary 5G/LTE Bands (Sub-6 GHz)Noted Coverage StrengthTypical Performance (Download/Upload)
NTT DocomoLTE: B1, B3, B19, B21, B28; 5G: n78, n79, n257 (mmWave)Excellent nationwide, including rural areas and mountainous regions. Strong indoor penetration.5G: 200-800 Mbps / 40-100 Mbps; LTE: 50-250 Mbps / 10-50 Mbps
au (KDDI)LTE: B1, B3, B11, B18, B26, B28, B41; 5G: n77, n78, n257 (mmWave)Very strong urban and suburban coverage, good in rural areas.5G: 180-700 Mbps / 35-90 Mbps; LTE: 45-220 Mbps / 8-45 Mbps
SoftBankLTE: B1, B3, B8, B11, B28, B41, B42; 5G: n77, n257 (mmWave)Excellent in major cities, good suburban coverage, improving rural footprint.5G: 160-650 Mbps / 30-85 Mbps; LTE: 40-200 Mbps / 7-40 Mbps

When you pick a Cellesim eSIM for Japan, you're getting connected through these top-notch carriers. Your eSIM will automatically find and use the strongest network available, usually NTT Docomo or SoftBank. This means you'll always have the best signal possible. It's a real perk compared to plans that tie you to just one carrier, which might leave you with spotty service in quieter areas or specific buildings.

What is Carrier Aggregation and Why it Improves Your Experience

Carrier Aggregation (CA) is a clever technology used by these networks, especially with faster LTE-Advanced and 5G Non-Standalone (NSA) setups. It lets your phone use several frequency bands at the same time to boost data speeds and capacity. For example, your device might combine LTE Band 1 and Band 3, or even mix 5G n77 with LTE B3. This essentially creates a bigger "pipe" for your data, giving you faster speeds and a more stable connection. This is super helpful when you're streaming 4K video on the Yamanote line or making a video call from a bustling market in Kyoto.

eSIM vs. Physical SIM Cards for Japan

For decades, a physical SIM card was the only way to get cell service when traveling. But eSIM technology has changed everything, especially for international trips.

An eSIM, or "embedded SIM," is a digital SIM. It lets you activate a cell plan from your carrier without needing a physical nano-SIM card. The eSIM chip in your phone is programmable, so you can store multiple eSIM profiles and switch between them whenever you need to. This flexibility is a huge plus if you're traveling through several countries or want to keep your home number active while using local data.

If you're curious about the tech behind it, check out What is a SIM Card? Your Guide to Mobile Connectivity. For Japan, deciding between an eSIM and a physical SIM often comes down to how much convenience and instant access you want.

FeatureeSIM for JapanPhysical SIM for Japan
Activation ProcessInstant via QR code or manual entry, often before arrival.Requires physical purchase, installation, and often identity verification at store.
Device CompatibilityRequires eSIM-compatible device (most modern smartphones, e.g., iPhone XS/XR onwards).Any unlocked smartphone with a SIM tray.
Number of ProfilesCan store multiple eSIM profiles, easy switching.One physical SIM at a time, requires swapping.
AvailabilityPurchase online from anywhere, anytime.Purchase at airports (Narita, Haneda, Kansai) or electronics stores (BIC Camera, Yodobashi Camera).
CostGenerally competitive, often cheaper than roaming. Plans for specific durations/data.Varies, local carrier plans can be good value but require more effort.
Dual SIM FunctionalityKeep home physical SIM active for calls/texts while using eSIM for data.Requires a dual-SIM phone to keep home number active, or swaps.

The Advantages of eSIM for Japanese Travelers

The biggest perk of an eSIM is how incredibly convenient it is. You can buy and activate your Cellesim plan before you even leave home. That means you land at Tokyo Narita or Osaka Kansai International with immediate data service. No more trying to find a SIM card machine or waiting in line at a mobile store after a long flight. This is a huge win for anyone with a packed schedule or arriving late at night.

Plus, eSIMs make using dual-SIM much simpler. Many travelers want to keep their main phone number active for calls and texts from home (especially for things like two-factor authentication) while also using a local data plan. With an eSIM, you can use your home's physical SIM for calls/texts (if your carrier supports international roaming, or if you're just saving it for when you get back) and your Cellesim eSIM for all your data needs. This helps you avoid those ridiculously expensive daily international roaming charges, which can easily hit €40 a day, as we mentioned in our Vodafone eSIM: The €40/Day Backpacker's Guide to Roaming in 2026 post.

A traveler holding a smartphone, scanning a QR code for eSIM activation against the blurred background of a modern airport terminal in Japan.
A traveler effortlessly scanning a QR code for eSIM activation at Haneda Airport, simplifying their arrival in Japan.

Choosing the Right Cellesim Plan for Japan

Cellesim has a variety of data plans for Japan, built to fit different trip lengths and how much data you use. It's smart to figure out your real needs so you don't pay too much or, worse, run out of data halfway through your trip.

Think about your usual data habits:

  • Light User (2-5 GB/week): Mostly maps, messaging (Line, WhatsApp), a bit of social media, and light web browsing.
  • Moderate User (5-15 GB/week): Adds streaming music, frequent social media posts, some video calls, and regular navigation.
  • Heavy User (15+ GB/week): This means lots of video streaming, frequent video conferencing, uploading big files, or using your phone as a hotspot for other devices.

Our plans typically start from 1 GB for 7 days and go up to 50 GB for 30 days, with plenty of options in between. For instance, a 10 GB plan for 15 days is often a good choice for a two-week trip for a moderate user. This might cost you around ¥3,000-¥5,000 (roughly $20-$35 USD), depending on current exchange rates and any special deals.

Data-Only vs. Data, Calls, and Texts

Most eSIM plans, including Cellesim's Japan offerings, give you data only. That means you get mobile internet access, but not a local Japanese phone number for regular calls (the old-school kind) or SMS texts. For most travelers, this is totally fine because:

  • Messaging Apps: Apps like Line (which is huge in Japan), WhatsApp, and FaceTime Audio/Video all use data. They pretty much replace traditional calls and texts.
  • VoIP Services: Tools like Google Voice or Skype let you call regular phone numbers over your data connection.
  • Dual SIM: As we mentioned, you can keep your home physical SIM active for incoming calls/texts to your main number, and use the eSIM just for data.

If you absolutely need a local Japanese phone number for something specific (like setting up a local bank account, which is rare for short visits), then a physical SIM from a local carrier might be necessary. But be warned, that usually comes with more setup steps.

Understanding Data Throttling and Fair Usage Policies

While Cellesim offers generous data, it's good to know how "unlimited" or large data plans usually work, especially regarding fair usage. No network, not even in Japan, gives you truly unlimited, full-speed data forever.

Some eSIM providers might advertise "unlimited" data, but if you read the fine print, there's often a soft limit. For example, after you use a certain amount of high-speed data (say, 20 GB in 7 days), your speed might drop to 128 kbps or 256 kbps for the rest of the period. This is a common practice in the industry to stop network abuse and make sure everyone gets fair access. Cellesim's plans are upfront about their data allowances, so you always know exactly how much high-speed data you're getting. Always double-check the details before buying any Japan eSIM plan.

Activating Your Cellesim in Japan: A Step-by-Step Technical Guide

Getting your Cellesim eSIM for Japan up and running is pretty simple. The goal is to get you connected fast. You'll mainly be scanning a QR code or typing in some info. Before you start, make sure your phone is unlocked by your home carrier and supports eSIM. (For a full guide on iPhone eSIM: Your 2026 Practical Guide to Seamless Global Connectivity, we have a dedicated post).

Prerequisites for eSIM Activation

  1. Unlocked Device: Your phone needs to be unlocked by your home carrier to use an eSIM from a different provider.
  2. eSIM Compatibility: Most newer smartphones (iPhone XS/XR and up, Samsung Galaxy S20/Note20 and up, Google Pixel 3 and up) support eSIM. Just double-check your specific model.
  3. Stable Internet Connection: You'll need Wi-Fi to download the eSIM profile. This is why it's usually best to activate it before you leave home or right when you get to the airport using their Wi-Fi.
  4. Cellesim QR Code/Manual Details: We'll send this to you by email after you buy your plan.

The Activation Process for iOS and Android

The steps are pretty much the same for both platforms, with slight differences in how the menus look.

For iOS Devices (iPhone):

  1. Go to Settings: Open your 'Settings' app.
  2. Navigate to Cellular/Mobile Data: Tap on 'Cellular' or 'Mobile Data'.
  3. Add eSIM: Tap 'Add eSIM' or 'Add Data Plan'.
  4. Scan QR Code: Choose 'Use QR Code' and scan the code Cellesim sent you. If you can't scan it, select 'Enter Details Manually' and type in the SM-DP+ Address and Activation Code.
  5. Label Your eSIM: Once the profile downloads, you'll be asked to name your new eSIM (like 'Japan Data'). This helps you tell it apart from your main SIM.
  6. Set Data Line: Go to 'Cellular Data' and pick your new Cellesim eSIM as your primary data line. You can choose to keep your physical SIM active for calls/texts, or turn it off completely.
  7. Enable Data Roaming: Make sure 'Data Roaming' is turned ON for your Cellesim eSIM. This is vital for connecting to the local Japanese network. (Don't worry, with an eSIM, this only turns on data for that specific profile, not your home SIM).

For Android Devices (Samsung, Google Pixel, etc.):

  1. Go to Settings: Open your 'Settings' app.
  2. Navigate to Network & Internet: Tap on 'Network & Internet' or 'Connections'.
  3. Add Mobile Network: Tap 'SIMs' or 'Mobile Network' then 'Add SIM' or 'Download a SIM instead'.
  4. Scan QR Code: Choose 'Use a QR code' and scan the code from Cellesim. Or, select 'Enter it manually' to type in the activation code.
  5. Label Your eSIM: Give your new eSIM a clear name so you can easily identify it (e.g., 'Japan Trip').
  6. Set Data Preference: Pick your Cellesim eSIM as the preferred SIM for mobile data. You can manage call and SMS preferences separately.
  7. Enable Data Roaming: For the Cellesim eSIM profile, make sure 'Roaming' is switched on in its settings.
A person's hands operating a smartphone, navigating through the settings menu to configure an eSIM profile.
Close-up of hands navigating phone settings to activate an eSIM, illustrating the digital nature of the process.

APN Settings: A Potential Edge Case

Usually, Cellesim eSIMs automatically set up the correct Access Point Name (APN) settings. However, very occasionally, or with specific Android phone models (like some older OnePlus or Xiaomi phones), you might need to type in the APN yourself. The APN for our Japan plans is typically simple, often "internet" or "plus.4g." If you have trouble connecting after activating, always check this setting. You can find the APN details in your Cellesim activation email or by contacting support. (On Android, for example, you'd go to Settings > Network & Internet > Mobile Network > Cellesim eSIM > Access Point Names).

Common eSIM Troubleshooting in Japan and Advanced Fixes

Even with good planning, you might run into connection problems. Here's how to figure out what's wrong and fix common eSIM issues while you're traveling in Japan.

No Service or Limited Connectivity

If your phone says "No Service" or "Limited Service" even after activating your eSIM, try these steps:

  1. Restart Your Device: It's the classic tech fix, but it often works. A full reboot can help your phone reconnect to the local network.
  2. Check Data Roaming: Double-check that "Data Roaming" is turned on for your Cellesim eSIM profile in your phone's settings. This is a common thing people forget.
  3. Verify APN Settings: As we talked about, make sure the APN is set correctly. If it's empty or wrong, manually enter "internet" or the specific APN Cellesim provided.
  4. Manual Network Selection: Sometimes, your phone has trouble automatically picking the best network. Go to your eSIM settings, turn off "Automatic Network Selection," and manually choose one of Japan's main carriers (Docomo, au, SoftBank). Try each one until you get a steady connection.
  5. Toggle Airplane Mode: Turning Airplane Mode on and then off can force your phone to look for available networks again.

Slow Data Speeds

Are your speeds slower than you expected?

  • Network Congestion: In super crowded spots like Shibuya Crossing during peak times or at a big festival, even Japan's excellent networks can get temporarily overloaded.
  • Fair Usage Policy: Look at your Cellesim plan details to see if you've hit a high-speed data limit, which would cause speeds to drop.
  • Signal Strength: Check how many signal bars you have. Are you deep inside a building, in an underground station, or a more rural area? Weaker signal naturally means slower speeds. Japanese networks are great, but physics still applies.
  • Band Support: Make sure your device supports the main LTE/5G bands used in Japan (like B1, B3, B19, n77, n78). An older phone might not be able to fully use the network's features, especially carrier aggregation.

Troubleshooting APN Issues on Specific Android Models

Some Android phones, especially those with heavily customized Android versions or models not originally made for international use, can be picky about APN settings. If the automatic APN setup fails, and even typing "internet" doesn't work:

  1. Delete Existing APNs: Sometimes, old or wrong APN profiles can cause problems. Delete all APN profiles for your Cellesim eSIM, then create a new one from scratch using the exact settings Cellesim gave you.
  2. Check APN Type: Make sure the APN type is set to "default,supl" or "default." Some devices add extra types that can cause issues.
  3. APN Protocol: Confirm the APN Protocol is set to "IPv4/IPv6." Japan is advanced with IPv6, but some older setups might default to IPv4 only, which can cause problems with Carrier-Grade NAT (CGNAT) systems that might give you an IPv6-only address with IPv4 NAT.
Pro Tip: When All Else Fails
If you've tried everything and still don't have data, take screenshots of your phone's "About Phone" or "Status" screen (showing your IMEI) and the "Cellular/Mobile Data" settings for your eSIM. Then, contact Cellesim support with these details. Giving them precise technical info will help them fix things much faster.

Voice/WiFi and VoLTE Considerations for Japan

While eSIMs are mostly about data, it's good to understand how voice calls work in Japan, especially with a data-only eSIM, so you're prepared.

What are VoLTE and VoWiFi?

VoLTE (Voice over LTE) means your voice calls happen over the 4G LTE network instead of older 2G/3G networks. This gives you clearer call quality and lets you use data at the same time you're on a call. VoWiFi (Voice over Wi-Fi), also known as Wi-Fi Calling, allows you to make and receive calls and texts using a Wi-Fi connection when your cell signal is weak or unavailable.

The VoLTE Gotcha for eSIM Users in Japan

Here's something really important for Japan: many of Japan's older 3G networks (W-CDMA) are being shut down. NTT Docomo plans to completely turn off its FOMA 3G network by March 2026. Au (KDDI) has mostly moved away from its CDMA2000 3G network. This means if your phone or eSIM profile doesn't support VoLTE, you might find yourself unable to make traditional voice calls. Falling back to 3G for voice (called Circuit Switched Fallback, or CSFB) will become less reliable or even impossible.

Most Cellesim eSIMs are data-only and don't include traditional voice services or a local Japanese phone number. So, VoLTE support for your eSIM profile usually isn't an issue. However, if you're using your home physical SIM for incoming calls, make sure your home carrier supports VoLTE roaming in Japan on the network your phone connects to. If not, incoming calls might be spotty or fail, especially if your phone tries to switch to a 3G network that isn't there anymore.

A person sitting at a small table in a cozy Japanese cafe, sipping coffee and using their smartphone to make a call over Wi-Fi.
A traveler in a Japanese cafe, using their phone connected to Wi-Fi to make a call, highlighting the reliance on data for communication.

Relying on VoIP and Wi-Fi Calling with Your eSIM

For talking to people, your Cellesim eSIM gives you great data, making VoIP (Voice over Internet Protocol) apps your best friend. Apps like Line, WhatsApp, FaceTime, Google Meet, and Zoom will work perfectly for calls and video chats, using your fast data connection. Many of these apps also let you do Wi-Fi Calling, so you can use them even if your cell signal is bad but you have strong Wi-Fi, like in a basement restaurant in Ginza.

If you're using your home physical SIM and it supports VoWiFi, you can often make and receive calls to your home number over any Wi-Fi network. This effectively bypasses roaming charges for voice calls. It's a powerful combination: Cellesim eSIM for data, and your home SIM's VoWiFi for calls, keeping your original number completely functional.

Staying Secure on Japan's Networks

Japan's public Wi-Fi networks are generally safe, but it's always smart to be careful. Your Cellesim eSIM gives you a private, secure mobile data connection, so you don't have to rely as much on potentially less secure public Wi-Fi hotspots.

The Value of a VPN

Even with a secure cellular connection, using a Virtual Private Network (VPN) adds another layer of security and privacy. A VPN encrypts your internet traffic, protecting your data from anyone trying to snoop, especially if you occasionally connect to public Wi-Fi at a cafe or train station (like those at big JR stations). It also lets you access content from your home country that might be blocked otherwise, which can be handy for streaming services.

Public Wi-Fi and Your eSIM

While your eSIM keeps you connected, Japan also has a lot of public Wi-Fi, especially in big cities, airports, and convenience stores (konbini). For example, the "Japan Connected-free Wi-Fi" app lists many hotspots. But even on these well-known networks, it's smart to:

  • Limit Sensitive Transactions: Avoid online banking or typing in credit card details on public Wi-Fi.
  • Use a VPN: As mentioned, a VPN encrypts your connection over any network, public or private.
  • Disable Auto-Connect: Stop your phone from automatically joining unknown Wi-Fi networks.

Your Cellesim eSIM should be your main, secure way to get online, making public Wi-Fi a secondary option you don't have to rely on as much.

Final Thoughts on Your Japan eSIM Strategy

Using an eSIM to get around Japan's advanced mobile networks is a smart move for any modern traveler. From the moment you land, a Cellesim eSIM ensures you're connected, whether you're looking up directions to the Tsukiji Outer Market or sending real-time updates from a traditional ryokan.

By understanding Japan's carriers, the perks of eSIM technology, and how to fix common issues, you're all set for a smooth and connected trip. Just remember to pick a plan that fits your data usage, keep your phone unlocked, and don't hesitate to contact Cellesim support if you hit any tech snags. Japan offers a unique mix of tradition and high-tech innovation, and with a reliable eSIM, you can experience it all without missing a beat.

An overhead flat-lay composition of travel essentials for Japan: a smartphone displaying an eSIM QR code, a Japanese phrasebook, a passport, and a traditional Japanese tea cup.
An overhead shot of a traveler's essentials: a smartphone with an eSIM QR code on screen, a Japanese phrasebook, a passport, and a traditional Japanese tea cup, symbolizing preparation and cultural immersion.

Frequently Asked Questions

Can I use an eSIM in Japan with my existing phone number?

Yes, absolutely. Most modern smartphones have Dual SIM, Dual Standby (DSDS) capabilities. This means you can keep your home's physical SIM active for calls and texts to your main number, while using your Cellesim eSIM just for mobile data in Japan. Your phone will smartly manage both connections.

What Japanese network does Cellesim use for its eSIMs?

Cellesim partners with Japan's top carriers, mainly NTT Docomo and SoftBank. Your eSIM will automatically connect to the strongest network available, giving you the best coverage and speeds across Japan. This dynamic network switching offers better reliability than being stuck with just one carrier's network.

Will my eSIM work on the Shinkansen (bullet train) in Japan?

Yes, usually. Japanese bullet trains have strong cellular coverage, with repeaters and small cells designed to keep you connected even at high speeds. You might have brief signal drops when going through tunnels or during certain high-speed handoffs, but you can generally expect reliable data with your Cellesim eSIM on most Shinkansen routes.

What if my Cellesim eSIM doesn't activate in Japan?

If your eSIM doesn't activate, first try restarting your phone. Then, manually check that "Data Roaming" is turned on for your Cellesim profile and confirm the APN settings (it should typically be "internet"). If problems continue, try manually picking a network operator (Docomo, au, or SoftBank) in your phone's cellular settings. Contact Cellesim support if you're still having trouble.

Can I top up my Cellesim eSIM data plan while in Japan?

Yes, Cellesim makes it easy to add more data to your plan directly through our website or app. If you use more data than you expected, you can buy an extra data package for your existing eSIM profile. This extends your connection without needing a new QR code or activation process.

Are there any specific phone models that struggle with eSIMs in Japan?

Most modern, unlocked phones work perfectly, but some older Android models, especially those with unusual regional software or heavily customized operating systems (like certain Chinese market versions), can occasionally have minor issues with APN configuration. These are rare, and Cellesim support can help with manual settings if needed.

See all eSIM FAQs →

Japan eSIM 2026: Best Data Plans for Seamless Trip