In the evolving landscape of travel connectivity, the shift from traditional physical SIM cards to eSIMs represents a significant leap forward. For many global explorers, the idea of converting their existing physical SIM to an eSIM offers a compelling blend of convenience, flexibility, and efficiency, especially when preparing for an international journey. This guide details the process, benefits, and practical considerations involved in making this transition, ensuring you remain connected effortlessly wherever your travels take you.
- Understanding the Shift: Why Travelers Convert to eSIMs
- Is Your Device Ready? Checking eSIM Compatibility for Travel
- The Conversion Process: Turning Your Physical SIM into an eSIM
- Acquiring Your Travel eSIM: Cellesim Options
- Activating Your Cellesim eSIM for Seamless Travel
- Dual SIM Power: Managing Your Numbers While Abroad
- eSIM vs. Traditional Options: A Traveler's Comparison
- Troubleshooting Common eSIM Conversion and Usage Issues
- Frequently Asked Questions
Connect Globally with Cellesim eSIMs
Eliminate physical SIM hassles. Choose from plans covering 200+ countries and join 50,000+ happy customers.
Shop All eSIM PlansUnderstanding the Shift: Why Travelers Convert to eSIMs
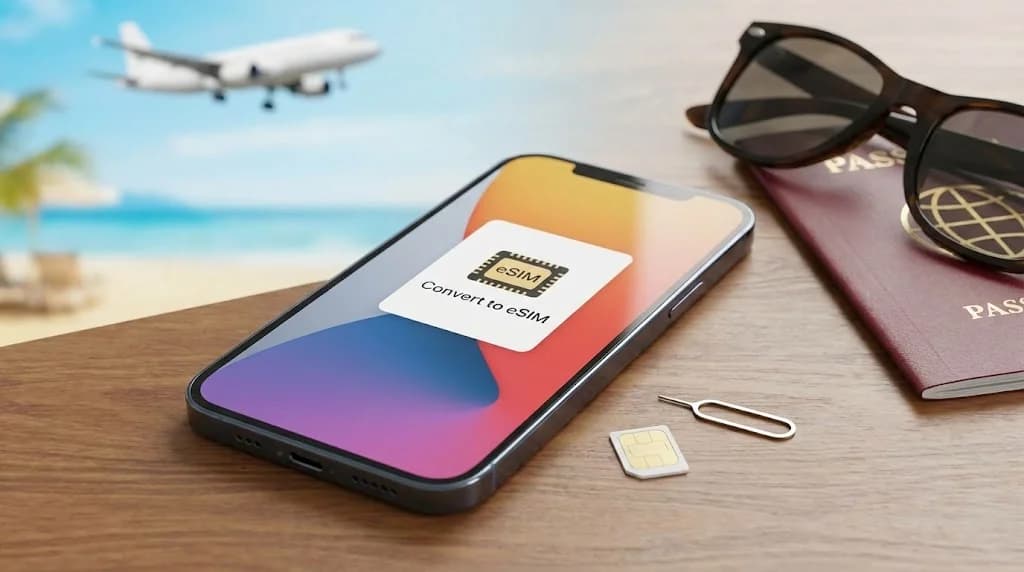
The concept of an embedded SIM, or eSIM, streamlines how we connect internationally. Unlike a traditional physical SIM card that requires insertion and removal, an eSIM is built directly into your device. This digital format offers numerous advantages for travelers, making the conversion from a physical SIM an increasingly popular choice.
When you convert your physical SIM to an eSIM, you essentially digitalize your primary phone line. This frees up the physical SIM slot in your device, allowing you to install a secondary eSIM for travel data without needing to swap cards. This dual SIM functionality is invaluable for maintaining your home number for calls and texts while using a separate, cost-effective data plan abroad. Travelers often prioritize this for convenience, avoiding the risk of losing small physical cards and simplifying the process of obtaining local connectivity.
The decision to switch also often stems from a desire for immediate connectivity upon arrival in a new country. With an eSIM, you can purchase and activate a Cellesim travel plan even before you depart, ensuring you have data from the moment your plane lands. This eliminates the need to search for local SIM card vendors or rely on potentially insecure public Wi-Fi networks.
Is Your Device Ready? Checking eSIM Compatibility for Travel
Before considering a conversion, the most critical step is to confirm that your smartphone supports eSIM technology. Most modern flagship smartphones released in the last few years, including Apple's iPhone XS/XR and newer, Google Pixel 3 and newer, and many Samsung Galaxy models, are eSIM compatible. However, regional variations exist, so it is essential to check your specific device model.
To verify compatibility, you can usually check your phone's settings under 'Cellular' or 'Mobile Data'. Look for an option to 'Add eSIM' or 'Add Data Plan'. Alternatively, Cellesim provides a dedicated eSIM checker tool that can quickly confirm your device's readiness. Additionally, ensure your phone is unlocked by your carrier. A carrier-locked phone will prevent you from using an eSIM from a different provider, including for international travel data.
The Conversion Process: Turning Your Physical SIM into an eSIM
Converting your existing physical SIM to an eSIM typically involves a request to your current mobile carrier. This process digitalizes your primary phone number and moves it from the physical chip to your phone's embedded eSIM module. The exact steps can vary slightly by carrier and device, but the general procedure is as follows:
- Contact Your Carrier: Reach out to your home network provider (e.g., AT&T, Vodafone, Orange) via their customer service, app, or in-store. Inform them you wish to convert your physical SIM to an eSIM.
- Verify Identity: Your carrier will need to confirm your identity to prevent unauthorized conversions.
- Receive Activation Information: They will provide you with an eSIM activation code, usually a QR code or a manual activation code, and instructions. This code contains all the necessary network profile information.
- Install eSIM Profile: On your smartphone, navigate to 'Settings' > 'Cellular' or 'Mobile Data' > 'Add eSIM' or 'Add Data Plan'. You will typically choose to 'Use QR Code' and scan the code provided by your carrier. Follow the on-screen prompts to complete the installation.
- Deactivate Physical SIM: Once the eSIM profile is successfully installed and activated, your physical SIM will become inactive. You can then remove it from your device.
This conversion generally preserves your existing phone number and plan details, simply changing the format of how your primary line is stored on your device. It is a one-time process for your home number.
"Converting my physical SIM to an eSIM for my main number was a game-changer for international travel. I no longer worry about losing my tiny SIM card or juggling different network settings. It made using a Cellesim travel eSIM seamless."
Acquiring Your Travel eSIM: Cellesim Options
Once your primary physical SIM is converted to an eSIM, your phone is ready to easily accommodate additional eSIMs for travel. Cellesim offers a wide range of eSIM plans designed for international travelers, providing data connectivity in over 200 countries and regions.
The process of acquiring a Cellesim eSIM is straightforward:
- Visit the Cellesim Website: Navigate to cellesim.com from your computer or smartphone.
- Choose Your Destination: Browse through our extensive list of countries or regions. For example, if you are traveling to the UK, select eSIM UK.
- Select Your Plan: Cellesim offers various data allowances and validity periods to suit different travel needs. Consider how much data you will likely use for navigation, social media, messaging, and email. Our Smart Data Calculator can help estimate your requirements.
- Purchase Securely: Complete your purchase through our secure online payment system.
- Receive Activation Details: Immediately after purchase, you will receive an email containing your eSIM QR code and detailed activation instructions.
Activating Your Cellesim eSIM for Seamless Travel
Activating your new Cellesim travel eSIM is a quick and digital process, often taking just a few minutes. You can do this at your convenience, even before you leave home, to ensure connectivity upon arrival.
Here’s a general guide:
- Ensure Wi-Fi Connection: You will need an active Wi-Fi connection to download the eSIM profile.
- Access Your eSIM Details: Open the email from Cellesim containing your QR code and instructions.
- Add Data Plan:
- For iPhones: Go to 'Settings' > 'Cellular' or 'Mobile Data' > 'Add eSIM' or 'Add Data Plan'.
- For Android Phones: Go to 'Settings' > 'Network & internet' > 'SIMs' or 'Mobile network' > 'Add eSIM' or 'Download a SIM'.
- Scan QR Code: Use your phone's camera to scan the QR code provided in the email. If scanning isn't possible (e.g., you're viewing the QR code on the same device), you can usually enter the activation details manually.
- Label Your eSIM: Once installed, label your Cellesim eSIM (e.g., "Travel Data," "Italy eSIM") to easily distinguish it from your primary line.
- Set Data Roaming: For the Cellesim eSIM, ensure data roaming is turned ON in your phone's settings. For your primary physical SIM (or converted eSIM), you can turn data roaming OFF to avoid unexpected charges.
- Select for Data: In your phone's cellular settings, set the Cellesim eSIM as your preferred line for cellular data when traveling.
For more detailed, device-specific instructions, refer to Cellesim's complete eSIM setup guide or our interactive setup guide.
Dual SIM Power: Managing Your Numbers While Abroad
One of the most significant advantages of converting your physical SIM to an eSIM (or having an eSIM-compatible phone) is the ability to use dual SIM functionality. This allows you to simultaneously use your primary number (on your converted eSIM) and a secondary travel eSIM, like one from Cellesim.
When traveling, you can set your phone to:
- Keep your primary number active: This allows you to receive calls and texts on your home number, which is useful for banking notifications, two-factor authentication, or urgent family contact. To avoid expensive roaming data charges, ensure you turn off data roaming for this line.
- Use your Cellesim travel eSIM for all data: Designate your Cellesim eSIM as the primary source for internet connectivity. This ensures you get high-speed data at local rates without affecting your home plan.
- Switch between lines: You can easily manage which line is used for calls, messages, and data through your phone's settings. This flexibility is crucial for business travelers and those who need to stay constantly reachable on their primary contact number.
eSIM vs. Traditional Options: A Traveler's Comparison
Understanding how an eSIM compares to other connectivity options is crucial for making an informed decision before your trip. Here is a comparison focusing on cost, convenience, and setup time for travelers:
| Option | Setup | Cost (approx.) | Convenience | Keep Home Number |
|---|---|---|---|---|
| Cellesim eSIM | Instant (digital) | From $4.50 (per plan) | High (no swapping, dual SIM) | Yes |
| Local Physical SIM | Store visit, activation | $15-$30 (per country) | Medium (requires finding store, swapping) | No (if only one slot) |
| International Roaming | Automatic | $10-$15/day (very high) | High (no setup needed) | Yes |
| Public Wi-Fi | Locate hotspot, login | Free to paid | Low (unreliable, insecure) | Yes |
This comparison highlights that while international roaming offers convenience, its cost is often prohibitive. Local physical SIMs can be cheaper than roaming but involve physical hassle and potentially losing access to your home number. Cellesim eSIMs strike a balance, offering the convenience of instant activation and dual SIM capabilities at competitive prices. For a deeper dive, read our article on Airport SIM vs. eSIM.
Troubleshooting Common eSIM Conversion and Usage Issues
While converting to an eSIM and using a travel eSIM is generally seamless, you might encounter a few common issues. Knowing how to troubleshoot them can save you time and frustration.
- "No Service" or "eSIM Not Activated":
Ensure data roaming is enabled for your Cellesim eSIM profile in your phone's settings. Sometimes, a simple restart of your device can resolve connectivity issues. Also, verify that your eSIM plan is active and has not expired. Check our guide on how to fix eSIM no service issues.
- Carrier Lock:
If your phone is still locked to your home carrier, it may prevent you from adding or activating a new eSIM profile from Cellesim or another provider. You must contact your original carrier to unlock your device before attempting to use other eSIMs. This is a common requirement across all eSIM providers.
- Incorrect APN Settings:
Occasionally, you might need to manually configure the Access Point Name (APN) settings for your Cellesim eSIM. Cellesim provides these details in your activation email or on our support pages. Navigate to your eSIM settings and look for the APN section.
- QR Code Scan Problems:
Ensure you have a stable internet connection for the initial scan. If the QR code isn't scanning, try entering the details manually. Make sure the QR code is displayed clearly on another screen, free from glare or damage.
- Data Usage Concerns:
Monitor your data usage through your phone's settings to avoid running out unexpectedly. You can always top up your Cellesim plan or purchase a new one if needed.
If you encounter persistent issues, Cellesim's 24/7 support team is available via [email protected] to assist you.
Ready for Seamless Travel Connectivity?
Convert your SIM and experience the future of global data with Cellesim. Instant activation, extensive coverage.
Start Your Connected JourneyTrusted by 50,000+ travelers in 200+ countries. 24/7 Support.
Frequently Asked Questions
Can I convert my physical SIM to an eSIM if my phone is locked to a carrier?
No, typically your phone must be unlocked to convert a physical SIM to an eSIM. Carrier-locked phones restrict changes to your network configuration. You will need to contact your carrier to unlock your device before proceeding with a conversion or using a Cellesim travel eSIM.
Is it safe to convert my physical SIM to an eSIM?
Yes, the conversion process is secure and managed by your mobile carrier. It simply digitalizes your existing phone number and plan. Your personal data and connectivity remain protected. Always ensure you are dealing directly with your official carrier.
Will I keep my original phone number after converting to an eSIM?
Yes, converting your physical SIM to an eSIM does not change your phone number. Your number remains the same; only the format in which your service profile is stored on your device changes from a physical chip to a digital profile.
Can I use my Cellesim travel eSIM simultaneously with my converted primary eSIM?
Absolutely. This is one of the primary benefits. Modern smartphones with eSIM capability support dual SIM functionality, allowing you to have both your primary number (on your converted eSIM) and a Cellesim travel data eSIM active at the same time. You can choose which line to use for calls, texts, and data.
What happens if I lose my phone after converting to an eSIM?
If you lose your eSIM-enabled phone, the process is similar to losing a phone with a physical SIM. You should immediately contact your carrier to suspend your service. The eSIM profile is tied to your device, so it cannot be easily transferred to another device without proper authentication.
Do I need an internet connection to activate my Cellesim travel eSIM?
Yes, an active Wi-Fi connection is required to download the eSIM profile to your device. Once installed, the Cellesim eSIM will use its own cellular data network for connectivity. You can activate it at home or once you arrive at your destination, as long as Wi-Fi is available.