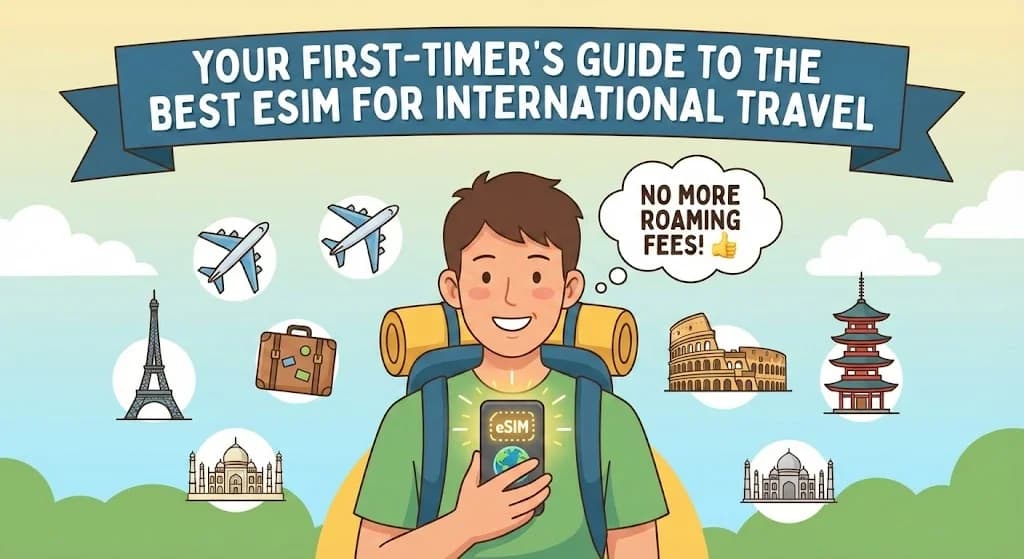
The moment you step off the plane in a new country is a mix of excitement and slight disorientation. You reach for your phone to pull up the hotel address, message your family that you've landed safely, or book a ride-share. But then, a familiar feeling of dread: no signal, no data. Suddenly, you feel disconnected and vulnerable. This is precisely the moment where choosing the best eSIM for international travel for first-timers beforehand transforms your arrival from stressful to seamless. Forget hunting for airport Wi-Fi passwords or fumbling with tiny plastic SIM cards. This guide is your friendly co-pilot, designed to demystify this essential travel technology and show you exactly how to stay connected affordably and easily on your first big trip abroad. We'll cover everything you need to know about this powerful international roaming alternative and explore how to avoid roaming charges and stay connected abroad for good.
- Understanding eSIMs: A Digital Upgrade for First-Time Global Travelers
- Why an eSIM is Your Best Travel Companion for a First International Trip
- Ensuring Compatibility: Your eSIM Checklist for Seamless Connectivity
- Choosing the Right eSIM Plan: Data Needs for Your First Adventure Abroad
- Activating Your eSIM: A Simple Step-by-Step Guide Before You Depart
- eSIM vs. Traditional Options: A First-Timer's Cost & Convenience Comparison
- Managing Your Data and Staying Connected While Abroad
- Frequently Asked Questions
Connect Instantly with a Cellesim International eSIM
Say goodbye to roaming fees and local SIM hunts. Join 50,000+ happy customers in 200+ countries who trust Cellesim for reliable connectivity.
Shop All eSIM PlansUnderstanding eSIMs: A Digital Upgrade for First-Time Global Travelers
You've probably heard the term eSIM, but for your first international trip, understanding its core concept is key. Think of an eSIM as a digital SIM card, permanently embedded within your phone. Unlike the physical plastic card you might be used to swapping, an eSIM is a rewritable chip that can be programmed with a new data plan remotely. This simple technological shift has profound benefits for travelers, particularly for those embarking on their first global adventure who want to avoid unexpected international roaming charges and connectivity headaches.
"The shift to eSIM technology has simplified global connectivity, offering travelers unprecedented flexibility and convenience. It's a fundamental change in how we connect abroad."
Ditching the Plastic: The Digital SIM Card Explained
At its core, an eSIM (embedded Subscriber Identity Module) performs the same function as a traditional SIM card: it connects your device to a cellular network. The crucial difference lies in the acquisition and activation process. With a physical SIM, you typically need to locate a store, purchase a small piece of plastic, find a tool (often a paperclip) to open your phone's SIM tray, and then carefully swap the chips. This process often involves the risk of losing your tiny home SIM card or struggling with installation in an unfamiliar environment.
An eSIM eliminates all of these physical steps. You purchase a data plan online from a provider like Cellesim, receive a QR code or activation details via email, and then simply scan it with your phone's camera. After following a few intuitive prompts, your travel data plan is digitally installed and ready to be activated upon arrival at your destination. This is a significantly cleaner, faster, and more convenient process, especially when you are jet-lagged and navigating a new country for the very first time.
Why an eSIM is Your Best Travel Companion for a First International Trip
For first-time international travelers, an eSIM offers a compelling array of advantages that simplify connectivity and enhance the overall travel experience. It removes several common pain points associated with traditional methods of staying online abroad.
No More Roaming Shock: Predictable Costs
One of the biggest anxieties for new international travelers is the fear of exorbitant roaming charges. Traditional carrier roaming can lead to bills in the hundreds or even thousands of dollars for even moderate data usage. An eSIM plan, especially from a dedicated provider like Cellesim, offers transparent, upfront pricing. You know exactly what you are paying for your data allowance, eliminating any post-trip surprises.
Instant Connectivity Upon Arrival
Imagine landing in a new country, turning on your phone, and instantly having data. No need to search for Wi-Fi, find a local SIM store, or wait in line at the airport. With an eSIM, you can often activate your plan before you even leave home or simply switch it on when your plane touches down. This immediate connectivity allows you to call a taxi, navigate to your accommodation, or message loved ones without delay, providing immense peace of mind for a first-timer.
Keep Your Home Number Active (Dual SIM Functionality)
Most eSIM-compatible phones support dual SIM functionality. This means you can keep your primary physical SIM (and your home phone number) active for calls and texts, while using your eSIM for data. This is invaluable for first-time travelers who need to receive important calls or two-factor authentication codes from their bank or other services back home, without incurring roaming data charges.
Flexibility and Control
eSIMs offer unparalleled flexibility. You can easily switch between different data plans or providers from your phone settings. If your initial plan runs out, topping up is quick and simple, or you can purchase a new plan entirely. This level of control is particularly reassuring for new travelers who might be unsure about their exact data needs or travel duration.
Ensuring Compatibility: Your eSIM Checklist for Seamless Connectivity
Before diving into plan selection, the most critical step for any first-time eSIM user is to verify that their smartphone is eSIM compatible. Not all phones support this technology, though most newer models do. Skipping this check can lead to frustration, so treat it as your essential pre-travel task.
How to Check If Your Phone is eSIM Compatible
Most phones released in the last 3-4 years, especially flagships from Apple, Samsung, Google, and some other brands, support eSIM. Here’s how you can typically check:
- iPhone: Go to Settings > General > About. Look for "eSIM" or "Digital SIM" in the EID (Embedded Identity Document) section. Alternatively, go to Settings > Cellular > Add eSIM. If you see this option, your iPhone supports eSIM.
- Android (Samsung, Google Pixel, etc.): The path can vary slightly by manufacturer and Android version. Generally, go to Settings > Network & Internet > Mobile Network (or SIM Card Manager). Look for an "Add eSIM" or "Download a SIM" option. Some phones might have "eSIM Cards" listed directly.
For a definitive check, you can also consult your phone's manufacturer website or use the Cellesim eSIM Checker. It's also important to ensure your phone is unlocked, as carrier-locked phones might restrict eSIM usage to specific providers. For technical details on eSIM technology, you can refer to the GSMA's official eSIM page.
Choosing the Right eSIM Plan: Data Needs for Your First Adventure Abroad
Selecting the best eSIM plan involves understanding your travel habits and data requirements. For first-time international travelers, estimating data usage can be tricky, but a little planning goes a long way in ensuring you stay connected without overspending.
Assessing Your Data Usage: What Do You Need?
Consider how you typically use your phone when traveling. Are you a heavy social media user, streamer, or rely on video calls? Or do you primarily use it for navigation, messaging, and occasional browsing? Here's a general guide:
- Light User (1-3 GB for 7 days): Emails, messaging (WhatsApp, iMessage), maps, light social media.
- Moderate User (5-10 GB for 7 days): Regular social media, some video streaming, occasional video calls, navigation.
- Heavy User (10+ GB for 7 days): Frequent video streaming, extensive social media, multiple video calls, tethering.
As a first-timer, it's often better to slightly overestimate your data needs to avoid the stress of running out while abroad. You can always top up if needed, but starting with a comfortable buffer is wise. Cellesim offers a Smart Data Calculator to help you estimate your needs.
Country-Specific vs. Regional eSIM Plans
Cellesim offers a variety of plans tailored to different travel itineraries:
- Single-Country Plans: If you are visiting only one country (e.g., Italy, Taiwan), a country-specific eSIM usually offers the best value and strongest local network access.
- Regional Plans: For trips covering multiple countries within a region (e.g., Europe, Asia (20 Countries)), a regional eSIM is incredibly convenient. You buy one plan, and it works seamlessly across all included countries, eliminating the need to purchase multiple eSIMs.
- Global Plans: For multi-continent trips or long-term travel, a Global eSIM Plan covering 127 countries offers maximum flexibility, ensuring you stay connected almost anywhere you go.
For your first international trip, assess your itinerary carefully. If you're staying in one country, a single-country plan is likely sufficient. If you're doing a multi-city European tour, a regional Europe eSIM makes the most sense.
Activating Your eSIM: A Simple Step-by-Step Guide Before You Depart
One of the biggest advantages of an eSIM for first-timers is the ability to set it up before you even leave home. This means you land ready to go, without any last-minute stress.
Pre-Departure Setup: A Smooth Start to Your Journey
Here’s a general guide on how to activate your Cellesim eSIM:
- Purchase Your Plan: Visit cellesim.com and choose the eSIM plan that fits your destination and data needs.
- Receive QR Code/Details: After purchase, you will receive an email containing a QR code or manual installation details.
- Install the eSIM:
- Via QR Code (Recommended): On your eSIM-compatible phone, go to Settings > Cellular (iOS) or Network & Internet > Mobile Network (Android). Look for "Add eSIM" or "Add Data Plan" and choose to scan a QR code. Use another device (like a tablet or computer) to display the QR code, then scan it with your phone's camera.
- Manual Installation: If you only have one device, or prefer not to use a QR code, you can manually enter the SM-DP+ Address and Activation Code provided in your email into your phone's eSIM settings.
- Label Your eSIM: Once installed, label your new eSIM (e.g., "Travel Data" or "Italy eSIM") to easily distinguish it from your primary SIM.
- Do NOT Activate Yet: Keep your new eSIM turned OFF in your phone's settings until you arrive at your destination. This prevents the plan from starting prematurely.
When to Activate Your eSIM for Optimal Use
For most eSIM plans, the validity period begins the moment it connects to a network in the destination country. Therefore, it's generally best to:
- Install at Home: Complete the installation steps (scanning QR code, labeling) while you have a stable Wi-Fi connection before your trip.
- Activate Upon Arrival: Once your plane lands, and you're ready to use data, go to your phone's settings, switch to your travel eSIM, and ensure data roaming is enabled for that eSIM. Your phone should then connect to a local network, and your plan will begin.
Cellesim also provides a complete eSIM setup guide and an interactive setup guide for detailed instructions. For a detailed guide on activation, particularly for first-timers, read our blog: I have only one phone: How do I scan the QR code eSIM installation guide?
Find Your Ideal Travel eSIM
eSIM vs. Traditional Options: A First-Timer's Cost & Convenience Comparison
To truly understand why an eSIM is often the best choice for your inaugural international journey, let's compare it with the other common options: traditional roaming and local physical SIM cards. This breakdown focuses on what matters most to a first-time traveler: cost, ease of use, and peace of mind.
| Option | Initial Cost (Example 7-day trip, 5GB data) | Setup Difficulty for First-Timers | Connectivity Upon Arrival | Flexibility / Top-up |
|---|---|---|---|---|
| Cellesim eSIM | From $4.50 - $15 | Easy (digital, pre-trip setup) | Instant | High (easy online top-up/new plan) |
| Carrier Roaming | $10-$20/day (or much higher) | Very Easy (automatic) | Instant (but expensive) | Low (often limited options, costly) |
| Local Physical SIM | $15-$30 + hassle | Moderate (find store, installation) | Delayed (after purchase/install) | Moderate (may require local visit) |
The Roaming Trap: Why It's Best to Avoid
While convenient as it requires no setup, using your home carrier for international roaming is almost universally the most expensive option. For a first-timer, this can quickly lead to bill shock. Your carrier's "international plan" might seem reasonable at first, but often comes with strict data limits, slower speeds, and punitive overage charges. Cellesim offers a Roaming Savings Calculator to demonstrate potential savings.
Local SIM Cards: A Good Alternative, But With Caveats
A local physical SIM card has historically been the go-to alternative to roaming. It offers local rates and often good speeds. However, for a first-time international traveler, it presents several inconveniences:
- Time and Effort: You need to find a local store (often at the airport, which can be pricier, or in the city), navigate language barriers, and complete a purchase.
- Physical Swap: This involves removing your home SIM, storing it safely, and installing the new one. This is a minor but potentially stressful task when jet-lagged.
- Number Change: You'll have a new local number, which might complicate receiving calls or messages from home.
- Document Requirements: Some countries require passport registration for local SIM cards, adding another layer of bureaucracy. For example, some countries in Southeast Asia may require ID registration for local SIMs, a detail often found on official tourism board websites.
eSIMs provide all the benefits of a local SIM (local rates, fast data) without the physical hassle, making them a superior choice for a smooth first-time international experience. For more insights, consider reading about airport SIM card prices vs. eSIM.
Managing Your Data and Staying Connected While Abroad
Once your eSIM is active, knowing how to monitor your usage and manage your connection will ensure a seamless experience throughout your trip. For first-timers, these practical tips can prevent unexpected interruptions.
Monitoring Your Data Usage
It's good practice to periodically check your data consumption to avoid running out prematurely. Most smartphones allow you to track data usage by network profile:
- iPhone: Settings > Cellular. Scroll down to see usage per app.
- Android: Settings > Network & Internet > Mobile Network > App data usage.
Many eSIM providers, including Cellesim, also offer a dedicated app or a web portal where you can view your remaining data, top up, or purchase additional plans. Refer to A Traveler's Guide: How to Check eSIM Data Usage and Top Up Instantly for more details.
Topping Up Your eSIM Plan
If you find yourself running low on data, topping up your Cellesim eSIM is straightforward. You can usually do this directly through the Cellesim website by logging into your account and selecting a top-up option for your active plan. The process is quick and completely digital, meaning you can add more data from anywhere with a Wi-Fi connection or even a minimal existing data connection.
Optimizing Data Usage While Traveling
To make your data last longer:
- Use Wi-Fi when available: Connect to hotel, cafe, or public Wi-Fi networks for large downloads or streaming.
- Download offline maps: Use Google Maps or other apps to download maps for your destination before you go.
- Limit background app refresh: Restrict apps from using data when you're not actively using them.
- Adjust streaming quality: Lower the quality of video streaming services when using mobile data.
Ready for Seamless Connectivity on Your First Global Trip?
Experience the freedom of instant, affordable data wherever you go. Join 50,000+ travelers in 200+ countries.
Start Your Connected JourneyTrusted by travelers worldwide. 24/7 Email Support: [email protected]
Frequently Asked Questions
Is an eSIM difficult to set up for a first-time international traveler?
No, setting up an eSIM is generally simpler than a physical SIM, especially for first-timers. You purchase and install it digitally before you travel, often by scanning a QR code. This avoids the need to find a local shop or deal with tiny plastic cards upon arrival, making your first moments abroad much smoother.
Can I keep my original phone number with an eSIM?
Yes, most eSIM-compatible phones support dual SIM functionality. This allows you to keep your primary physical SIM active for calls and texts (from your home number) while using your Cellesim eSIM for all data needs. This ensures you stay connected without missing important calls from home.
How do I know if my phone is compatible with an eSIM?
Most newer smartphones (e.g., iPhone XS/XR and later, Google Pixel 3 and later, Samsung Galaxy S20 and later) support eSIM. You can check your phone's settings under 'Cellular' or 'Network & Internet' for an 'Add eSIM' option, or use the Cellesim eSIM Checker on our website for a definitive answer.
When should I activate my eSIM before or after I arrive?
It is best to install your Cellesim eSIM profile before you travel, while you have a stable internet connection. However, you should only activate the data plan (turn it on in your phone settings) upon arrival at your destination. This ensures the plan's validity period begins exactly when you need it.
What if I run out of data while using my eSIM abroad?
If your Cellesim eSIM data runs low, topping up is easy. You can usually purchase additional data directly from the Cellesim website or app. The process is quick and digital, allowing you to add more data from anywhere, ensuring continuous connectivity.
Are eSIM data speeds comparable to local physical SIM cards?
Yes, Cellesim eSIMs generally provide access to the fastest available local networks, including 4G and 5G where supported by your device and the network in the visited country. Speeds are typically comparable to what you would experience with a local physical SIM card, offering a robust connection for all your travel needs.