You feel the gentle bump as the plane touches down. The seatbelt sign dings off. Your first instinct, like most travelers, is to reach for your phone. You need to pull up the address for your hotel, message family you have arrived safely, and perhaps book a rideshare out of the airport chaos. But then comes the familiar moment of hesitation: do you dare turn on your data and risk outrageous roaming fees? This is where understanding how to switch between physical SIM and eSIM on your iPhone transforms from a technical chore into a travel superpower. It is the key to getting affordable, local data the second you need it, without losing access to your primary number. This guide is not just a list of settings; it is a practical walkthrough designed to give you confidence and control. For a primer on getting started, check out The Complete eSIM Setup Guide.
- The iPhone's Dual SIM Advantage for Travelers
- How Dual SIM Technology Works on Your iPhone
- Essential Pre-Travel Checklist for iPhone eSIM Switching
- Selecting the Optimal Cellesim Plan for iPhone Connectivity
- Step-by-Step: Activating and Switching to Your Cellesim eSIM on iPhone
- Smart Management Tips for iPhone Dual SIM Abroad
- Cost Efficiency: iPhone eSIM vs. Traditional Roaming and Local SIMs
- Troubleshooting Common eSIM Switching Issues on iPhone
- Seamless Return: Switching Back to Your Home Physical SIM
- Frequently Asked Questions about iPhone eSIM Switching
Connect Your iPhone Instantly with Cellesim
Say goodbye to roaming fees and slow Wi-Fi. Join 50,000+ happy customers across 200+ countries who trust Cellesim for seamless iPhone connectivity abroad.
Shop eSIM Plans for iPhoneThe iPhone's Dual SIM Advantage for Travelers
Modern iPhones, particularly models from the XS and XR onwards, come equipped with Dual SIM technology. This capability is a game-changer for international travelers, allowing your device to hold two active cellular plans simultaneously. Typically, this means maintaining your existing physical SIM card (your home number) while adding a digital eSIM for local data when you travel.
This setup offers significant advantages. You can receive calls and texts on your familiar home number for essential communications like banking alerts or messages from family, without incurring expensive international roaming data charges. Simultaneously, your Cellesim eSIM provides affordable, high-speed mobile data through a local network at your destination. This eliminates the need to swap physical SIM cards, hunt for Wi-Fi, or worry about unexpected bills. It is the ultimate convenience for staying connected globally.
How Dual SIM Technology Works on Your iPhone
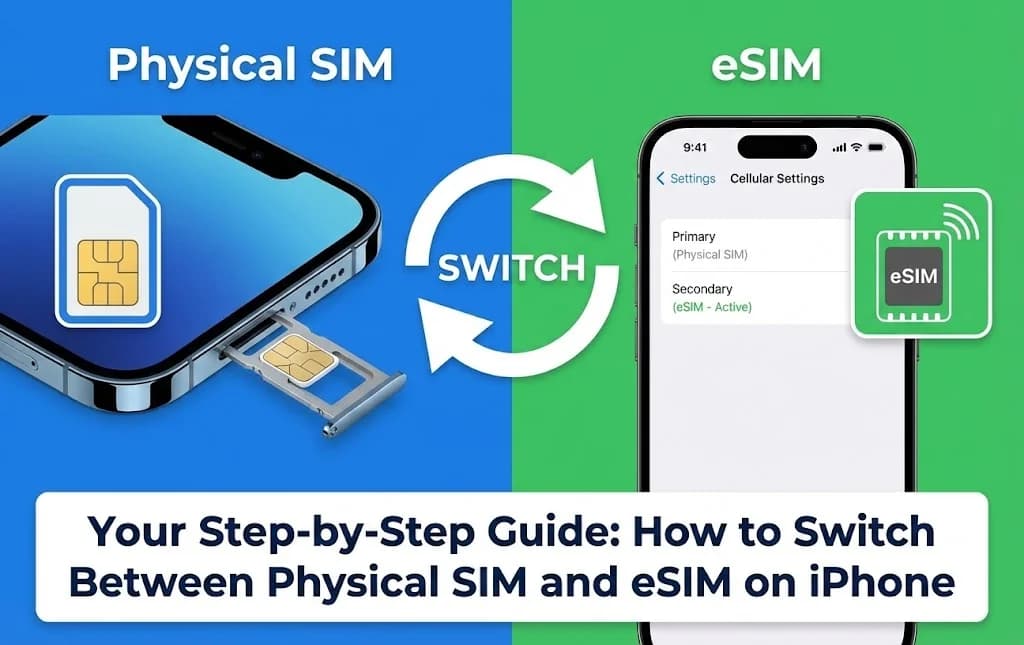
Your iPhone manages its Dual SIM functionality through its Cellular settings. One plan, usually your home line, occupies the physical SIM slot, while the second (or more, depending on your iPhone model) is stored digitally as an eSIM. When both are active, your iPhone intelligently routes calls, messages, and data based on your preferences.
Key aspects of this technology on iPhone:
- **Primary and Secondary Lines:** You designate one line as your "Primary" for calls, messages, and default data, and the other as "Secondary."
- **Data Switching:** You can easily switch which line provides cellular data. When traveling, you would typically set your Cellesim eSIM as the data provider.
- **Voice & SMS Flexibility:** Even when using your eSIM for data, you can still receive calls and texts on your home physical SIM number. You can also choose to make calls from either line.
- **Labeling:** iPhones allow you to label your plans (e.g., "Home," "Travel," "Business") for easy identification in menus and during usage.
Essential Pre-Travel Checklist for iPhone eSIM Switching
Preparation is crucial for a smooth transition to your Cellesim eSIM. Before you even pack your bags, complete these steps on your iPhone:
- **Confirm iPhone Compatibility:** Ensure your iPhone supports eSIM. Most iPhones released after 2018 do. You can check this in Settings > Cellular (or Mobile Data) > Add eSIM. If you see this option, your phone is compatible. For a detailed list, visit eSIM Compatible Devices.
- **Unlock Your iPhone:** Your iPhone must be unlocked by your home carrier to use an eSIM from a different provider like Cellesim. If it is locked, contact your carrier for unlocking instructions well in advance of your trip.
- **Purchase Your Cellesim eSIM:** Visit cellesim.com, select your destination (e.g., Italy eSIM or Europe eSIM), and choose a data plan that suits your travel duration and usage needs. You will receive an activation QR code or manual details via email.
- **Install Your eSIM (Before You Leave):** It is always recommended to install your eSIM before you depart, ideally while you still have a stable Wi-Fi connection. Go to Settings > Cellular > Add eSIM. Scan the QR code or enter the details manually. Name your new plan clearly (e.g., "Cellesim Travel" or "Italy eSIM"). For a detailed guide, see How to Install Cellesim eSIM.
- **Understand Your Home Carrier's Roaming:** Know what your home carrier charges for international roaming. This information helps you make informed decisions and avoid accidental charges. You can use a Roaming Savings Calculator to compare.
Selecting the Optimal Cellesim Plan for iPhone Connectivity
Choosing the right Cellesim plan ensures seamless connectivity tailored to your iPhone usage abroad. Consider these factors:
- **Destination Specificity:** Do you need coverage for a single country (e.g., United Kingdom eSIM) or multiple countries within a region (e.g., Europe 42 Countries eSIM or Asia 20 Countries eSIM)? Cellesim offers plans for over 200 countries and regions.
- **Data Volume:** Estimate your daily data usage. Are you a heavy streamer, or do you primarily use maps and messaging? A Smart Data Calculator can help. Cellesim offers plans ranging from a few GB for light use to larger packages for extensive browsing and streaming.
- **Duration:** Match your plan duration to your trip length. Cellesim plans typically come in 7, 15, or 30-day options, offering flexibility.
- **Top-Up Options:** Cellesim provides easy top-up options directly from your account if you find yourself needing more data mid-trip. This avoids any disruption to your connectivity.
By carefully selecting your Cellesim plan, you ensure your iPhone is ready for all your communication and navigation needs as soon as you arrive, providing peace of mind throughout your journey.
Step-by-Step: Activating and Switching to Your Cellesim eSIM on iPhone
The moment you land, activating your Cellesim eSIM for data on your iPhone is straightforward. Follow these steps:
- **Turn Off Data Roaming for Your Home SIM:** To avoid accidental roaming charges, go to Settings > Cellular > [Your Home SIM] > Data Roaming and toggle it OFF. Keep your home line enabled for calls and texts if you wish.
- **Select Your Cellesim eSIM for Cellular Data:**
- Go to Settings > Cellular (or Mobile Data).
- Tap on "Cellular Data."
- Select your Cellesim eSIM (e.g., "Cellesim Travel") from the list of plans.
- **Enable Data Roaming for Your Cellesim eSIM:** This is crucial for your Cellesim eSIM to connect to local partner networks.
- Go back to the main Cellular settings screen.
- Tap on your Cellesim eSIM plan.
- Toggle "Data Roaming" to ON. (Do not worry, this does not incur extra charges as your Cellesim plan is prepaid).
- **Verify Connectivity:** Your iPhone should now display the Cellesim network name (or its local partner network) in the status bar. Test by opening a web browser or a messaging app.
You have successfully switched your iPhone to use your Cellesim eSIM for data. Your home line remains active for calls and texts, operating on a separate network from your Cellesim data connection.
Explore All Cellesim eSIM Plans
Smart Management Tips for iPhone Dual SIM Abroad
Optimizing your iPhone's Dual SIM settings ensures a smooth and efficient experience:
- **Label Your Plans Clearly:** In Settings > Cellular, tap on each plan and give it a descriptive label (e.g., "Home SIM," "Cellesim Italy"). This makes it easy to differentiate them.
- **Set Default Voice Line:** Choose which line you prefer for outgoing calls. You can always override this when making a call from the Phone app. Go to Settings > Cellular > Default Voice Line.
- **Use "Allow Cellular Data Switching":** This setting (found under Cellular Data in Settings > Cellular) allows your iPhone to intelligently switch to your other line for cellular data if your primary data line has poor coverage. For international travel with an eSIM, it is often best to keep this OFF to ensure your data stays on the Cellesim eSIM and does not accidentally use expensive roaming data on your home SIM.
- **Monitor Data Usage:** Keep an eye on your data consumption. Go to Settings > Cellular and scroll down to see usage for each line. This helps you know when to consider a Cellesim top-up.
- **Disable Specific Apps from Using Cellular Data:** If you have data-hungry apps you do not need abroad, you can restrict their cellular data usage in Settings > Cellular, scrolling down to "CELLULAR DATA" and toggling off apps individually.
"The flexibility of managing two numbers and separate data plans on one device is invaluable. I can stay connected with my usual contacts while enjoying fast, local data without the bill shock."
Cost Efficiency: iPhone eSIM vs. Traditional Roaming and Local SIMs
When traveling with your iPhone, your connectivity options come with varying costs. Understanding these differences helps highlight the value of an eSIM.
| Option | Data Cost (e.g., 7-day trip, 5GB) | Setup Difficulty | Retain Home Number | Speed/Reliability |
|---|---|---|---|---|
| Cellesim eSIM (iPhone) | From $4.50 (country dependent) | Easy (digital installation) | Yes | Full 4G/5G local network |
| Traditional Roaming | $10-$15+ / day (total $70-$105+) | Automatic (no setup) | Yes | Can be throttled, high latency |
| Local Physical SIM | $15-$30 (plus activation fee) | Moderate (find store, swap SIM, activate) | No (home SIM removed) | Full 4G/5G local network |
As the table illustrates, using a Cellesim eSIM on your iPhone offers a compelling balance of cost-effectiveness, convenience, and the ability to maintain your primary number. While local physical SIMs can offer competitive pricing, the setup process and the loss of your home number are often significant drawbacks for travelers. Traditional roaming remains the most expensive option for data.
Troubleshooting Common eSIM Switching Issues on iPhone
Even with a clear guide, sometimes issues arise. Here are solutions to common problems when switching to your eSIM on an iPhone:
- **"No Service" or No Data:**
- Ensure "Data Roaming" is ON for your Cellesim eSIM plan (Settings > Cellular > [Cellesim eSIM] > Data Roaming).
- Verify that your Cellesim eSIM is selected for Cellular Data (Settings > Cellular > Cellular Data > [Cellesim eSIM]).
- Restart your iPhone.
- Try manually selecting a network: Settings > Cellular > [Cellesim eSIM] > Network Selection > Toggle "Automatic" OFF, then choose a local carrier from the list. (Cellesim provides recommended networks in your activation email).
- **Accidental Roaming Charges on Home SIM:**
- Double-check that "Data Roaming" is OFF for your home physical SIM plan (Settings > Cellular > [Home SIM] > Data Roaming).
- Ensure "Allow Cellular Data Switching" is OFF (Settings > Cellular > Cellular Data > Allow Cellular Data Switching).
- **eSIM Not Activating:**
- Verify your iPhone is unlocked.
- Ensure you have a stable internet connection (Wi-Fi) during the initial installation.
- If using a QR code, ensure it is clear and well-lit for scanning.
- Check your Cellesim account for the status of your plan.
- **"The cellular plan cannot be added" error:** This often means your iPhone is carrier-locked. Contact your home carrier.
If these steps do not resolve the issue, contact Cellesim support at [email protected]. Provide them with your iPhone model, iOS version, destination, and a description of the problem for quick assistance.
Seamless Return: Switching Back to Your Home Physical SIM
Transitioning back to your home physical SIM upon your return is just as simple as switching to your eSIM. You will want to re-enable your home data and potentially deactivate your eSIM data plan.
- **Switch Cellular Data Back to Your Home SIM:**
- Go to Settings > Cellular (or Mobile Data).
- Tap on "Cellular Data."
- Select your home physical SIM plan (e.g., "Home SIM") from the list.
- **Re-enable Data Roaming for Your Home SIM (if needed):** If you usually have data roaming enabled for your home plan, remember to switch it back on. Go to Settings > Cellular > [Your Home SIM] > Data Roaming and toggle it ON.
- **Disable Your Cellesim eSIM (Optional):** You can either turn off your Cellesim eSIM or delete it.
- **To turn off:** Go to Settings > Cellular > [Cellesim eSIM] > Turn On This Line (toggle OFF). This keeps the eSIM on your phone for future use.
- **To delete:** If you do not plan to use this specific eSIM again, go to Settings > Cellular > [Cellesim eSIM] > Remove Cellular Plan. This frees up space and cleans your settings.
- **Verify Connectivity:** Ensure your home network is active and data is working correctly by checking your status bar and opening an app.
By following these steps, your iPhone will seamlessly revert to using your home physical SIM for all cellular functions, making your return as smooth as your departure.
Ready for Seamless iPhone Connectivity Abroad?
Ditch the hassle of traditional roaming and physical SIM cards. Get your Cellesim eSIM today and travel smarter.
Start Your Connected JourneyTrusted by 50,000+ travelers in 200+ countries. Set up in minutes.
Frequently Asked Questions about iPhone eSIM Switching
Can I use my home number for calls and texts while using an eSIM for data on iPhone?
Yes, this is one of the primary benefits of Dual SIM functionality on iPhone. You can set your physical SIM (home number) as your default voice line and your Cellesim eSIM for all mobile data. This allows you to receive calls and essential SMS (like banking codes) on your regular number, while using affordable data from your Cellesim eSIM.
Will turning on Data Roaming for my Cellesim eSIM incur extra charges on my iPhone?
No. When you enable Data Roaming for your Cellesim eSIM, it allows your iPhone to connect to local partner networks in your destination. Your Cellesim plan is prepaid, so this setting simply enables the service you have already purchased and does not lead to additional charges.
What should I do if my eSIM shows "No Service" after following the steps on my iPhone?
First, ensure Data Roaming is ON for your Cellesim eSIM. Then, try restarting your iPhone. If the issue persists, go to your eSIM settings, turn off "Automatic Network Selection," and manually select a network from the list that appears. Refer to your Cellesim activation email for recommended local carriers.
How can I check my data usage on my travel eSIM on iPhone?
You can monitor your data consumption by going to Settings > Cellular on your iPhone. Scroll down to see a breakdown of data usage for each cellular plan under the "Current Period." This helps you manage your Cellesim plan effectively and top up if needed. You can also monitor usage directly via your Cellesim account.
Is my iPhone compatible with eSIM technology?
Most iPhones released since 2018, starting with the iPhone XS, XR, and newer models, support eSIM technology. However, phones purchased from certain carriers or in specific regions might have limitations. You can verify your device's compatibility on our eSIM compatible devices page or by using our eSIM Checker.
Can I keep my Cellesim eSIM for future iPhone trips?
Yes, you can. After returning home, you can simply toggle your Cellesim eSIM line to OFF in your iPhone's cellular settings. There is no need to delete it. When planning your next trip, you can reactivate it and purchase a new data package, or a new Cellesim eSIM for a different destination, making it a convenient option for frequent travelers.