eSIM Primer: How Does It Really Work?
The transition from physical SIM cards to embedded SIMs, or eSIMs, marks a significant shift in mobile network architecture. For those of us who spend our weekends dissecting 3GPP specifications, an eSIM isn't just a convenience, it's a fundamental re-imagining of subscriber identity modules. At its core, an eSIM is an integrated circuit that's permanently embedded within your device's motherboard, adhering to the ETSI TS 102 671 standard for machine-to-machine (M2M) communication. It replaces the removable plastic card, allowing your device to download and store multiple subscriber profiles digitally. This means no more fumbling with tiny trays and even tinier pins, particularly useful when you're rushing to catch a Shinkansen at Tokyo Station.
When you purchase an eSIM plan, what you're actually receiving is a digital profile, typically provisioned via a QR code or manual entry. This profile contains all the necessary information, including the International Mobile Subscriber Identity (IMSI), authentication keys, and network configuration data, that your phone needs to connect to a specific mobile network operator (MNO). The actual activation process involves the device securely downloading this profile onto the embedded Universal Integrated Circuit Card (eUICC) chip. This secure element handles the cryptographic operations required for network authentication, making the entire process robust and tamper-resistant.
For instance, when you activate a Cellesim eSIM for Japan, your iPhone 15/16/17 downloads a profile from a server, authenticates it, and then configures itself to connect to local carriers like NTT Docomo or KDDI. This digital handover is far more efficient than swapping physical cards and, crucially, allows for seamless switching between different carriers or plans without physical interaction, a boon for remote workers hopping between Wi-Fi networks and cafes.
The Architecture Behind Digital Profiles
Understanding the underlying architecture helps demystify the eSIM. The eUICC chip is essentially a secure microprocessor with its own operating system, designed to manage multiple eSIM profiles. When you scan a QR code, your iPhone transmits a request to a Subscription Management Platform, often referred to as an SM-DP+ (Subscription Manager - Data Preparation+), which then pushes the encrypted profile to your device. This platform ensures the integrity and authenticity of the profile before it's stored. Think of it as a highly secure, over-the-air provisioning system for your cellular identity. This design also facilitates remote provisioning, making it ideal for IoT devices and, of course, international travelers.
eSIM vs. Physical SIM: Key Differences for Travelers
While both SIM types serve the same fundamental purpose, their operational differences impact the traveler significantly. The primary advantage of eSIMs is the flexibility they offer. With an eSIM-only iPhone (like U.S. models of the iPhone 14/15/16/17), you're no longer constrained by a single physical slot. This means you can keep your primary line active for calls and texts (potentially on VoLTE) while using a secondary eSIM for local data abroad. This dual SIM functionality, often referred to as DSDS (Dual SIM Dual Standby), allows your phone to be registered on two networks simultaneously, though only one can actively use data at a given moment. This is particularly useful for managing costs and maintaining a local presence while traveling.
| Feature | Physical SIM | eSIM |
|---|---|---|
| Installation | Physical insertion/removal | Digital download via QR or app |
| Multiple Profiles | One physical card per slot | Multiple profiles stored, one active for data |
| Switching Carriers | Requires new physical card | Digital switch within settings |
| Device Compatibility | Universal slot | Newer devices (iPhone XS/XR and later) |
| Security | Can be lost/stolen | Embedded, less prone to physical theft |
Preparing Your iPhone for eSIM Activation
Before you even think about scanning a QR code, a few preparatory steps can smooth out the eSIM activation process on your iPhone 15, 16, or 17. These aren't just suggestions, they're essential pre-flight checks for a successful data connection, especially when you're thousands of miles from your home network. Ensuring your device is ready prevents common headaches that can delay getting online. (Trust me, I've spent too many hours debugging connections in airport lounges.)
Checking iOS Version and Device Compatibility
First and foremost, confirm your iPhone is running the latest stable version of iOS. While eSIM support has been present since iOS 12.1, subsequent updates, particularly in iOS 16 and iOS 17, have introduced significant enhancements to eSIM management. Apple frequently rolls out patches that improve eSIM provisioning, dual SIM performance, and overall network stability. To check, go to Settings > General > Software Update. An outdated iOS version can sometimes lead to provisioning errors or unexpected network behavior, so updating is always the safest bet. All iPhone models from the XS/XR onward, including your iPhone 15, 16, or 17, are eSIM-compatible. However, specific regional models, especially those sold in the U.S. since iPhone 14, are eSIM-only and lack a physical SIM tray entirely. Verify your model if you're unsure.
Stable Wi-Fi Connection is Crucial
eSIM activation requires a stable internet connection to download the profile. This is typically done over Wi-Fi. Attempting to activate an eSIM using a flaky hotel Wi-Fi or a congested public hotspot can lead to timeouts and corrupted profile downloads. A good rule of thumb is to use a known reliable Wi-Fi network, or if you're in a pinch, ensure you have a strong signal from another cellular connection if your phone supports it. For instance, I always try to use my home network or a trusted cafe Wi-Fi before heading out, especially when planning a trip that requires immediate connectivity upon arrival abroad.
Unlocking Your iPhone: Carrier Restrictions
This is a critical, often overlooked, step. If your iPhone is still locked to a specific carrier (e.g., AT&T, Verizon, T-Mobile), it may not be able to activate an eSIM from a different provider, especially an international one. Carrier locks are imposed by your home operator and restrict your phone to only use their network or their roaming partners. Before purchasing any international eSIM, ensure your iPhone is unlocked. You can usually check this by going to Settings > General > About and looking for a "No SIM restrictions" message under Carrier Lock. If it says "SIM locked," you'll need to contact your home carrier to request an unlock, a process that can take a few business days. Don't wait until you're at the airport to discover this.
Step-by-Step eSIM Activation via QR Code
The QR code method is by far the most straightforward way to activate an eSIM on your iPhone 15, 16, or 17. Most eSIM providers, including Cellesim, deliver your eSIM profile as a QR code via email or within their app. This process leverages the camera on your iPhone to quickly provision the digital SIM, minimizing manual data entry errors. It's designed for speed and simplicity, getting you connected without unnecessary delays.
Here’s the precise sequence for activating your eSIM using a QR code:
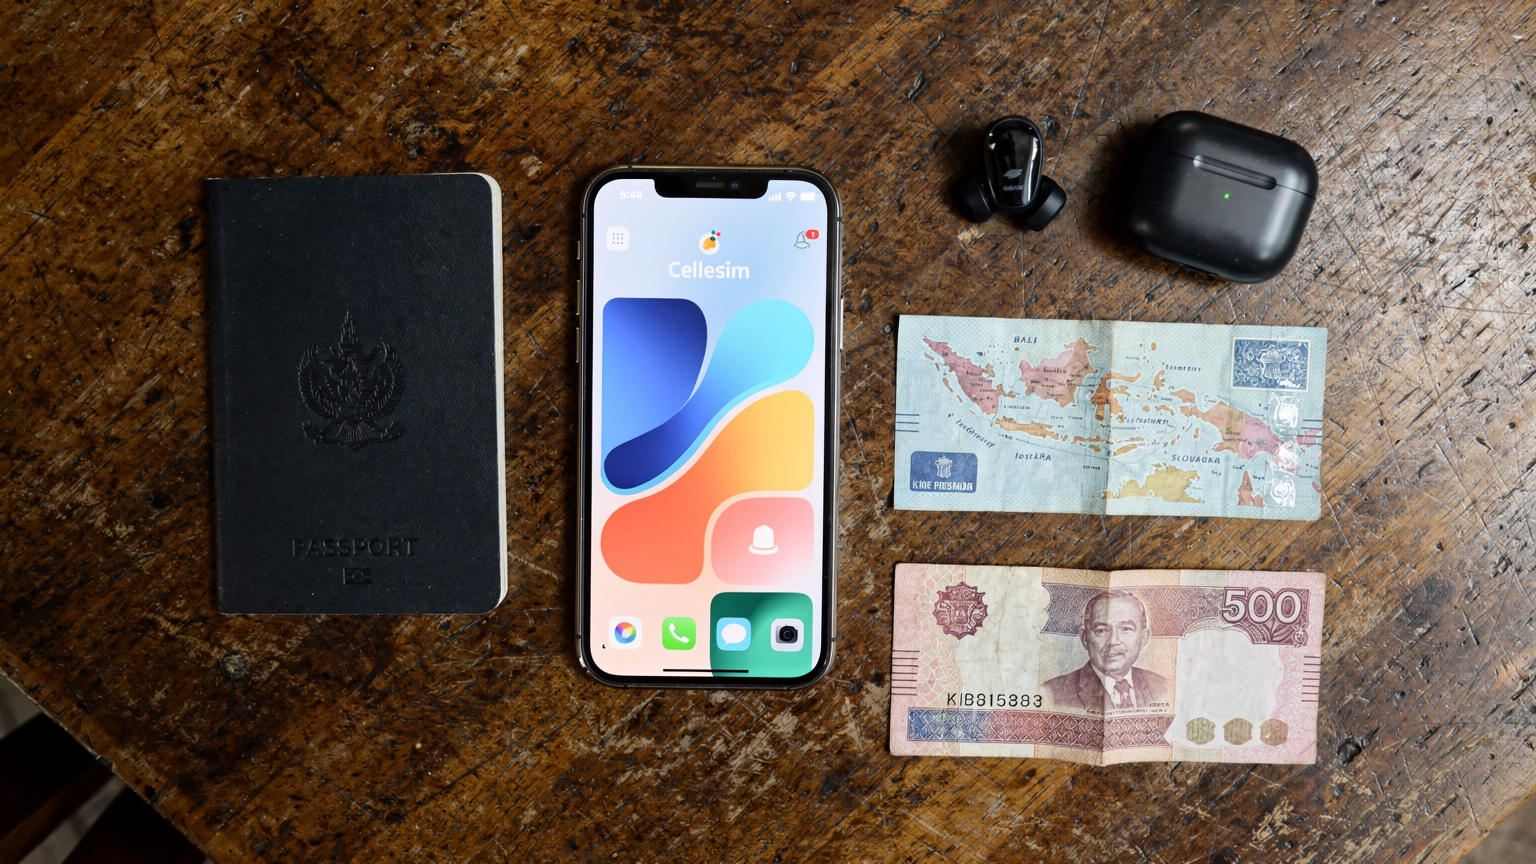
- Purchase Your eSIM Plan: First, select and purchase an eSIM plan from Cellesim. You'll receive an email containing your QR code and activation instructions. It's often helpful to have this QR code displayed on another device (like a laptop or another phone) or printed out, as your iPhone will use its camera for scanning. For instance, if you're traveling through Europe, consider a regional plan that covers multiple countries, simplifying data management.
- Access Cellular Settings: On your iPhone, open the Settings app. Scroll down and tap on Cellular (or Mobile Data in some locales). This menu is your central hub for all things related to cellular connectivity.
- Initiate eSIM Addition: Tap on Add eSIM. Your iPhone will then present you with two options: "Transfer From Nearby iPhone" (for transferring an existing plan) or "Use QR Code." Select Use QR Code.
- Scan the QR Code: Your iPhone's camera will activate. Position your iPhone so that the QR code is centered within the frame on your screen. The phone should automatically detect and scan the code. If it struggles, ensure good lighting and a steady hand.
- Confirm and Activate: After a successful scan, your iPhone will display "Cellular Plan Detected." Tap Continue. You'll then be prompted to confirm adding the new cellular plan. Tap Add Cellular Plan. The phone will then download and activate the eSIM profile. This typically takes 30-60 seconds.
- Label Your eSIM: Once activated, iOS will ask you to label your new eSIM (e.g., "Travel Data," "Japan eSIM," or the carrier name). This is crucial for distinguishing between multiple plans, especially if you maintain your primary line. Choose a descriptive label.
- Set Default Line (Optional): If you have multiple active plans (e.g., your home physical SIM and the new eSIM), iOS will ask you to set your "Default Line." For international data, you'll generally want to keep your primary line for calls and messages, and set the new eSIM for "Cellular Data" only. Make sure "Allow Cellular Data Switching" is off to prevent accidental roaming charges on your primary line.
Troubleshooting QR Code Scan Failures
Sometimes, the QR scan can be finicky. If your iPhone isn't picking up the code, try these steps:
- Check Lighting: Ensure the QR code is well-lit and free from glare.
- Clean Camera Lens: A smudged camera lens can prevent a successful scan.
- Zoom/Distance: Adjust the distance between your iPhone and the QR code. Sometimes moving closer or further away can help the camera focus.
- Resolution: If displaying the QR code on a screen, ensure its resolution is high enough to be clear. If printing, use a sharp, high-contrast print.
- Restart iPhone: A quick reboot can sometimes resolve temporary camera or system glitches.
Manual eSIM Setup for Tricky Situations
While QR code activation is the preferred method, there are instances where a manual setup is necessary. This often occurs if you don't have a second device to display the QR code, if the QR code is damaged, or if you're dealing with an older eSIM provisioning system that doesn't rely on QR codes. Manual entry requires precise input of several parameters, so attention to detail is paramount. This method is essentially a fallback, but a reliable one when needed.
When you opt for manual entry, your eSIM provider will typically supply you with specific details: an SM-DP+ address (often referred to as an activation code or server address) and, less commonly, a confirmation code. These are the digital coordinates your iPhone uses to locate and download your eSIM profile from the provider's server. Mis-entering even a single character can lead to activation failure, so double-check every input.

Here's how to manually set up your eSIM:
- Purchase and Obtain Details: As with QR code activation, purchase your eSIM plan. Instead of a QR code, you will specifically look for "Manual Installation Details" in your confirmation email or Cellesim account. This will include the SM-DP+ Address (often a long string of characters) and sometimes an optional Confirmation Code.
- Navigate to Cellular Settings: On your iPhone, go to Settings > Cellular (or Mobile Data).
- Choose Manual Entry: Tap on Add eSIM, then select Enter Details Manually (or a similar option, depending on your iOS version).
- Input SM-DP+ Address: You will be presented with fields to enter the "SM-DP+ Address." Carefully type or paste the exact address provided by your eSIM carrier. This address typically looks like
smdp.operator.comor a longer alphanumeric string. Any typo here will prevent the profile from being found. - Enter Confirmation Code (If Applicable): Some providers require a "Confirmation Code" for an additional layer of security or to specify a particular profile. If your provider supplied one, enter it in the designated field. If not, you can leave it blank.
- Activate the eSIM: Tap Next or Activate. Your iPhone will then attempt to connect to the SM-DP+ server and download the eSIM profile. This process can take slightly longer than a QR scan, as it involves establishing a connection based on the manually entered address.
- Label and Configure: Once the profile is downloaded and activated, you'll be prompted to label your eSIM and configure your default line settings, just as you would with a QR code activation.
Common Manual Entry Errors and How to Avoid Them
Manual entry is prone to human error. The most frequent mistake is mistyping the SM-DP+ address. These strings are often case-sensitive and can include special characters. Always copy-paste if possible, or meticulously cross-reference each character if typing. Another edge case I've encountered, particularly with older Android devices but worth noting for iPhone users, is related to APN settings. While iPhones generally auto-configure APNs for eSIMs, if you find yourself with data but no connectivity after manual setup, double-check if your provider specified a custom APN. This is rare for consumer eSIMs but can happen with specialized enterprise plans. You can usually find APN settings under Settings > Cellular > Cellular Data Network for the specific eSIM profile.
Post-Activation: Verification and Data Prioritization
Once your eSIM is activated, the job isn't quite done. Verification is key to ensuring you're actually connected and using the intended data plan. This involves checking signal strength, confirming data flow, and, crucially, configuring your iPhone to prioritize the new eSIM for data usage, especially when traveling. Properly managing your data lines prevents unwanted roaming charges on your primary SIM and ensures you get the speeds you expect. (I've seen too many travelers unwittingly rack up bills because they didn't verify their active data line.)
Checking for Successful Connection
The first indicator of a successful connection is the appearance of a signal strength indicator and the carrier name in your iPhone's status bar. You should see two sets of signal bars if you have dual SIMs active, each corresponding to a different line. To confirm which line is active for data, navigate to Settings > Cellular (or Mobile Data). Under the "CELLULAR PLANS" section, you should see your newly added eSIM listed. Tap on it to view its status. Ensure its "Turn On This Line" toggle is enabled. For immediate verification, try opening a web browser or a data-intensive app (like Instagram or Google Maps). If pages load quickly, you're good to go.
For a more technical check, particularly if you're experiencing slow speeds, download a speed test app like Ookla Speedtest. Run a test to verify your actual download and upload speeds. For example, in downtown Kyoto, on Docomo's network (utilizing bands B1, B3, B7, and n78 for 5G), I typically observe download speeds of 80-150 Mbps and upload speeds of 15-40 Mbps. If your speeds are significantly lower, it might indicate a network congestion issue or a sub-optimal band selection, rather than an eSIM activation problem. For more on Japanese network performance, see Field Notes: Areola eSIM and the Uncharted Peaks of Japan's North, 2026.
Configuring Data and Voice Preferences
This is where the power of dual SIM truly shines, but also where misconfigurations can lead to unexpected charges. In Settings > Cellular, you'll find options to manage your "Cellular Data" and "Default Voice Line."
- Cellular Data: Tap on "Cellular Data" and select your newly activated eSIM. This ensures all your internet traffic goes through this plan.
- Allow Cellular Data Switching: Below "Cellular Data," you'll see "Allow Cellular Data Switching." By default, this is often enabled. If you have an expensive home plan and want to strictly use your travel eSIM for data, I strongly recommend turning this OFF. With it on, your iPhone might momentarily switch to your primary line for data if the eSIM signal is weak, potentially incurring roaming charges.
- Default Voice Line: This setting determines which line is used for making calls and sending SMS by default. You can set it to your primary line to receive calls and texts from home, or set it to "Ask Every Time" if you want manual control for each outgoing communication.
Troubleshooting Common eSIM Activation Issues
Even with careful preparation, issues can arise during eSIM activation. These problems often stem from network configuration nuances, device settings, or simple human error. As an engineer, I approach troubleshooting systematically, eliminating variables one by one. Randomly tapping settings rarely yields results; a structured approach is far more effective. (It's like debugging code, you need a precise methodology.)
No Service or Unable to Activate eSIM
If your iPhone displays "No Service" or "Activation Failed," here are the first steps to take:
- Restart Your iPhone: The simplest fix often works. A full power cycle can clear temporary software glitches.
- Check Wi-Fi Connection: Ensure you have a stable Wi-Fi connection during activation. The eSIM profile download requires internet access.
- Verify QR Code/Manual Entry: Double-check the QR code for damage or smudges. If using manual entry, meticulously verify the SM-DP+ address and confirmation code. Even a single incorrect character can cause failure.
- Airplane Mode Toggle: Turn Airplane Mode on for 30 seconds, then turn it off. This forces your iPhone to re-register with available networks.
- Network Settings Reset: Go to Settings > General > Transfer or Reset iPhone > Reset > Reset Network Settings. This clears all Wi-Fi passwords, cellular settings, and VPN configurations, effectively giving your network stack a fresh start. You won't lose personal data, but you'll need to re-enter Wi-Fi passwords.
- Contact eSIM Provider Support: If all else fails, your eSIM provider (like Cellesim) is the next point of contact. They can verify if the eSIM profile was correctly provisioned on their end or if there's an issue with your account. They can also often re-send the QR code or manual details.
Data Not Working After Activation
You've activated your eSIM, you see signal bars, but no data is flowing. This usually points to a data configuration issue rather than an activation problem.
- Verify Cellular Data Selection: As mentioned, go to Settings > Cellular > Cellular Data and ensure your new eSIM is selected.
- Disable "Allow Cellular Data Switching": Turn this off in Settings > Cellular. This ensures your iPhone doesn't try to use your primary line's data.
- Check APN Settings: This is a less common issue with iPhones but worth checking. Go to Settings > Cellular > Cellular Data Network for your new eSIM. Most consumer eSIMs auto-configure APN settings. However, if your provider gave you specific APN details, enter them here. Incorrect APN settings are a classic reason for "connected, but no internet" scenarios.
- Enable Data Roaming: If you're using an international eSIM, ensure "Data Roaming" is enabled for that specific eSIM. Go to Settings > Cellular, tap on your eSIM, then toggle "Data Roaming" on. Many local eSIMs don't require this, but some regional or global plans might.
- Test Different Locations: Sometimes, "no data" is simply a lack of coverage. Move to a different area, ideally outdoors, to rule out local signal dead zones.
Optimizing Your eSIM for International Travel 2026
Beyond basic activation, optimizing your eSIM setup can significantly enhance your international travel experience. This isn't just about getting online, it's about ensuring reliable, efficient, and cost-effective connectivity. From managing multiple profiles to understanding network nuances, a well-configured eSIM acts as your digital travel companion.
Managing Multiple eSIM Profiles
Your iPhone 15/16/17 can store multiple eSIM profiles, though only two can be active simultaneously (one physical SIM + one eSIM, or two eSIMs). This capability is incredibly powerful for frequent travelers. For example, you might have one eSIM for Japan, another for Thailand, and a third for general Europe, all stored on your device. When you arrive in a new country, you simply go to Settings > Cellular, select the relevant eSIM, and toggle "Turn On This Line."
| Scenario | Primary Line (Physical/eSIM 1) | Secondary Line (eSIM 2) | Benefit |
|---|---|---|---|
| Travel to Japan | Home Line (calls/texts only) | Cellesim Japan (data) | Keeps home number active, uses local data rates. |
| Multi-country Europe trip | Home Line (disabled for data) | Cellesim Europe Regional (data+some calls) | Single data plan across multiple Schengen countries. |
| Digital Nomad in Bali | Local Indonesian SIM (e.g., Telkomsel) | Backup Cellesim Global (data) | Primary local data, global backup for critical work. |
Remember to label each eSIM clearly (e.g., "JP-Docomo," "TH-AIS") to avoid confusion. You can also delete old eSIM profiles from Settings > Cellular > [eSIM Name] > Remove Cellular Plan if they're no longer needed, freeing up space, though storage capacity for eSIMs isn't typically a concern.
Data Monitoring and Usage Alerts
Staying on top of your data consumption is crucial to avoid unexpected cut-offs or overages. Your iPhone provides built-in tools for this. In Settings > Cellular, scroll down to see "Cellular Data Usage." While this shows cumulative usage since the last reset, it's not ideal for specific plan monitoring. Many eSIM providers, including Cellesim, offer dedicated apps that provide real-time data usage tracking. Always check if your provider has an app, as it often provides more granular details, including remaining data, validity periods, and options to top up. Setting up usage alerts within these apps, or even through your iPhone's built-in "Usage" settings (if applicable for your plan), can prevent you from running out of data mid-Zoom call in a Kyoto café.
Carrier Aggregation and Band Selection: What It Means for You
As a telecom engineer, these are the details that truly differentiate a good connection from a great one. Carrier aggregation (CA) and specific frequency band support are the unsung heroes of modern cellular speeds, especially with 5G Non-Standalone (NSA) and Standalone (SA) deployments. Your iPhone 15/16/17, packed with advanced modem technology, takes full advantage of these, but understanding the basics helps manage expectations and troubleshoot performance. (It's not just about "5G," it's about *which* 5G.)
Understanding Frequency Bands and 5G Deployment
Every cellular network operates on specific radio frequency bands, designated by numbers (e.g., B1, B3, B7 for LTE, and n1, n3, n78 for 5G). Different countries and carriers use different combinations. The iPhone 15, 16, and 17 support a vast array of these global bands, ensuring compatibility in most regions. For example, in Thailand, carriers like AIS, TrueMove H, and Dtac heavily utilize LTE bands B1 (2100 MHz), B3 (1800 MHz), and B8 (900 MHz), alongside 5G New Radio (NR) bands like n41 (2500 MHz) and n78 (3500 MHz, the common "C-band"). Understanding which bands are prevalent in your destination helps you assess potential speeds. If your device or eSIM plan doesn't fully support key local bands, your performance will suffer, even if you have "5G" indicated on your status bar.
The Power of Carrier Aggregation
Carrier aggregation is a key feature in LTE-Advanced and 5G that allows your device to use multiple frequency blocks (component carriers) simultaneously to increase data throughput. Imagine having several lanes on a highway instead of just one. For example, a carrier might aggregate two 20 MHz blocks of spectrum, say B3 and B7, effectively doubling the available bandwidth to your device. In 5G, this becomes even more sophisticated, combining both LTE (for control plane, NSA mode) and 5G NR carriers. This is why you might see speeds of 300-500 Mbps in dense urban areas, far exceeding what a single band could offer. Without CA, your connection would be bottlenecked to the capacity of a single component carrier, leading to much lower speeds. While iPhones manage CA automatically, knowing that it's active explains why speeds can vary so dramatically between locations and network conditions.
VoLTE and VoWiFi Gotchas for Global Nomads
Voice over LTE (VoLTE) and Voice over Wi-Fi (VoWiFi) are essential technologies for high-quality voice calls, especially for travelers. However, their implementation with international eSIMs can introduce some complexities, or "gotchas," that even seasoned digital nomads might overlook. These aren't always straightforward, as they depend heavily on both your device's capabilities and the specific carrier's provisioning. (It's not just data, folks, voice still matters.)
VoLTE with International eSIMs
VoLTE allows your voice calls to be carried over the 4G LTE data network, rather than reverting to older 2G/3G networks. This results in clearer audio, faster call setup, and the ability to use data simultaneously during a call. For your primary home SIM, VoLTE is almost certainly enabled. However, when using an international eSIM for data, you might find that voice calls made through that eSIM (if it even supports voice) don't always use VoLTE. Many data-only eSIMs, by design, do not support voice services. Even if an international eSIM technically supports voice, the local carrier's network might not provision VoLTE for roaming or temporary eSIM users. This means your calls could fall back to 3G (UMTS) or even 2G (GSM), leading to lower call quality or dropped calls in areas with poor legacy network coverage.
The critical point here is that for your home line, even if you're using an international eSIM for data, VoLTE should still work if your home carrier supports it and you have signal. If you find your primary line calls are failing or dropping to 2G/3G when abroad, ensure "VoLTE" (sometimes labeled "LTE Calls" or "4G Calling") is enabled under Settings > Cellular > [Your Primary Line] > Voice & Data. Also, be aware that some carriers (like T-Mobile's free eSIM trial, which often focuses solely on data capabilities as discussed in T-Mobile Free eSIM Trial: Is It Right for Your 2026 Family Travel?) may not offer VoLTE on their trial or international data-only plans.
VoWiFi for Seamless Connectivity
VoWiFi, or Wi-Fi Calling, is a fantastic feature that allows you to make and receive calls and texts over a Wi-Fi network when cellular signal is weak or unavailable. This is particularly useful in places like basements, remote cabins, or even on airplanes with Wi-Fi. For your primary home line, VoWiFi will typically work abroad, leveraging any available Wi-Fi connection to route your calls back to your home network. This means you can still receive calls to your home number even if your iPhone is in airplane mode (with Wi-Fi on) or if your travel eSIM is active for data, without incurring international roaming charges for voice.
The "gotcha" is ensuring it's enabled and correctly configured. Go to Settings > Cellular > Wi-Fi Calling for your primary line and toggle it on. Your iPhone might require you to enter or confirm an emergency address for E911 services (for US users). Additionally, some older iPhone models or specific carrier firmwares might have quirks where VoWiFi doesn't activate immediately. A simple toggle off/on or a quick restart usually resolves it. Always test your VoWiFi before relying on it exclusively, especially if you're in a critical remote work scenario in, say, a quiet coworking space in Bali.
The Future of eSIM and iPhones Beyond 2026
Looking beyond the iPhone 17 and into 2026 and further, the trajectory for eSIM technology is clear: it's becoming the dominant, if not exclusive, method for cellular connectivity. As a telecom engineer, I see this evolution not just as a convenience, but as a gateway to more dynamic, adaptable, and secure mobile networks. The shift is driven by a confluence of factors, from device form factor optimization to enhanced user control and improved network management. (The physical SIM is, effectively, on borrowed time.)
Full eSIM Adoption and Its Implications
Apple's decision to remove the physical SIM tray from U.S. iPhone models starting with the iPhone 14 was a bold, albeit predictable, move. It's a strong indicator of the industry's direction. By 2026, it's highly probable that a significant majority, if not all, iPhone models globally will be eSIM-only. This full adoption has several key implications:
- Increased Device Security: Without a removable SIM, it's harder for thieves to quickly disable tracking services or swap out SIMs. The embedded nature of the eUICC chip also offers greater resistance to physical tampering.
- More Robust Device Design: Eliminating the SIM tray allows for better waterproofing, potentially more internal space for other components (like larger batteries or improved camera sensors), and a cleaner industrial design.
- Enhanced User Experience: The ability to provision and switch cellular plans digitally simplifies life for travelers and those who frequently change carriers. The friction of acquiring a physical SIM in a new country, or even just at a local store, is entirely removed. This directly benefits services like Cellesim, allowing for immediate activation upon landing.
- Carrier Flexibility: While some traditional carriers have been slow to embrace eSIM, the widespread adoption by device manufacturers will compel them to accelerate their eSIM support and offerings. This fosters greater competition and more flexible plans for consumers.
Remote SIM Provisioning and Global Roaming
The core technology behind eSIM, Remote SIM Provisioning (RSP), is continuously evolving. RSP allows for the secure management of eSIM profiles over the air, a capability that will only become more sophisticated. Expect to see:
- Seamless Global Profiles: Instead of needing a new eSIM for each country, future eSIMs might offer "global profiles" that dynamically connect to the best available network in any region, perhaps with tiered pricing based on data usage.
- Integrated Travel Experience: Imagine arriving at an airport, and your iPhone automatically suggests or even pre-activates a suitable local eSIM plan based on your travel itinerary, linked directly to your Apple Wallet. This level of integration, while speculative, is certainly within the realm of technical possibility.
- Improved Roaming Agreements: As eSIMs become standard, traditional roaming agreements may evolve. We might see more competitive international data rates as MNOs compete directly with eSIM providers, potentially leading to lower costs for the end-user.
The future of connectivity, especially for the globetrotting iPhone user, is undeniably digital. Mastering eSIM activation now is not just about current travel, it's about preparing for the standard of tomorrow. Your iPhone 15, 16, or 17 is more than capable of handling this transition, making your international journeys smoother and more connected than ever before. For comprehensive data solutions, always remember to explore Cellesim's eSIM options for your next adventure.
Frequently Asked Questions
Can I use both my physical SIM and an eSIM on my iPhone 15/16/17 simultaneously?
Yes, all iPhone models from the XS/XR onwards support Dual SIM functionality, allowing you to use one physical SIM and one eSIM concurrently. U.S. models of iPhone 14 and newer are eSIM-only, supporting two active eSIMs simultaneously. This setup is ideal for keeping your home number active for calls/texts while using a travel eSIM for data.
What if my iPhone is carrier-locked? Can I still activate an international eSIM?
No, a carrier-locked iPhone will prevent you from activating an eSIM from a different provider. You must contact your home carrier to request an unlock before attempting to activate an international eSIM. Verify your iPhone's unlock status under Settings > General > About > Carrier Lock.
Why is my data not working even after my eSIM is activated and shows signal?
This often indicates a configuration issue. First, check that your new eSIM is selected for 'Cellular Data' in Settings > Cellular. Crucially, turn off 'Allow Cellular Data Switching' to prevent your iPhone from defaulting to your primary line. Also, verify that 'Data Roaming' is enabled for your international eSIM if required by the provider.
How many eSIM profiles can I store on my iPhone 15/16/17?
Your iPhone can store multiple eSIM profiles, typically around 5 to 10, though the exact number can vary by model and iOS version. However, only two can be active at any given time (one physical SIM + one eSIM, or two eSIMs on eSIM-only models). You can easily switch between stored profiles in your Cellular settings.
Is VoLTE or VoWiFi supported when using an international eSIM for calls?
While your primary home SIM will usually support VoLTE and VoWiFi, many international data-only eSIMs do not offer voice services, or if they do, VoLTE provisioning may not be available for temporary users. For voice, it's generally best to rely on your primary line with VoLTE/VoWiFi enabled or use VoIP apps over your eSIM data connection.
What is the SM-DP+ Address and why do I need it for manual eSIM setup?
The SM-DP+ (Subscription Manager - Data Preparation+) Address is a server address provided by your eSIM carrier. It acts as the digital location where your iPhone downloads your encrypted eSIM profile during manual activation. It's a critical component for the remote SIM provisioning process, ensuring your device connects to the correct server for activation.