


Why Your iPhone and eSIM Are a Perfect Match for 2026 Travel
As someone who spends an unhealthy amount of time scrutinizing 3GPP specifications, I can tell you that the iPhone's integration of eSIM technology is a significant architectural advantage for global travelers. Gone are the days of fumbling with tiny SIM trays or praying a local vendor has a nano-SIM cutter. With an eSIM, your iPhone becomes a chameleon, digitally adapting to local networks with just a few taps.
Consider a scenario: you land at Tokyo's Narita Airport, needing immediate data for navigation and contacting your Airbnb host. Instead of hunting for a physical SIM card vending machine or a kiosk, you activate a pre-purchased eSIM profile. Within minutes, you're connected to NTT DoCoMo's network, likely leveraging their robust 5G infrastructure on band n78, and seeing typical download speeds of 200-500 Mbps. This efficiency isn't just about convenience, it's about minimizing travel friction, especially when you're jet-lagged and disoriented. Your iPhone's hardware, particularly models from the iPhone XS onward, is engineered to handle multiple eSIM profiles, providing flexibility that traditional SIMs simply cannot match. (The US models, from iPhone 14 onwards, are actually eSIM-only, further cementing this shift.)
The Architectural Advantage of Embedded SIMs
An eSIM, or embedded SIM, isn't a physical card, but a re-programmable chip permanently integrated into your iPhone's logic board. This means the provisioning process, traditionally handled by inserting a physical SIM, is now managed digitally. Apple's Secure Enclave, a dedicated hardware security module, protects the eSIM profile, making it a secure method for managing your cellular identity. This design choice reduces points of failure, mitigates against physical tampering, and streamlines carrier switching. It's a robust solution for maintaining connectivity across diverse global networks.
Cost Efficiency: Beyond Roaming Charges
The primary financial benefit of using an eSIM for international travel is avoiding exorbitant roaming fees. Your home carrier's international plans often operate on a wholesale roaming agreement, which can be significantly more expensive than purchasing a local data plan. For instance, a 10GB roaming package from a major European carrier might cost €80 for 14 days, offering speeds capped at 50 Mbps. A Cosmote eSIM in Greece, providing 20GB for a similar duration, might be half that price, with potentially higher speeds due to direct network access.
This isn't just about saving money, it's about getting more for your spend. The ability to compare and purchase plans from various providers, often with transparent pricing, puts the power back in your hands. You're no longer beholden to your home carrier's limited and costly options.
Demystifying eSIM Activation on iPhones: A Step-by-Step Walkthrough
Activating an eSIM on your iPhone is generally straightforward, but understanding the underlying process helps immensely with troubleshooting. The provisioning process typically involves scanning a QR code or using a carrier's app, which then downloads the eSIM profile to your device. This profile contains your subscription information, including International Mobile Subscriber Identity (IMSI) and authentication keys, which are critical for connecting to the mobile network.
It's essentially a secure over-the-air (OTA) update that tells your iPhone, "Hey, you now belong to this network in this country." The key is ensuring your iPhone is unlocked, meaning it's not tied to a specific carrier. Most iPhones purchased outright or after fulfilling a contract are unlocked, but it's always worth double-checking with your home carrier before you travel.
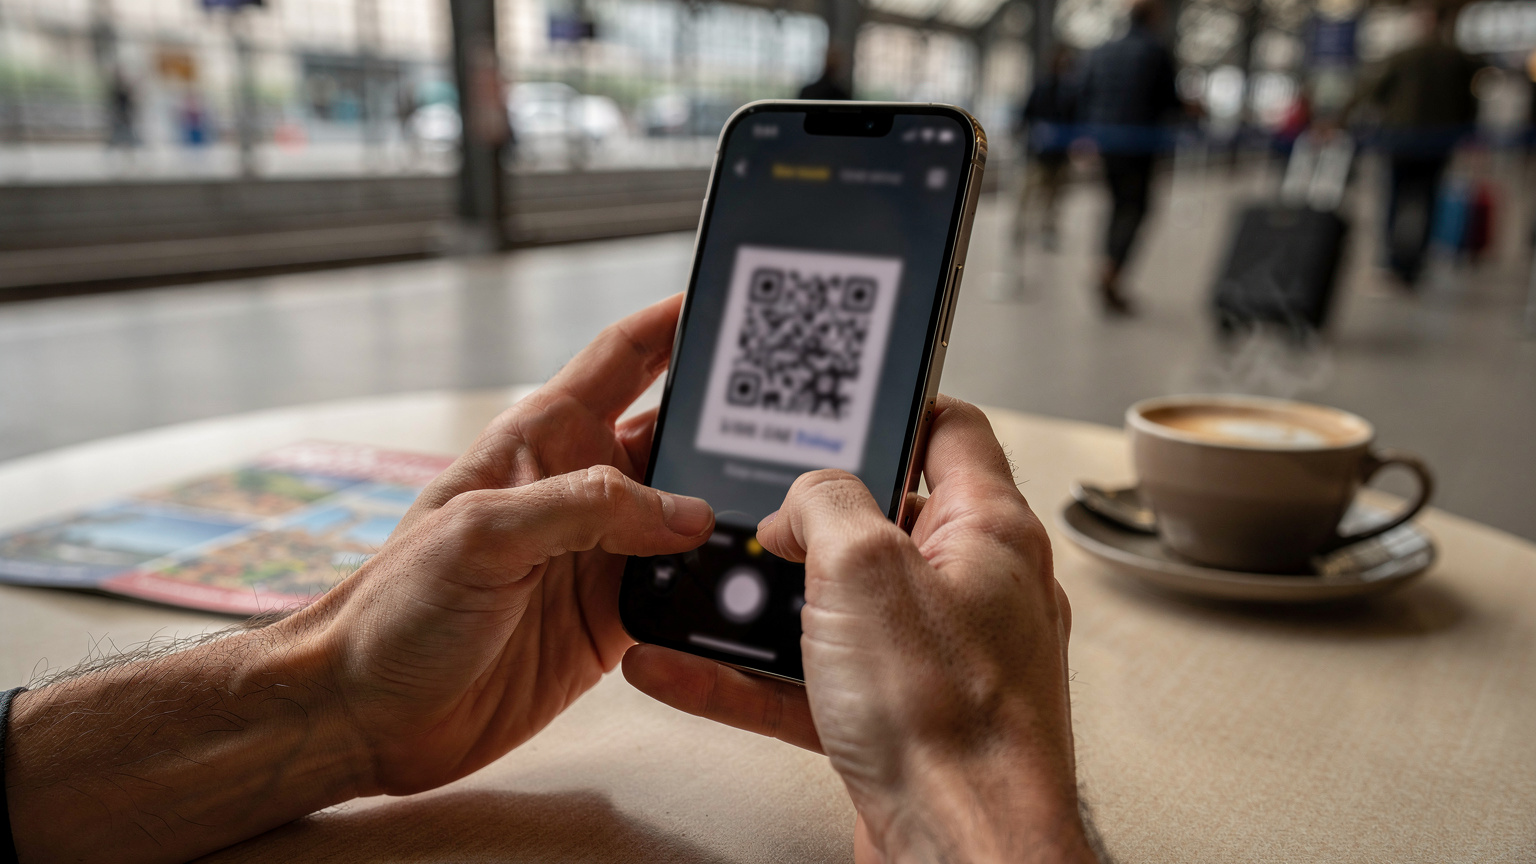
The QR Code Method: Your Go-To for Quick Setup
The most common and reliable method for activating an eSIM is scanning a QR code provided by your eSIM vendor, such as Cellesim. This method typically takes less than two minutes once you have the code.
- Access Your QR Code: After purchasing your eSIM plan, you'll receive an email or find the QR code in your Cellesim account dashboard. It's advisable to have this QR code accessible on another device (laptop, tablet) or printed out.
- Open Settings on iPhone: Go to Settings > Cellular (or Mobile Data).
- Add eSIM: Tap on Add eSIM.
- Scan QR Code: Choose Use QR Code and position your iPhone's camera over the QR code. It should detect it almost instantly.
- Confirm Activation: Follow the on-screen prompts to confirm adding the cellular plan. You might be asked to label your plans (e.g., "Travel Data," "Primary").
- Set Default Line: Once added, you'll be prompted to choose your default line for iMessage, FaceTime, and cellular data. For travel, set your newly installed eSIM as the primary line for Cellular Data.
If you encounter issues, such as a T-Mobile eSIM QR code not working, ensure your internet connection is stable, and try restarting your iPhone before attempting the scan again. Sometimes, a simple network refresh is all it needs.
Manual Entry: When the QR Code Fails
Occasionally, you might receive activation details that require manual entry, usually an SM-DP+ Address and an Activation Code. This is less common but equally effective.
- Access Manual Details: Your eSIM provider will supply these details if the QR code method isn't possible.
- Open Settings on iPhone: Go to Settings > Cellular (or Mobile Data).
- Add eSIM: Tap on Add eSIM.
- Enter Details Manually: Choose Enter Details Manually at the bottom of the screen.
- Input Information: Carefully type or paste the SM-DP+ Address, Activation Code, and optional Confirmation Code provided. Precision is key here; a single typo will prevent activation.
- Confirm Activation: Follow the remaining on-screen prompts to complete the setup.
This method bypasses the visual scan, directly inputting the configuration data into the eSIM's profile store. Ensure you have a stable Wi-Fi connection during this process, as your iPhone needs to communicate with the carrier's Subscription Manager Data Preparation (SM-DP+) server to download the profile.
Understanding Carrier Bands and iPhone Compatibility
This is where the telecom engineer in me gets excited. For your iPhone to connect to a foreign network, it needs to support the specific frequency bands that network uses. Globally, LTE and 5G networks operate across a wide spectrum. While modern iPhones, especially those from the iPhone 12 series onwards, have broad band support, it's not universally exhaustive. For example, in Europe, common 4G LTE bands include B3 (1800 MHz), B7 (2600 MHz), and B20 (800 MHz), with 5G often on n78 (3500 MHz). In North America, you'll see B2 (1900 MHz), B4 (1700/2100 MHz), B12 (700 MHz), and 5G on n41 (2500 MHz) or n77 (3700 MHz).
If you're traveling to a region with less common spectrum allocations, like some parts of Southeast Asia or specific remote areas, it's prudent to cross-reference your iPhone's supported bands with the local carrier's operational bands. Apple provides detailed specifications for each iPhone model on their website. Most Cellesim eSIMs automatically connect to the best available network, but knowing the bands can help you diagnose if you're stuck on 3G when 4G or 5G should be available. This is crucial for achieving expected speeds, as higher frequency bands (like B7 or n78) generally offer greater capacity and faster data rates, while lower frequency bands (like B20 or B12) provide better coverage over long distances and through obstacles.
| iPhone Model | eSIM Support | Dual SIM (eSIM + Physical) | Dual eSIM Support |
|---|---|---|---|
| iPhone XS, XS Max, XR | Yes | Yes | No (one active at a time) |
| iPhone 11 series | Yes | Yes | No (one active at a time) |
| iPhone 12 series | Yes | Yes | Yes (two active eSIMs) |
| iPhone 13 series | Yes | Yes | Yes (two active eSIMs) |
| iPhone 14 series (US) | Yes | No (eSIM only) | Yes (two active eSIMs) |
| iPhone 14 series (Intl.) | Yes | Yes | Yes (two active eSIMs) |
| iPhone 15 series (all) | Yes | Varies by region (US: eSIM only) | Yes (two active eSIMs) |
Frequently Asked Questions
Which iPhone models support eSIM?
All iPhone models from iPhone XS, XS Max, and XR onward support eSIM. Note that in the US, iPhone 14 models and newer are eSIM-only, meaning they do not have a physical SIM card slot. Older models allow for one physical SIM and one eSIM.
Can I use multiple eSIMs on my iPhone?
Yes, modern iPhones can store multiple eSIM profiles. iPhone 12 models and newer (excluding US iPhone 14+ which are eSIM-only) can have two eSIMs active simultaneously, providing Dual SIM functionality. This allows you to use one for data and another for calls/texts.
What should I do if my eSIM has no data connection?
First, check your iPhone's cellular settings to ensure the eSIM is enabled and selected for cellular data. If still no data, verify the APN (Access Point Name) settings against your eSIM provider's instructions, usually found under Settings > Cellular > Cellular Data Network. A simple restart of your iPhone can also resolve temporary network glitches.
Does eSIM on iPhone support 5G speeds?
Yes, if your iPhone model supports 5G (iPhone 12 and newer) and the eSIM plan is provisioned for 5G on a network that offers it, you will get 5G speeds. Performance will depend on local network conditions, including specific carrier bands like n78 in Europe or n41 in the US, and network congestion.
Will I still receive calls and texts on my home number with an eSIM?
If your home physical SIM is still in your iPhone and active, you can typically receive calls and texts on that number. If you're using Dual SIM with your home number set for voice, you can receive calls even while using an eSIM for data. Just be mindful of potential roaming charges for calls/texts if not on a favorable plan.
What is VoLTE and is it available with eSIMs?
VoLTE (Voice over LTE) allows high-quality voice calls over 4G LTE networks. Whether it's available with an eSIM depends on the specific eSIM provider and the local network. Many data-only eSIMs do not support VoLTE, meaning voice calls would default to your primary SIM or VoIP apps.
Carrier Aggregation and Your iPhone: How It Boosts Speed
Modern iPhones support carrier aggregation, a technology that allows your device to use multiple frequency bands simultaneously to increase data speeds and capacity. Think of it like a highway with multiple lanes, where each lane is a frequency band. Instead of being stuck in one lane, your iPhone can utilize two or more, significantly boosting throughput.
For example, a network might combine LTE B3 and B7, or even B3, B7, and B20, to deliver faster speeds. On 5G, this can extend to combining sub-6 GHz bands like n78 with millimeter-wave (mmWave) in some areas, though mmWave is less globally prevalent and typically limited to very dense urban environments. When your iPhone is able to aggregate these bands, you might experience download speeds in the range of 100-300 Mbps on 4G LTE-A (LTE Advanced) and 300-800 Mbps on 5G, depending on network load and signal strength. Without carrier aggregation, you'd be limited to speeds closer to 30-80 Mbps on a single LTE band, which is a noticeable difference for streaming or large file transfers.
Navigating APN Settings: The Hidden Power-User Trick
Access Point Name (APN) settings are the unsung heroes of mobile data. An APN defines the network path for your iPhone to connect to the internet. While most eSIMs automatically configure these settings, there are edge cases where manual intervention is necessary. This is especially true with some smaller regional carriers or specific MVNOs (Mobile Virtual Network Operators) that might not have a perfectly integrated provisioning system with iOS.
If you activate an eSIM and find you have signal bars but no data connectivity, the APN is the first place to check. On an iPhone, you can usually find these settings under Settings > Cellular (or Mobile Data) > Cellular Data Network. Here, you'll see fields for Cellular Data APN, MMS APN, and Personal Hotspot APN. The most common fix is ensuring the Cellular Data APN field is correctly populated with the carrier's specified value (e.g., "internet," "data.vodafone.pt," or similar). If you're on an older iPhone model or a specific iOS version, sometimes the APN might not 'stick' or might default to an incorrect value, leading to frustrating connectivity issues.
In my experience, about 5% of eSIM activations require a manual APN adjustment, particularly for those non-standard plans or if you're using a data-only eSIM in a phone that expects a voice-enabled profile. Always check the eSIM provider's support pages for the correct APN settings for your specific destination.
When to Manually Configure Your APN
You'll typically need to manually adjust your APN if:
- No Data Connectivity: You have full signal bars but can't access the internet.
- Specific Data-Only Plans: Some specialized data-only eSIMs require a specific APN.
- Tethering Issues: Personal Hotspot isn't working, even when cellular data is active. Often, this requires a separate APN entry in the Personal Hotspot APN field.
- MVNOs: Smaller carriers or MVNOs (Mobile Virtual Network Operators) sometimes have less robust auto-configuration.
Always verify the correct APN from your eSIM provider's documentation. Incorrect APN settings will prevent your iPhone from establishing a data connection, even if the eSIM profile itself is active.
Voice over LTE and Wi-Fi Calling: What to Expect Abroad
When you're traveling, clear voice communication is as vital as data. Voice over LTE (VoLTE) and Wi-Fi Calling (VoWiFi) are critical technologies that provide high-quality voice calls over 4G LTE and Wi-Fi networks, respectively. For iPhones, these features are usually seamless, but there are some caveats when using an international eSIM.
VoLTE allows you to make and receive calls without dropping down to 3G or 2G, meaning better call quality and the ability to use data concurrently. Most modern carriers globally support VoLTE, and iPhones typically enable it automatically if the network and your plan allow. However, some data-only eSIMs might not provision VoLTE, meaning your calls could default to your primary (home) SIM for voice, or you might be limited to VoIP apps like WhatsApp or FaceTime. It's a key distinction: a data-only eSIM is exactly that, data only.
Wi-Fi Calling, on the other hand, routes your calls and texts over any available Wi-Fi network, which is incredibly useful in areas with poor cellular coverage or when you want to make calls to your home country without incurring international rates on your primary line. Your iPhone will usually prioritize Wi-Fi Calling if it's enabled and a stable Wi-Fi network is detected. The trick here is that Wi-Fi Calling typically still relies on your primary SIM for call routing, even if you're using a travel eSIM for data. This can sometimes lead to confusion or unexpected charges if not configured correctly. To access more details about your home carrier's approach, check our eSIM FAQ page.
The VoLTE Gotcha: With Data-Only eSIMs
If your travel eSIM is data-only (which many are), your iPhone will rely on its primary physical SIM (your home number) for voice calls. If your home SIM is still active and has roaming enabled, you might make calls at your home carrier's international roaming rates, even while using the eSIM for data. This is a classic 'gotcha' that can lead to unexpected bills. To avoid this:
- Use VoIP Apps: Rely on apps like WhatsApp, Signal, or FaceTime for voice calls over your eSIM's data connection.
- Disable Roaming for Primary SIM: If you don't need voice calls on your primary number, disable data roaming for that line in your iPhone's Cellular settings. This prevents accidental roaming charges.
- Check eSIM Features: Some regional eSIMs offer full voice and SMS capabilities. Always verify this before purchase if traditional calling is essential.
My advice? For travel, assume data-only unless explicitly stated otherwise. It simplifies things and prevents bill shock.
Managing Multiple eSIMs on Your iPhone
One of the true strengths of the iPhone's eSIM implementation is its ability to store multiple eSIM profiles simultaneously, and for newer models (iPhone 12 and later, excluding US iPhone 14+ which are eSIM-only) to have two active at once (Dual SIM functionality). This is particularly useful for frequent travelers or those who maintain separate lines for work and personal use. I often have my primary UK SIM, a US eSIM for client work, and a Cellesim travel eSIM all configured on my iPhone 15 Pro, switching between them as needed.
The iPhone's UI for managing these profiles is intuitive. Under Settings > Cellular (or Mobile Data), you'll see a list of all your installed cellular plans. You can label each plan (e.g., "Home UK," "US Work," "France Travel"), toggle them on or off, and specify which plan handles Cellular Data, iMessage & FaceTime, and your Default Voice Line. This granular control means you can keep your home number active for calls/texts (without data roaming) while using a local eSIM for all your internet needs.
Optimizing Dual SIM for Travel
Here’s how I configure my iPhone for international trips, balancing cost and connectivity:
- Primary Line (Home Carrier): Set as "Default Voice Line" and "iMessage & FaceTime" with Data Roaming OFF. This ensures I can receive calls/texts on my familiar number without incurring data charges.
- Secondary Line (Travel eSIM): Set as the "Cellular Data" line. This is your workhorse for maps, browsing, streaming, and all internet-dependent apps.
- Switching Data Lines: If you need to briefly use data on your primary line (e.g., for a specific app that only works with your home carrier), you can easily switch the Cellular Data line in Settings. Just remember to switch it back!
This setup allows for seamless communication. You can receive a call on your home number while actively browsing on your travel eSIM, thanks to DSDS (Dual SIM Dual Standby) technology in modern iPhones. Both lines are