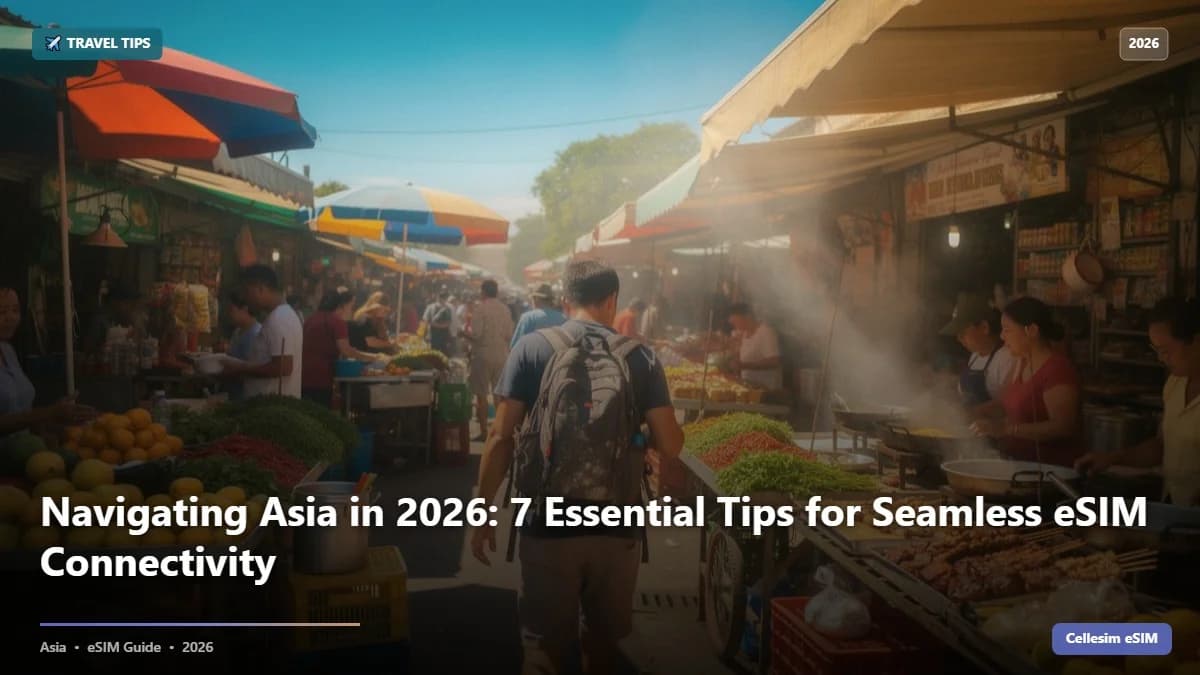
Updated: 2026-02-16
For modern travelers, the question of when to secure your mobile connectivity abroad often comes down to a fundamental choice: purchasing an eSIM before you depart, or waiting until you land in your destination country. This decision significantly impacts your arrival experience, dictating whether you face immediate connection or a search for local options.
- The Strategic Advantage of Pre-Purchasing Your eSIM
- Navigating Connectivity Challenges Upon Arrival
- eSIM vs. Local SIM vs. Roaming: A Cost and Convenience Comparison
- Key Considerations When Buying Your Travel eSIM
- Seamless Activation: A Step-by-Step Guide for Pre-Departure Setup
- Maximizing Your Connectivity Abroad: Essential Tips
- Frequently Asked Questions
Connect Instantly with a Cellesim eSIM
Skip the airport SIM queue and avoid roaming fees. Join 50,000+ travelers in 200+ countries who connect instantly with Cellesim.
Shop All eSIM PlansThe Strategic Advantage of Pre-Purchasing Your eSIM
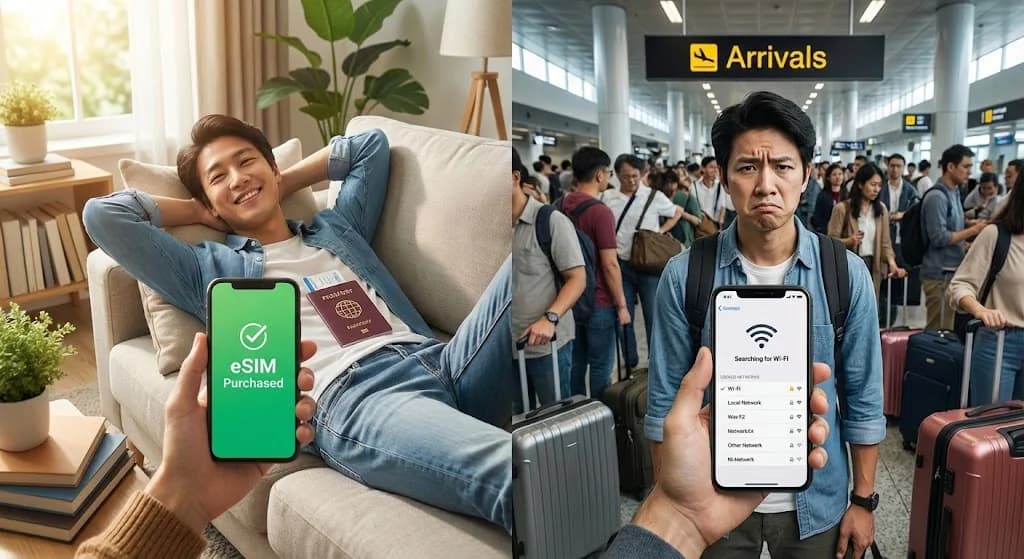
For the vast majority of travelers, the answer to the dilemma is clear: purchase your eSIM before you leave home. This proactive approach transforms your arrival from a moment of potential stress into one of seamless connectivity. It is the proven strategy for a smoother journey when traveling abroad.
Land and Connect Instantly
Imagine this scenario: You have just endured a long flight, perhaps 10 hours, and landed at a bustling international airport like London's Heathrow (LHR) or Tokyo's Narita (NRT). The immediate need is to let family know you have arrived safely, confirm airport transfer details, or locate your hotel address using a ride-sharing app. With an eSIM purchased and installed beforehand, you simply turn off Airplane Mode. Your phone automatically connects to the local network, and you are online. There is no frantic search for spotty Wi-Fi, no language barriers at a local SIM card shop, and no wasted time.
Pre-purchasing an eSIM ensures immediate access to essential services. This includes navigation apps for finding your way around, translation tools for communication, and messaging apps to stay in touch with loved ones. It eliminates a common source of travel anxiety and allows you to focus on enjoying your trip from the moment you step off the plane.
Navigating Connectivity Challenges Upon Arrival
While the appeal of buying a local SIM card or an eSIM upon arrival might seem convenient, this approach often presents several unforeseen challenges that can complicate your initial hours in a new country.
The Hunt for Wi-Fi and Local SIM Shops
Arriving in a foreign country without pre-arranged connectivity often leads to a scavenger hunt for free airport Wi-Fi. This Wi-Fi is frequently slow, unreliable, or requires registration, delaying your ability to communicate or navigate. Once you manage to get online, the next step is locating a local SIM card vendor, which may involve queues, language barriers, and limited opening hours, especially if you arrive late at night or on a public holiday.
Furthermore, local SIM card shops might not always offer the best rates for short-term travelers, and some require local identification or complex registration processes. The pressure to choose a plan quickly can lead to suboptimal decisions, or even security concerns if you are forced to share personal information with an unfamiliar vendor.
This process can be particularly inconvenient in countries where finding an easily accessible SIM card retailer at the airport is not guaranteed, or where local regulations make it challenging for foreigners to purchase a SIM without extensive paperwork. For a deeper dive into the comparison, read our guide on Airport SIM Card Prices vs. eSIM.
"The first few hours in a new country set the tone for the entire trip. Immediate connectivity means less stress and more exploration, right from the start." - A frequent international traveler.
eSIM vs. Local SIM vs. Roaming: A Cost and Convenience Comparison
Understanding the financial and practical implications of each connectivity option is crucial for making an informed decision. Here's a comparative overview:
| Option | Setup Time | Cost (per GB) | Convenience | Network |
|---|---|---|---|---|
| Cellesim eSIM | 2-5 mins | From $1.50 | Very High | Local 4G/5G |
| Local Physical SIM | 30-60 mins | From $2.00 | Medium | Local 4G/5G |
| International Roaming | Instant | $10-20+ | High | Home Network Roam |
Cellesim eSIM: Offers the best balance of cost-effectiveness and convenience. You purchase and install it before your trip, activate it upon arrival, and benefit from competitive local data rates. Plans are transparent, and setup is digital.
Local Physical SIM: Often requires locating a store, dealing with language barriers, and potentially presenting identification. While data rates can be good, the initial hassle and time investment can be significant. This option also means handling a physical card and potentially swapping your primary SIM, risking loss.
International Roaming: The easiest to activate, as your home provider automatically connects you. However, it is almost always the most expensive option, with data costs reaching exorbitant levels. Many travelers experience bill shock after returning home due to unexpected roaming charges. You can estimate your potential savings with our Roaming Savings Calculator.
Find Your Destination eSIM Plan
Key Considerations When Buying Your Travel eSIM
To ensure a smooth experience, several factors warrant your attention when selecting and purchasing an eSIM for your upcoming travels.
Device Compatibility
Not all phones support eSIM technology. Before purchasing, verify that your device is eSIM-compatible and unlocked. Most newer smartphones from Apple (iPhone XS and later), Samsung (Galaxy S20 and later), Google (Pixel 3 and later), and other manufacturers support eSIMs. You can easily check if your phone is ready using our eSIM Checker or by visiting our eSIM Compatible Devices page.
Data Usage Estimation
Accurately estimating how much data you will need is vital to avoid running out or overpaying. Consider your typical usage habits: frequent social media, streaming, navigation, or light browsing. A typical traveler might use 1-3 GB for a week of moderate use, while heavy users might need 5-10 GB or more. Our Smart Data Calculator can help you determine the ideal data package for your trip.
Coverage and Network Quality
Cellesim partners with leading local network providers in each country to ensure reliable 4G/5G connectivity. Before you travel, you can review the specific network partners for your destination on the Cellesim website. This ensures you have access to the best available network quality throughout your journey. For example, when traveling to Italy, Cellesim leverages robust local networks to provide seamless internet access across major cities and rural areas.
Seamless Activation: A Step-by-Step Guide for Pre-Departure Setup
Activating your Cellesim eSIM before your flight is a straightforward process that takes only a few minutes, ensuring you are ready to connect immediately upon arrival.
- Purchase Your eSIM Plan: Visit cellesim.com, select your destination and desired data package.
- Receive Your eSIM QR Code: After purchase, you will receive an email containing a QR code or manual installation details.
- Install the eSIM:
- iPhone: Go to Settings > Cellular/Mobile Data > Add eSIM. Scan the QR code or enter details manually.
- Android: Go to Settings > Network & internet > SIMs > Add more. Scan the QR code or enter details manually.
- Label Your eSIM: Name your new eSIM plan (e.g., "Travel eSIM") to differentiate it from your primary SIM.
- Keep it Off Until Arrival: Most Cellesim eSIMs activate only when they connect to a network in the destination country. Keep your primary SIM set as default for calls/SMS and enable your Cellesim eSIM for data only once you land.
For a detailed walkthrough, refer to our Complete eSIM Setup Guide or try the Interactive Setup Guide for visual instructions.
Maximizing Your Connectivity Abroad: Essential Tips
Beyond choosing the right time to buy your eSIM, implementing a few practical tips can significantly enhance your connectivity experience while traveling.
Managing Your Data Usage
To make your data plan last, consider downloading maps, travel guides, and entertainment content over Wi-Fi before heading out. Utilize Wi-Fi whenever available at your accommodation or cafes for heavy data tasks. Monitor your data usage through your phone's settings to stay within your plan limits.
Keeping Your Primary Number Active
One of the major benefits of an eSIM is that it allows you to keep your primary physical SIM active in your phone. This means you can continue to receive calls and SMS on your home number, even while using your eSIM for data. Remember to turn off data roaming for your primary SIM to avoid unexpected charges. This also helps you keep your WhatsApp number and other messaging apps seamlessly.
Staying Informed on Local Regulations
While eSIMs simplify connectivity, it's always wise to be generally aware of local internet usage regulations or any temporary service restrictions in your destination. For example, some countries may have specific rules regarding VPN usage or access to certain services. Reputable sources like the U.S. Department of State's travel advisories or your home country's foreign ministry provide up-to-date travel information.
Ready for Seamless Connectivity?
Choose Cellesim and ensure instant internet access from the moment you land, in over 200 countries.
Start Your Connected JourneyTrusted by 50,000+ travelers worldwide. 24/7 Support.
Frequently Asked Questions
Is it better to buy an eSIM before or after I land?
It is generally much better to buy your eSIM before you fly. This ensures you have instant connectivity upon arrival, avoiding the hassle of finding Wi-Fi or a local SIM card shop, potential language barriers, and often better pricing.
Can I activate my Cellesim eSIM while still at home?
Yes, you can install your Cellesim eSIM profile on your device before you leave. However, most Cellesim plans only activate when they connect to a supported network in your destination country, meaning your plan duration starts upon arrival, not installation.
What if my phone isn't eSIM compatible?
If your phone is not eSIM compatible, you won't be able to use an eSIM. You can check your device's compatibility using our eSIM Checker. If it's not compatible, your options would be international roaming or purchasing a traditional physical SIM card upon arrival.
Will I lose my WhatsApp number if I use an eSIM?
No, using an eSIM for data does not affect your WhatsApp number or other messaging apps linked to your primary phone number. You can keep your primary SIM active for calls and SMS while using the eSIM for data, ensuring you maintain all your existing contacts and apps.
How much data do I need for my trip?
The amount of data you need depends on your usage habits. Light users might need 1-3 GB per week for basic browsing and messaging, while heavy users could need 5-10 GB or more for streaming and extensive navigation. Our Smart Data Calculator can help you estimate your needs.
What if I encounter issues with my eSIM abroad?
Cellesim offers 24/7 customer support via email at [email protected]. If you experience any connectivity issues or have questions while abroad, you can contact our support team for assistance.