eSIM Essentials: What iPhones Support It?
Look, if you’re still wrestling with physical SIM cards for international travel, you’re probably wasting time and money. The world moved on, and your iPhone has too. Since the iPhone XS, XS Max, and XR launched in late 2018, every flagship iPhone model has come equipped with eSIM capability. That means if your iPhone isn’t from the dark ages, it’s ready.
Specifically, here’s a breakdown:
- iPhone XS, XS Max, XR: These were the pioneers, offering dual-SIM with one physical nano-SIM and one eSIM.
- iPhone 11 series through iPhone 14 series: Continued the physical SIM + eSIM configuration for most regions.
- iPhone 14 series (US models only): Apple took the plunge, making these fully eSIM-only. If you bought your iPhone 14 in the US, there’s no physical SIM tray at all. This was a big deal for us long-term travelers, as it removed one more point of failure.
- iPhone 15 series and newer: All global models now support dual eSIM, meaning you can have multiple eSIM profiles active and switch between them, or even use two simultaneously. US models remain eSIM-only, while international models still retain a physical SIM slot alongside dual eSIM capability. This dual eSIM feature on the iPhone 17 Pro Dual-eSIM is a game-changer for managing global roaming and local data.
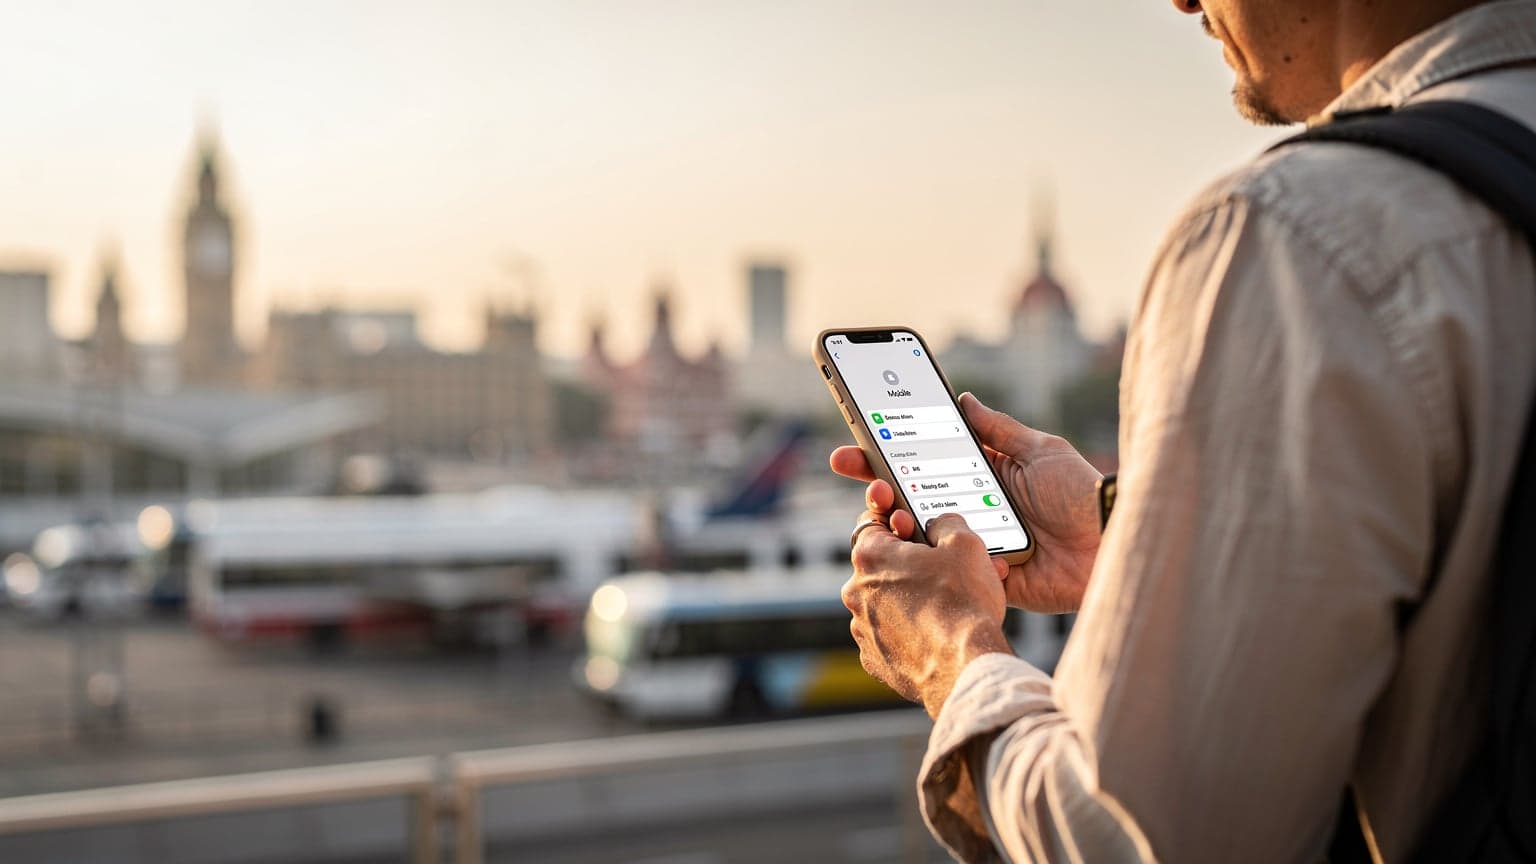
Before you even think about buying an eSIM for Greece or anywhere else, confirm your iPhone model. You can usually find this under Settings > General > About, looking for “Model Name.” No point buying a digital plan if your hardware can’t handle it.
Checking Your iPhone’s eSIM Compatibility
This is a quick verification step. Most modern iPhones are good to go, but a few regional variants or older refurbished models might be tricky.
- Go to Settings: Tap the “Settings” app icon.
- Navigate to Cellular: Select “Cellular” or “Mobile Data.”
- Look for “Add eSIM”: If you see an option like “Add eSIM” or “Add Data Plan,” your iPhone is eSIM compatible. If it’s missing, you likely have a model that doesn’t support it, or your carrier has disabled the feature (rare, but it happens).
If you’re really unsure, pop your current SIM card out and check for a physical tray. If there isn’t one, like with US iPhone 14 models and newer, you’re definitely eSIM-only.
Why Go eSIM for International iPhone Travel?
I’ve been on the road for four years, bouncing between continents, and the biggest headache used to be sorting out local SIMs. The small kiosks at airports with inflated prices, the language barrier, the worry about losing your tiny physical chip in a hostel — it’s all a nightmare. eSIMs changed that equation entirely. They’re not just a convenience, they’re a necessity for anyone serious about managing their connectivity without fuss.
When you’re trying to book an Uber from a new airport, or find that obscure Airbnb in a foreign city (which, let’s be honest, is most of them), reliable data isn’t a luxury, it’s oxygen. Relying on airport Wi-Fi is a rookie mistake; it’s either slow, insecure, or nonexistent when you need it most. eSIMs solve this by letting you buy and activate data plans before you even land.
Plus, let's talk about the cost. Roaming plans from your home carrier are usually highway robbery. I’ve seen friends get hit with hundreds of dollars in charges for basic WhatsApp use. As I’ve argued before in eSIM vs International Plan: Why Smart Travelers Pick eSIMs in 2026, an eSIM is almost always the smarter financial choice.
The Cost Savings and Flexibility
I remember being in Chiang Mai, Thailand, and needing data for a month. A local SIM from AIS cost me about 300 THB (around $8 USD) for 10GB. With an eSIM from a global provider, I could get comparable data for a similar price, or often less, especially for shorter trips. The real win? I could buy it from my Airbnb in the Nimmanhaemin area before I even stepped out for my first “khao soi” (a must-try). No searching for kiosks, no language barriers, just smooth activation.
Here's why the flexibility matters:
- No more SIM swapping: You can store multiple eSIM profiles on your iPhone and switch between them in seconds. This is invaluable when you’re country-hopping.
- Keep your primary number: Your home number stays active for calls and texts (critical for banking two-factor authentication) while your eSIM handles data. Some sensitive apps, like certain Brazilian banking apps or India’s Aadhaar, still need a local physical SIM for initial setup or ongoing verification, so this dual functionality is a lifesaver.
- Instant activation: Buy a plan online, scan a QR code, and you’re connected. No waiting in line. I’ve activated an eSIM while taxiing to the gate in Barcelona’s El Prat, ready to go the moment we landed.
Security and Convenience on the Go
Losing a physical SIM card is a pain. It’s small, easily misplaced, and replaces your local number. An eSIM is embedded digitally, making it impossible to lose physically. If your iPhone is stolen, the eSIM is still tied to the device, making it harder for someone to just pop it out and use your data plan — an unlikely but unsettling scenario when you’re trying to keep your data secure in a foreign city.
Plus, for those of us who travel with family, keeping everyone connected is paramount. I’ve helped friends set up eSIM SMS for Families to ensure kids can always reach parents and that crucial verification codes flow seamlessly, even when abroad.
Getting Started: How to Activate an eSIM on Your iPhone
Activating an eSIM on your iPhone is generally straightforward, assuming you’ve purchased a plan from a reputable provider. Most providers will give you either a QR code to scan or manual details to enter. I usually prefer the QR code method; it’s faster and less prone to typos.
Step-by-Step QR Code Activation
This is the most common and easiest method. Make sure you have another device (a laptop, another phone) to display the QR code, or print it out if you’re old school.
- Purchase your eSIM plan: Buy an eSIM plan from a provider like Cellesim. You’ll typically receive an email with a QR code and activation instructions.
- Open Settings on your iPhone: Tap the “Settings” app.
- Go to Cellular/Mobile Data: Tap “Cellular” or “Mobile Data.”
- Add eSIM: Tap “Add eSIM” or “Add Data Plan.”
- Scan QR Code: Choose “Use QR Code” and scan the QR code provided by your eSIM carrier. Your iPhone camera will open. Position the QR code within the frame.
- Confirm Activation: Follow the on-screen prompts. You’ll typically be asked to label your new plan (e.g., “Travel Data,” “Spain eSIM”) and set it as your primary for data or specific contacts. I always label mine clearly, especially if I’m stacking multiple plans for different countries.
- Select Default Line: Choose which line (your primary physical SIM or the new eSIM) will be used for data, and which for calls/texts. For travel, I usually keep my home SIM for calls/texts on Wi-Fi calling and set the eSIM for all data.
Within a minute or two, your iPhone should connect to the local network. You’ll see the new carrier name appear in your status bar. If you’re having trouble, check out “iPhone 17 eSIM Abroad: Quick Fixes for New Device Activation (2026)” for common troubleshooting steps.
Manual eSIM Activation
Sometimes, a QR code isn’t an option, or it simply doesn’t scan properly (bad screen, glare, etc.). In these cases, manual entry is your backup.
- Purchase your eSIM plan: Get your manual activation details from your eSIM provider, usually an SM-DP+ Address and an Activation Code.
- Open Settings on your iPhone: Tap “Settings.”
- Go to Cellular/Mobile Data: Select “Cellular” or “Mobile Data.”
- Add eSIM: Tap “Add eSIM” or “Add Data Plan.”
- Enter Details Manually: Choose “Enter Details Manually.”
- Input SM-DP+ Address and Activation Code: Carefully type in the information provided. This is where precision matters — a single typo will prevent activation.
- Confirm Activation: Follow the remaining on-screen prompts to label and configure your new plan.
It’s a bit more tedious, but it gets the job done. Make sure your internet connection is stable during this process — a dodgy hotel Wi-Fi can cause issues here.
Managing Multiple eSIMs: The Power of Dual-SIM
This is where iPhones really shine for nomads. With dual-SIM capability (one physical + one eSIM, or dual eSIM on newer models), you can juggle multiple numbers and data plans. I’ve often got my US number for banking and family, and then three or four eSIM profiles loaded for different regions. In Southeast Asia, for instance, I’ll load a Vietnam eSIM, a Thailand eSIM, and a regional Asia eSIM — ready to switch as I cross borders. My current iPhone 15 Pro, with its dual eSIM setup, handles this without a hitch.
Switching Between eSIM Profiles
This is surprisingly simple:
- Go to Settings > Cellular/Mobile Data.
- Tap “Cellular Plans” or “Data Plans.” You’ll see a list of your active and inactive eSIMs.
- Select the eSIM you want to use for data. Toggle “Turn On This Line” to activate it, and if it’s not already, set it as your “Cellular Data” line.
You can also quickly turn off an eSIM if you don’t need it, saving you from accidental data usage. I do this regularly when I’m planning to stay in one place for a while and have a dedicated local SIM, but want to keep the eSIMs available for my next hop.
Using Two eSIMs Simultaneously
On iPhone 15 series and newer, you can actually use two eSIMs at once. This is excellent for scenarios where you might need two local numbers, or if you want to use one eSIM for data and another for local calls/texts. For example, if you’re living in Medellín, Colombia, you might have an eSIM from Claro for calls and texts (many local businesses still prefer calls) and a Cellesim data-only eSIM for cheap internet.
To set this up, you’ll assign different functions to each active line in your Cellular settings: one for “Primary” calls/texts, another for “Secondary” calls/texts, and then specify which one handles “Cellular Data.” It gives you incredible granularity.
Troubleshooting Common eSIM Issues on iPhone
Even with the simplicity of eSIMs, things can go sideways. I’ve seen it all: “No Service” messages, slow data, activation errors. Most issues are minor and can be fixed with a few basic steps.
No Service or Slow Data
This is the most common complaint. Before you panic, try these:
- Check your data roaming settings: Go to Settings > Cellular/Mobile Data > [Your eSIM Plan] > Data Roaming and ensure it’s turned ON. Many eSIMs are technically “roaming” on partner networks.
- Restart your iPhone: The classic fix, but often effective. It forces your phone to re-register with the network.
- Check APN settings: Sometimes, the Access Point Name (APN) needs to be manually configured. Your eSIM provider will give you these details. Go to Settings > Cellular/Mobile Data > [Your eSIM Plan] > Cellular Data Network and enter the APN. For example, some Cellesim plans might use “internet” or “data.”
- Verify network selection: Your iPhone should automatically pick the best network. However, if you’re in a border region or an area with spotty coverage, manual selection can help. Go to Settings > Cellular/Mobile Data > [Your eSIM Plan] > Network Selection and toggle “Automatic” off, then choose a strong local carrier.
- Contact support: If all else fails, reach out to your eSIM provider’s support. They can check if your plan is active and if there are any network-specific issues.
...a "No Service" message. If you're still encountering persistent "No Service" issues, or facing other common problems like activation errors, here’s how to tackle them:
Activation Errors
You’ve scanned the QR code, but your eSIM just won’t activate. Frustrating, right? Here’s your checklist:
- Stable Internet Connection: Ensure your iPhone has a strong Wi-Fi connection during the activation process. eSIMs need to communicate with the network to provision.
- Re-scan QR Code: Sometimes, a quick re-scan can resolve a minor glitch. Make sure the QR code is clear and well-lit.
- Check for Pending Activations: In rare cases, a previous activation attempt might be stuck. Go to Settings > Cellular/Mobile Data and look for any "Activating..." messages. You might need to delete and re-add the plan.
- Verify Plan Details: Double-check that you're trying to activate the correct eSIM plan. Mistakes happen, especially if you've purchased multiple plans.
- Contact Your eSIM Provider: If all else fails, your provider can verify if the eSIM profile has been correctly provisioned on their end. They can often re-send activation instructions or troubleshoot remotely.
Maximising Your eSIM Experience on iPhone for 2026 Travel
With eSIM technology constantly evolving, here are some advanced tips to ensure you get the most out of your iPhone's capabilities for your 2026 adventures:
Pre-Trip Preparation & Smart Purchasing
- Buy Before You Fly: Purchase your eSIM plan a few days or weeks before your departure. This allows you to set it up at home with reliable Wi-Fi, avoiding last-minute stress upon arrival in a new country.
- Multi-Country Plans: For multi-destination trips, look for regional or global eSIM plans. Cellesim, for instance, offers plans covering multiple countries, simplifying connectivity across borders without needing new eSIMs for each stop.
- Data-Only vs. Voice & Data: Decide if you need local calls/texts. Many travelers find data-only eSIMs sufficient, relying on VoIP apps (WhatsApp, FaceTime, Messenger) for communication, which can be more cost-effective.
- Monitor Data Usage: Regularly check your data consumption via Settings > Cellular/Mobile Data. This helps you avoid running out unexpectedly and can inform future plan purchases. Your iPhone provides a breakdown per app.
Leveraging iPhone Features for Seamless Travel
- Label Your eSIMs Clearly: Go to Settings > Cellular/Mobile Data > [Your eSIM Plan] > Cellular Plan Label. Rename your eSIMs to something intuitive, like "Mexico Data," "Europe Trip," or "Home Line." This prevents confusion when managing multiple plans.
- Conditional Activation: While not fully automated, you can pre-load multiple eSIMs and only activate them when you land in a specific country. Keep them "Off" until needed to prevent accidental data usage.
- Personal Hotspot with eSIM: Your eSIM data plan can power your personal hotspot, allowing you to share internet with laptops, tablets, or travel companions. Ensure your plan supports hotspot usage.
- Emergency Services & Roaming: In 2026, iPhones continue to support emergency calls even without an active cellular plan, but having an active eSIM ensures you can be reached and use data for maps or information in an emergency.
Real-World Scenarios for the Modern Traveler
"Using an eSIM on my iPhone 15 Pro Max for my 3-month backpacking trip through Southeast Asia was a game-changer. I landed in Bangkok, scanned my Cellesim QR code, and was online before I even left the airport. No fumbling for local SIMs, no language barriers, just instant connectivity. I kept my home eSIM active for banking alerts and two-factor authentication, using the Cellesim data-only plan for everything else. Seamless." - Alex P., Digital Nomad, March 2026
- The Business Traveler: Juggling multiple client calls across time zones? Keep your primary business line on one eSIM, and use a dedicated data eSIM for reliable internet in different countries, ensuring you're always connected for video conferences and emails.
- The Family Vacationer: Purchase a high-data regional eSIM for your iPhone. Use it for navigation, booking attractions, and keeping the kids entertained with streaming, then leverage your Personal Hotspot to share data with other family devices.
- The Budget-Conscious Explorer: Research and pre-purchase data-only eSIMs for each country or region you visit. Activate them only when needed, ensuring you get the best local rates without commitment to long contracts.
Conclusion: Your iPhone, Your Global Connectivity Hub
By 2026, the eSIM has firmly established itself as the superior choice for iPhone users on the move. Its unparalleled flexibility, ease of activation, and the ability to manage multiple plans directly from your device transform your iPhone into the ultimate global connectivity hub. Say goodbye to physical SIM cards, cumbersome swapping, and unexpected roaming charges.
Whether you're a frequent flyer, a digital nomad, or simply taking your annual holiday, embracing eSIM technology on your iPhone simplifies your travel experience, keeping you connected, informed, and in control, no matter where your adventures take you.
Ready to simplify your 2026 travels? Explore Cellesim's wide range of affordable and reliable eSIM plans designed for global connectivity. Get your Cellesim eSIM today and experience the freedom of seamless travel.