
Why Your eSIM Number Matters for Backpackers
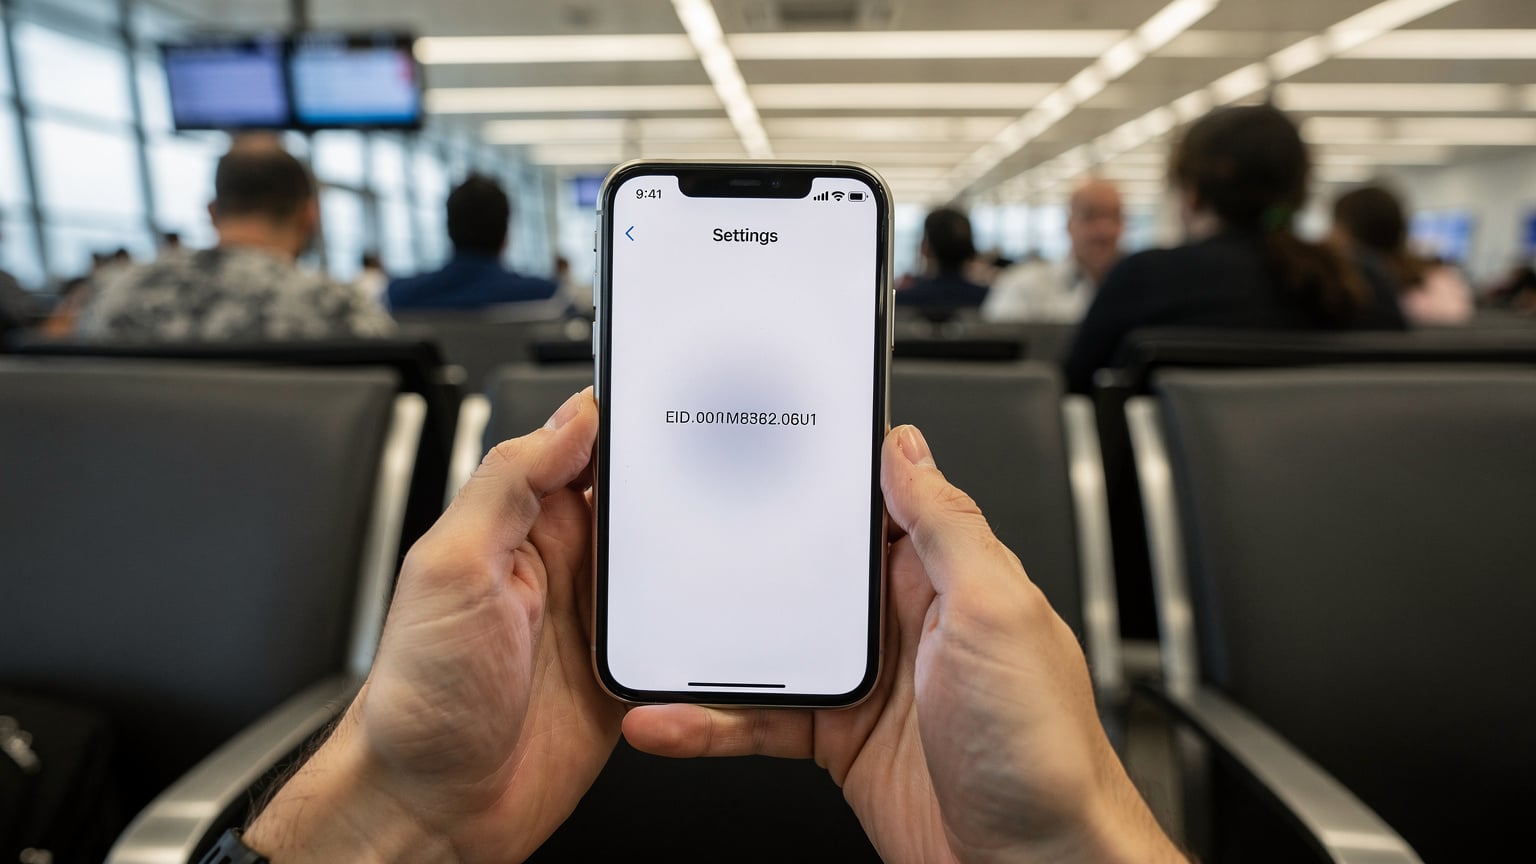
Look, I've been there. You're trying to activate your new Cellesim data plan for your trip to Morocco, you're on a sketchy hostel WiFi, and the support chat asks for your EID. Panic sets in. What's an EID, and where do I find it? This isn't just tech jargon, it's a piece of information that can save you hours of frustration and potentially, your carefully planned budget.
Think of the EID, or eSIM Identifier, as the serial number for your phone's embedded SIM. It's a unique string of characters that identifies your eSIM hardware. Without it, your provider, whether it's Cellesim or a local carrier like Telkomsel (if you're using their eSIM in Indonesia), can't properly activate or troubleshoot your digital SIM profile. For a budget backpacker, every minute spent troubleshooting is a minute not exploring, not finding the cheapest falafel stand, or worse, paying for expensive roaming data.
My last trip through the Balkans, I spent 8 days in Croatia and Slovenia, using a Cellesim regional eSIM. Total data spent: 16GB. My total data cost: €28. That's about €3.50/day. If I'd hit a snag and needed support, knowing my EID would have meant a quick fix, not a scramble. Trust me, you want this number handy.
Spotting the Elusive EID on iPhone, iOS 17 and Later
Apple likes to keep things tidy, which sometimes means burying important details. But once you know where to look, finding your eSIM number on an iPhone running iOS 17 or later is pretty straightforward. You won't be digging through any obscure menus, I promise.
- Unlock Your iPhone and Head to Settings: Tap the familiar grey gear icon on your home screen.
- Navigate to 'General': Scroll down and select 'General'. This is where most of your phone's core information lives.
- Tap 'About': This section contains all the nitty-gritty details about your device, from serial numbers to software versions.
- Locate Your EID: Scroll down in the 'About' menu. You'll see various numbers like IMEI, ICCID, and then your EID. It's usually a long, 32-digit string.
- Copy if Needed: You can often tap and hold on the EID to copy it, which is super handy if you need to paste it into a support chat or an activation form.
This method works whether you're juggling one eSIM for your daily use and another for your Nordic travels, or if you've got multiple profiles enabled.
What if 'About' Doesn't Show It?
Rarely, if you haven't activated any eSIM profiles yet, the EID might not be immediately visible. In this case, sometimes installing the first eSIM profile will make it appear. If you're really stuck, a quick reset of network settings can sometimes jog it, but that's a last resort after checking with your provider.
Android Adventures: Finding Your eSIM Number on Samsung, Google Pixel, and More
Android phones, bless their open-source hearts, can have slightly different menu structures depending on the manufacturer and the Android version. However, the core path to finding your eSIM number, or EID, remains largely consistent across devices like Samsung, Google Pixel, OnePlus, and others. It's usually tucked away in the 'About phone' or 'SIM status' sections.
- Open Your Settings App: Look for the gear icon, typically found in your app drawer or by swiping down from the top of your screen and tapping the settings icon.
- Scroll to 'About Phone' or 'About Device': This is often at the very bottom of the main Settings menu. Tap on it.
- Find 'SIM status' or 'eSIM status': Within 'About Phone', you might need to tap on 'SIM status' or 'eSIM status'. On some devices, the EID might be listed directly under 'About Phone'.
- Locate the EID: Your EID will be displayed here, often alongside other details like your IMEI numbers.
Samsung Specifics
On a Samsung Galaxy running Android 14, you'd typically go: Settings > About phone > Status information > SIM card status. From there, look for the 'EID' entry. Simple enough, but you might need to scroll a bit.
Google Pixel Specifics
For a Google Pixel, it's usually: Settings > About phone > SIM status (eSIM). The EID will be clearly listed there. Google's interface tends to be a bit more streamlined, which is a blessing when you're trying to save a euro.
Other Android Devices
If you're on a less common Android device, the path might vary slightly, but always start with 'Settings' and look for 'About Phone' or 'System', then dig around for 'SIM status' or anything related to 'eSIM'. When in doubt, search for 'EID' within your phone's settings search bar.
When You Really Need That eSIM Number
You don't just need this number for bragging rights, though it does make you sound like you know what you're doing. There are concrete situations where having your EID ready can save your trip, and your wallet.
- Support Queries: If you're experiencing issues with your Cellesim data not connecting, or if an activation fails, the first thing a support agent will ask for is your EID. They use it to identify your specific eSIM hardware and diagnose problems.
- Transferring eSIMs: While not universally supported, some carriers allow you to transfer an eSIM profile to a new device. This process often requires the EID of both the old and new devices.
- Reactivating a Deleted Profile: If you accidentally delete an eSIM profile and need to reactivate it, the EID can be crucial for the provider to identify and push the profile back to your device. This happens more often than you'd think when you're trying to manage multiple eSIMs for different legs of a long trip, say, from the UK to Turkey.
- Unlocking Your Device: In rare cases, if you're dealing with a carrier-locked device and trying to use an international eSIM, the EID might come into play during the unlocking process, though this is less common with modern, unlocked phones.
Always keep a screenshot or a written note of your EID in a secure, accessible place. A quick snap to your cloud storage or a note in a secure app like Signal's 'Note to Self' can be a lifesaver.
The Cheapest Fallback: Physical SIM Cards and Border-Crossing Tricks
Okay, real talk. While eSIMs are my go-to for convenience and avoiding roaming shock, sometimes a physical SIM is still the cheapest option, especially in certain countries or if you're hitting specific border crossings. For fairness, you need to know this.
For example, in many parts of Southeast Asia, like Vietnam or Cambodia, local physical SIMs can be ridiculously cheap. I'm talking 10GB for €5 from a street vendor. The catch? You need to find a reputable vendor, ensure it's activated properly, and sometimes, you'll need your passport for registration. This is where eSIMs win on ease, but lose on sheer rock-bottom price.
| Country | Cheapest Local SIM (Physical) | Average Cost for 10GB |
|---|---|---|
| Thailand | DTAC Tourist SIM | €7-€10 (7-15 days) |
| Vietnam | Viettel, Mobifone | €5-€8 (30 days) |
| Indonesia | Telkomsel (physical option) | €10-€15 (30 days) |
| Turkey | Turkcell, Vodafone TR | €15-€25 (30 days, higher upfront) |

Border-Crossing Edge Cases
Here's a tactical tip: When crossing land borders, especially in regions like the Balkans or Central America, local SIM vendors might literally be waiting on the other side. For example, crossing from Laos into Thailand at the Friendship Bridge, there are DTAC and AIS stalls ready to sell you a physical SIM for cheap. This can be faster and cheaper than an eSIM if you're only spending a few days and the eSIM's regional plan doesn't quite fit your short stay. The downside? You'll be fumbling with tiny plastic, and potentially dealing with language barriers. For a seamless experience, especially for Morocco or other more regulated destinations, an eSIM is still the easiest option.
Another scenario: some countries, like India, require extensive paperwork and biometric verification for local SIMs. An eSIM from a global provider like Cellesim bypasses much of this hassle, saving you hours at a local shop (and potential scams).
eSIM Data Consumption: Show Me The Math
As a budget backpacker, every euro counts, and that includes your data spend. Understanding your data consumption is key to picking the right Cellesim plan and not overspending. I track mine religiously. Here's how I break it down and some benchmarks:
- Google Maps & Navigation: About 5 MB per hour of active navigation. If you're walking around a city for 4 hours a day, that's 20 MB.
- Social Media (Instagram, Facebook, TikTok): This is a killer. Up to 100-200 MB per hour if you're scrolling videos. Keep this in check.
- WhatsApp/Messaging: Very low, usually less than 1 MB per hour for text. Video calls are another story, 5-10 MB per minute.
- Email & Light Browsing: Around 10-20 MB per hour.
- Streaming Music (Spotify, Apple Music): 50-150 MB per hour, depending on quality.
- Streaming Video (Netflix, YouTube): 500 MB to 1.5 GB per hour. Avoid this on mobile data unless absolutely necessary.
My typical daily usage, hitting hostels with WiFi for heavy lifting, looks like this:
- Maps: 0.5 GB / month (17 MB/day)
- Social Media: 3 GB / month (100 MB/day, mostly evening scroll)
- Messaging/Email: 0.3 GB / month (10 MB/day)
- Light browsing/Research: 1 GB / month (33 MB/day)
- Emergency video calls: 0.2 GB / month (variable)
Total: ~5 GB per month, or about 170 MB per day. For a 15-day trip, I'd aim for a 3GB or 5GB plan, depending on how much I expect to rely on hostel WiFi. If I'm doing a lot of 'digital nomad' work, I'd double that. A 10GB plan for 30 days usually costs me around €18-€25 with Cellesim, depending on the region. So, 10GB / 30 days = 0.33 GB/day. At €25 for 10GB, that's €2.50/GB. That's a good benchmark for value.
| Activity | Estimated Data Consumption (per hour) | Backpacker Daily Avg. (if no WiFi) |
|---|---|---|
| Maps & Navigation | 5 MB | 50 MB (2-3 hrs active) |
| Social Media (scrolling) | 150 MB | 300 MB (2 hrs light use) |
| Messaging & Email | 10 MB | 20 MB |
| Light Browsing | 20 MB | 100 MB (5 hrs light use) |
| Music Streaming | 100 MB | 200 MB (2 hrs) |
| Video Calls | 300 MB | 150 MB (30 mins emergency) |
Saving Data: My Top 3 Tactics
- Download Offline Maps: Google Maps lets you download entire city or region maps. Do this on WiFi. It saves tons of data.
- Limit Background App Refresh: Go into your phone's settings and turn off background refresh for data-hungry apps like Instagram or TikTok when you're on mobile data.
- Use WiFi Whenever Possible: Every hostel, cafe, and sometimes even night buses (like those operated by FlixBus in Europe) have WiFi. Use it for updates, uploads, and heavy streaming.
These small habits add up to big savings, keeping you within that €40/day budget.
Troubleshooting Missing eSIM Numbers
What if you've followed all the steps, scoured your settings, and your EID is just, well, missing? Don't panic. It happens. Here's a quick troubleshooting rundown:
- Restart Your Device: The classic tech fix. A simple reboot can sometimes resolve minor software glitches that prevent information from displaying correctly.
- Check for Software Updates: Ensure your phone's operating system (iOS or Android) is up to date. Outdated software can sometimes cause unexpected issues.
- Reset Network Settings: This is a more drastic step, but it won't erase your personal data. On iPhone, go to Settings > General > Transfer or Reset iPhone > Reset > Reset Network Settings. On Android, it's usually under System > Reset options > Reset Wi-Fi, mobile & Bluetooth. You'll have to re-enter WiFi passwords, but it can fix underlying network-related display issues.
- Contact Your Device Manufacturer: If the EID remains invisible, there might be a deeper hardware or software issue. Reaching out to Apple Support or your Android phone's manufacturer support might be necessary.
- Contact Cellesim Support: If you've just installed a Cellesim profile and the EID isn't showing, or if you're encountering issues activating, their support team can guide you. They might have specific steps or tools to help you identify it, or at least help you understand why it's not appearing. You can find their support information on the Cellesim FAQ page.

Always make sure you've actually installed an eSIM profile first. If you haven't, there's no active eSIM to display an EID for!
Comparing eSIM Options for the Budget Traveler
Navigating the world of eSIMs can feel like decoding a bus schedule in a foreign language. There are global providers, regional plans, and country-specific options. As someone who lives by a budget, I've seen the good, the bad, and the overpriced. Here's a simplified comparison:
| eSIM Type | Pros for Backpackers | Cons for Backpackers | Best Use Case |
|---|---|---|---|
| Global/Regional eSIM (e.g., Cellesim Europe) | Seamless transition across multiple countries, often competitive per-GB rates, easy activation. | May not be the absolute cheapest in every single country, data validity periods can vary. | Multi-country trips (e.g., European backpacking), avoiding border-crossing SIM hunts. |
| Country-Specific eSIM (e.g., Cellesim Turkey) | Often offers better local rates and higher data allowances than regional for a single country. | Requires purchasing a new eSIM for each country, less flexible for fluid itineraries. | Longer stays in a single country, needing significant local data (e.g., a month in Turkey). |
| Carrier eSIM (e.g., T-Mobile eSIM Free Trial) | Can be free or very low cost for trials, direct integration with your home carrier. | Limited to specific carriers and regions, often not ideal for international roaming long-term. | Testing eSIM functionality, short cross-border trips where your home carrier has good agreements (e.g., T-Mobile free trial for US travelers into Canada/Mexico). |
My strategy is usually a Cellesim regional eSIM for Europe, Asia, or Africa, and then if I'm spending more than two weeks in one country and expect to use a lot of data (say, 20GB+), I'll consider a country-specific eSIM for that leg of the journey. This hybrid approach keeps costs down and convenience high.
Remember, always check the data expiry. A 5GB plan for 7 days might be cheaper per GB than a 10GB plan for 30 days, but if you're only staying 5 days, the 7-day plan is the smarter move. Don't pay for data you won't use. It's like paying for a fancy hotel breakfast when you can get a simit and tea for €1.50 at the local baker.
Final Thoughts on Staying Connected Without Breaking The Bank
Finding your eSIM number, while it sounds like a technical chore, is actually a crucial step in being a savvy, self-sufficient traveler. It empowers you to troubleshoot issues quickly, manage your data plans effectively, and ultimately, save money. My philosophy has always been: know your gear, know your options, and always, always know your numbers. That includes your EID.
In the world of budget backpacking, where every euro is accounted for, seamless connectivity isn't a luxury, it's a necessity for navigation, communication, and finding the next cheap meal. An eSIM from Cellesim provides that, but being prepared with your EID is your personal insurance against those frustrating tech hiccups on the road. Stay connected, stay savvy, and keep those travel budgets lean!
Frequently Asked Questions
What is an EID and why do I need it?
An EID (eSIM Identifier) is a unique, 32-digit serial number for your phone's embedded SIM hardware. You need it for activating new eSIM profiles, troubleshooting connectivity issues with your provider, and sometimes for transferring eSIMs between devices. It helps support teams identify your specific eSIM.
Can I find my EID if I don't have an active eSIM installed?
Yes, your EID is linked to your phone's hardware, not necessarily an active eSIM profile. It should be visible in your device's 'About Phone' or 'General > About' settings even without an active eSIM. However, if it's not showing, activating your first eSIM can sometimes make it appear.
Is the EID different from the IMEI or ICCID?
Yes, they are distinct. The IMEI (International Mobile Equipment Identity) identifies your physical phone device, while the ICCID (Integrated Circuit Card Identifier) identifies a specific SIM card (physical or eSIM profile). The EID, however, identifies the embedded eSIM chip itself, which can hold multiple ICCIDs (eSIM profiles).
What should I do if my EID is missing or not displayed?
First, try restarting your phone and checking for software updates. If it's still missing, a network settings reset might help (though you'll need to re-enter WiFi passwords). If all else fails, contact your device manufacturer's support or your eSIM provider's support for further assistance.
Can I use the same EID for multiple eSIM profiles?
Yes, your device's EID is static and identifies the embedded chip. You can install and manage multiple eSIM profiles (each with its own ICCID) on that single EID-identified chip. Think of the EID as the 'shelf' and the eSIM profiles as the 'books' on it.
Will finding my EID cost me any data or money?
No, checking your EID in your phone's settings is an offline process and does not consume any mobile data or incur any charges. It's a free piece of information stored directly on your device.