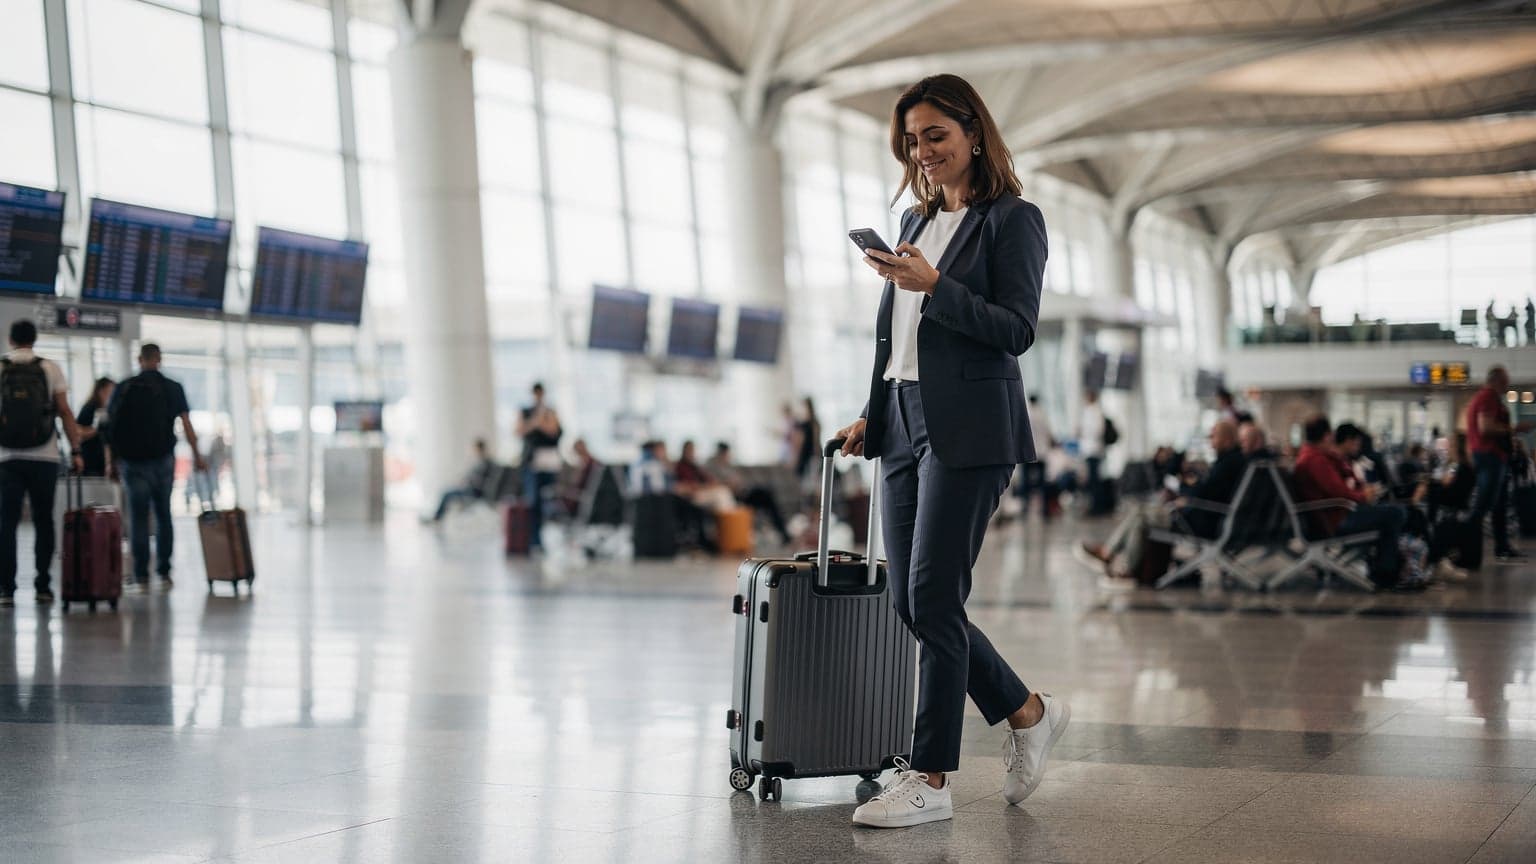
You have just landed. The airplane cabin door opens, and the first wave of warm, foreign air hits you. You are excited, but a familiar, low-grade anxiety kicks in. Your phone, your lifeline to maps, hotel bookings, and ride-sharing apps, is essentially a brick until you connect to the airport's spotty Wi-Fi. Many travelers have experienced this situation. But what if you could step off the plane, turn off airplane mode, and be instantly connected, all while keeping your home number active for important calls? This is not a travel fantasy; it is a reality for anyone learning how to use dual SIM on iPhone. This guide will show you exactly how to set up your device to make calls on one line and use affordable data on another, the ultimate travel hack. Before you dive in, the first step is always to confirm you have one of the many eSIM compatible devices, which includes most modern iPhones.
- What Exactly is Dual SIM and Why Should Travelers Care?
- Choosing the Right eSIM Plan for Your Trip
- Setting Up Your iPhone for Dual SIM Success: A Step-by-Step Guide
- When to Activate Your Cellesim eSIM for Maximum Benefit
- The Core Skill: How to Make Calls on One SIM and Use Data on Another iPhone
- eSIM vs. Traditional Roaming and Local SIM Cards: A Cost Comparison
- Pro Tips for Managing Dual SIMs on iPhone While Traveling
- Troubleshooting Common Dual SIM Issues
- FAQ: Frequently Asked Questions About Dual SIM & eSIM for Travel
Stay Connected Across Europe with Cellesim
Explore 42 countries with seamless, high-speed data. Join 50,000+ happy customers already traveling smarter.
Get Your Europe eSIM 🌍
What Exactly is Dual SIM and Why Should Travelers Care?
At its core, Dual SIM technology lets you use two different mobile plans on a single iPhone. This could be a combination of a physical nano-SIM (the little card you are used to) and an eSIM (an embedded, digital SIM), or on newer iPhone models, two separate eSIMs. It is like having two phones in one, without the bulk.
iPhones utilize a technology called Dual SIM, Dual Standby (DSDS). This sounds technical, but it simply means both of your phone lines are active and standing by to receive calls and texts. You can receive a call on your home number or your travel number at any time. The key thing to understand is that while both are ready for calls, only one can be actively using cellular data at any given moment. For a traveler, that is the perfect setup.
The Unbeatable Dual SIM Benefits for International Travel
Why go through the trouble? The advantages are immense, especially when you are abroad:
- Avoid Crippling Roaming Fees: This is the most significant benefit. By using a local or regional travel eSIM for data, you sidestep the often-outrageous per-megabyte charges your home carrier would love to bill you. It is the most effective international roaming alternative available today.
- Keep Your Home Number Active: You can still receive important calls and SMS texts (like two-factor authentication codes from your bank) on your primary number. Your friends and family can reach you as they normally would.
- Get Local Speeds and Coverage: A travel eSIM connects you to local networks, often giving you faster, more reliable data than you would get when roaming with your home provider. Cellesim partners with top local carriers in over 200+ countries to ensure optimal performance.
- Ultimate Convenience: With an eSIM, there is no need to hunt for a local SIM card shop at the airport, fumble with tiny SIM trays and ejector tools, or worry about losing your primary SIM card. This ease of use is a significant upgrade from traditional airport SIM purchases.
Choosing the Right eSIM Plan for Your Trip
Selecting the appropriate eSIM plan is crucial for a smooth travel experience. Cellesim offers a variety of options designed to fit different travel needs and durations. Consider these factors when making your choice:
Data Volume: How Much Do You Really Need?
Your data requirements depend heavily on your travel style. Are you a light user who only checks emails and maps, or do you stream videos and make frequent video calls? Cellesim offers plans ranging from 1 GB for short trips or light usage up to 20 GB or more for extended stays or heavy data consumption.
- Light Use (1-3 GB): Occasional maps, messaging, email, light social media. Sufficient for a weekend trip.
- Moderate Use (5-10 GB): Regular navigation, social media, some video streaming, occasional video calls. Good for a 1-2 week trip.
- Heavy Use (15+ GB): Frequent video calls, streaming, working remotely, extensive social media. Recommended for longer trips or digital nomads.
You can use our Smart Data Calculator to estimate your ideal data amount based on your planned activities.
Regional vs. Single-Country Plans
If your itinerary includes multiple countries within a specific region, a regional eSIM plan can be more cost-effective and convenient than buying individual country eSIMs. For example, Cellesim offers Europe eSIM plans covering 42 countries, or Southeast Asia plans for backpacking adventures.
- Single Country: Best for focused trips to one destination, like a week in Italy or France.
- Regional: Ideal for multi-country tours, such as a Eurotrip or exploring Asia. One eSIM covers all destinations, simplifying connectivity.
Always check the plan's validity period to ensure it covers your entire trip duration. Cellesim plans typically range from 7 to 30 days, with options for longer terms.
Setting Up Your iPhone for Dual SIM Success: A Step-by-Step Guide
Getting your iPhone ready for dual SIM travel is straightforward if you follow a few key steps. Think of it as a pre-flight check for your connectivity.
Before You Leave: The Pre-Travel Checklist
First, ensure your iPhone is “unlocked.” This means it is not tied to a specific carrier. If you bought your phone directly from Apple, it is likely unlocked. If you got it through a carrier contract, you may need to contact them to request an unlock once your contract is fulfilled. An unlocked phone is essential; it will not accept a second SIM from another provider otherwise. You can verify your phone's compatibility using our eSIM Checker.
Next, decide on your second line. While you could get a physical SIM card upon arrival, a travel eSIM for iPhone is far more convenient. You can purchase and install it from the comfort of your home before you even pack your bags, ensuring you are connected the moment you land.
Activating Your Travel eSIM
The activation process is remarkably simple. After purchasing a plan from a provider like Cellesim, you will typically receive a QR code via email. On your iPhone, you just need to:
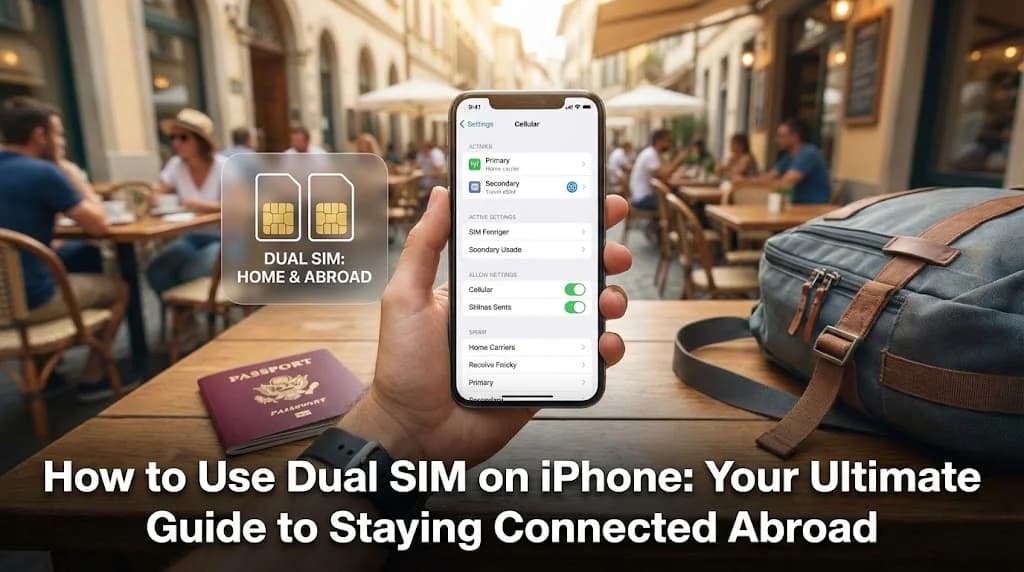
- Go to Settings > Cellular.
- Tap on Add eSIM.
- Choose Use QR Code and scan the code provided.
Your iPhone will guide you through the next few prompts. For a more detailed walkthrough, you can always consult an interactive setup guide, which visually breaks down every step of the process. For those who prefer comprehensive instructions, Cellesim also provides a complete eSIM setup guide.
Labeling Your Lines for Clarity
Once your second line is active, your iPhone will prompt you to label your plans. Do not skip this. It is a lifesaver. Default labels are often “Primary” and “Secondary,” but you can create custom labels. It is highly recommended to use clear, descriptive names like “Home Number” and “Travel Data” or "Cellesim [Country/Region]". This simple act prevents confusion later when you are choosing which line to use for a call or for data.
When to Activate Your Cellesim eSIM for Maximum Benefit
One of the key advantages of a Cellesim eSIM is the flexibility it offers regarding activation. Knowing the optimal timing can enhance your travel experience and ensure you make the most of your plan.
Pre-Departure Activation: Seamless Arrival
The ideal scenario for most travelers is to activate their Cellesim eSIM before leaving home. This can be done via Wi-Fi once you receive your QR code. The benefit here is instant connectivity upon arrival at your destination. As soon as your plane lands and you switch off airplane mode, your phone will connect to the local network covered by your eSIM plan. This means immediate access to navigation, ride-sharing apps, and communication with family without searching for airport Wi-Fi.
For example, if you are traveling to Turkey, you can activate your Cellesim eSIM while still at home in the UK or Germany. This ensures you are connected from the moment you land at Istanbul Airport, avoiding any delays or reliance on unreliable public Wi-Fi.
Consider Your Plan's Validity
Most Cellesim plans begin their validity period either from the moment of activation or upon first connection to a supported network in the destination country. Always check the specific terms of your purchased plan. If your plan's validity starts immediately upon activation, and you activate it several days before your trip, those days will count towards your plan's duration. Therefore, activate it close to your departure date if the plan begins upon activation.
If your plan's validity starts upon connecting to a foreign network, you have more flexibility. You can install the eSIM profile weeks in advance, and the data package will only begin counting down when your phone registers on a network in one of the covered countries.
For detailed information on when your specific Cellesim plan activates and expires, refer to the purchase confirmation email or the Cellesim app.
The Core Skill: How to Make Calls on One SIM and Use Data on Another iPhone
This is where the magic happens. You have two lines active; now it is time to tell your iPhone exactly how you want to use them. This configuration is the key to unlocking seamless, affordable connectivity abroad.
Designating Your Default Lines
Your iPhone's control center for this is in Settings > Cellular. Here you will see two crucial options:
- Default Voice Line: This is the number your iPhone will use by default for making calls and sending SMS messages. It is often best to keep this set to your “Home Number” so that calls to your contacts go out from the number they recognize.
- Cellular Data: This is the most important setting for travel. Tap on it and select your “Travel Data” eSIM (e.g., "Cellesim [Country/Region]"). This action tells your iPhone to use the affordable travel plan for all internet-related activities: maps, browsing, email, social media, and data-dependent apps like WhatsApp and FaceTime.
The Magic of “Allow Cellular Data Switching”
You will also see a toggle for “Allow Cellular Data Switching.” What does this do? It is a clever feature that allows your iPhone to temporarily use data from your non-primary data line during a voice call. Imagine you are on a call with your airline using your “Home Number,” but you need to look up your booking reference in your email. With this feature enabled, your iPhone will pull data from your “Travel Data” eSIM for that task without interrupting your call. For most travelers, it is best to leave this turned on, especially when relying on your home number for important calls.
For those looking to streamline their setup even further, you might consider freeing up your physical SIM slot entirely. Many travelers are now choosing to convert a physical SIM to an eSIM, which allows them to use two travel eSIMs at once or maintain maximum flexibility.
Making a Call: Choosing Your Line on the Fly
Even with a default voice line set, you are not locked in. When you go to make a call from the Phone app or your Contacts, you will see a small button right above the number you are about to dial. Tapping this lets you choose which line, ”Home Number” or “Travel Data”, to place the call with. This gives you granular control, perfect for when you need to make a local call using your travel plan's number (if your Cellesim eSIM plan includes a local number, which some regional plans do not).
Browse All Cellesim eSIM Plans

eSIM vs. Traditional Roaming and Local SIM Cards: A Cost Comparison
When traveling internationally, your connectivity options typically boil down to three choices: using your home provider's international roaming, buying a local physical SIM card, or opting for an eSIM. Let us compare these options, highlighting the financial and practical advantages of Cellesim eSIMs.
| Feature | Carrier Roaming | Local Physical SIM | Cellesim eSIM |
|---|---|---|---|
| Cost (example 5GB/7 days in Europe) | $50 - $100+ (often per day or per MB) | $15 - $30 (local currency equivalent) | $10 - $25 (competitive rates) |
| Activation Time | Automatic, but often throttled or expensive | Upon arrival, find store, queue, register | Instant, can activate before travel |
| Data Speed & Coverage | Variable, often throttled (e.g., 256kbps), dependent on roaming agreements | Full local speeds, strong coverage | Full local speeds (4G/5G), strong coverage via local partners |
| Keeping Home Number | Yes (calls/texts cost extra) | Yes (physical SIM removed, no service) | Yes (via Dual SIM, home number active for calls/texts) |
| Convenience | Easy, but expensive | Requires physical swap, can lose home SIM | Hassle-free digital installation, no physical swap |
| Flexibility | Limited plans, often auto-renew | Country-specific, limited multi-country options | Wide range of data plans, regional options, easy top-ups |
As the table illustrates, Cellesim eSIMs offer a compelling balance of cost, convenience, and performance, often outperforming both traditional roaming and the logistical challenges of local physical SIMs. They are especially beneficial for travelers who wish to keep their primary number active without incurring exorbitant charges, a common concern explored in our guide on eSIM vs. international roaming.
Pro Tips for Managing Dual SIMs on iPhone While Traveling
You have got the basics down. Now let us cover a few expert tips that separate the novice from the pro when it comes to managing dual SIMs on iPhone.
- CRITICAL: Turn Off Data Roaming on Your Home SIM. Go to Settings > Cellular > [Your Home Number] and make sure the “Data Roaming” toggle is switched OFF. This is your safety net. It prevents your home carrier from charging you for data usage, even if there is a momentary glitch or incorrect setting. Double-check this before you take off. It is the difference between a great trip and a post-travel bill shock, a scenario detailed in many guides comparing Cellesim vs. roaming in Mexico.
- Manage iMessage and FaceTime Settings. In Settings > Messages > Send & Receive, you can choose which number or email address to start new conversations from. Similarly, in FaceTime settings, you can select your caller ID. You can keep this as your home number so your contacts recognize you, while all the data for the service runs over your affordable Cellesim eSIM.
- Understand Voicemail Charges. Accessing your home number's voicemail from abroad by dialing in can trigger roaming charges. It is often better to rely on Visual Voicemail if it can access data from your travel SIM, or simply wait until you are back home.
- Keep an Eye on Battery Life. Maintaining a connection to two networks simultaneously can use slightly more battery than using one. It is usually not a dramatic difference, but if you are on a long day of sightseeing, carrying a small power bank is always a good idea. Consider adjusting settings like background app refresh or using low power mode to extend battery life.
- Monitor Data Usage. Regularly check your data consumption under Settings > Cellular. This helps you track how much data your Cellesim eSIM plan is using and allows you to top-up if necessary. Most Cellesim plans offer easy in-app top-ups. For more details on managing data, refer to our guide on checking eSIM data usage.
- Consider a VPN. If you are traveling to countries with internet censorship, such as China, a Virtual Private Network (VPN) is essential. While Cellesim provides the connectivity, a VPN encrypts your traffic and can help you bypass restrictions, as outlined in our guide on bypassing censorship with an eSIM. Choose a reputable VPN service before you travel. For broader travel security tips, consulting official government travel advisories like those from the U.S. Department of State can be beneficial.
Troubleshooting Common Dual SIM Issues
While Dual SIM and eSIM technology generally provide a smooth experience, you might occasionally encounter minor issues. Knowing how to troubleshoot them can save you time and frustration.
- eSIM Not Activating: Double-check you have a stable internet connection (Wi-Fi is best for activation). Ensure the QR code is scanned correctly in good lighting. If issues persist, restart your iPhone. For persistent problems, contact Cellesim support at [email protected].
- No Data Service:
- Confirm your Cellesim eSIM is selected as the "Cellular Data" line in Settings > Cellular.
- Ensure "Data Roaming" is ON for your Cellesim eSIM (this is different from your home SIM).
- Check your APN settings. Sometimes, these need to be manually configured, although Cellesim eSIMs usually auto-configure. You can find the correct APN settings in your Cellesim activation email or on the website.
- Verify you have data remaining on your plan.
- If still no service, try manually selecting a network in Settings > Cellular > Network Selection (for your eSIM line) and toggle "Automatic" off.
- Calls Not Going Through:
- Ensure your "Default Voice Line" is set correctly in Settings > Cellular.
- If making an international call, ensure you are dialing with the correct country code.
- Check that your home SIM is not experiencing a network outage if you are trying to use it for calls.
- "No Service" Message:
- Try turning Airplane Mode on and off.
- Restart your iPhone.
- Ensure you are within coverage of the Cellesim partner network in your destination. You can check network details on the Cellesim network page.
- Unexpected Home Carrier Charges: This almost always indicates that "Data Roaming" was not turned OFF for your home SIM. Review and rectify this setting immediately. If charges have already occurred, contact your home carrier for clarification, and then Cellesim support for any assistance if related to eSIM functionality.
Remember that Cellesim's support team is available to assist with any technical issues you might face. Do not hesitate to reach out if you cannot resolve a problem on your own.
FAQ: Frequently Asked Questions About Dual SIM & eSIM for Travel
What is Dual SIM and how does it benefit travelers?
Dual SIM technology allows your iPhone to use two different mobile plans simultaneously. For travelers, this means you can keep your home number active for calls and SMS while using an affordable Cellesim eSIM for data, avoiding expensive roaming fees and gaining access to local network speeds.
Do I need an unlocked iPhone to use Dual SIM with a travel eSIM?
Yes, your iPhone must be unlocked to use a travel eSIM from a different provider. If your phone was purchased through a carrier contract, you might need to contact them to request an unlock once your contract is fulfilled. iPhones bought directly from Apple are typically unlocked.
How do I activate a Cellesim eSIM on my iPhone?
After purchasing a Cellesim plan, you will receive a QR code via email. On your iPhone, go to Settings > Cellular, tap 'Add eSIM', and choose 'Use QR Code' to scan it. Follow the on-screen prompts to complete the installation. You can do this before you travel for instant connectivity upon arrival.
Can I make calls and use data from different SIMs at the same time?
Yes. With iPhone's Dual SIM, Dual Standby (DSDS) feature, both lines are active for calls and texts. You can set one line as your default for voice and another (typically your Cellesim eSIM) for cellular data. The 'Allow Cellular Data Switching' feature lets your iPhone use data from your secondary line during a voice call on your primary line.
How can I avoid unexpected data roaming charges on my home SIM?
It is critical to turn off Data Roaming for your home SIM. Navigate to Settings > Cellular > [Your Home Number] and ensure the 'Data Roaming' toggle is switched OFF. This prevents your home carrier from charging you for data usage abroad, even in unforeseen circumstances.
When is the best time to activate my Cellesim eSIM?
For maximum convenience, it is best to purchase and activate your Cellesim eSIM before you leave for your trip. This ensures you are instantly connected the moment you land, without needing to find Wi-Fi or a local SIM shop. The eSIM plan's validity period typically starts upon activation or first use in the destination country.
Travel with Confidence, Stay Connected Effortlessly
Say goodbye to roaming fees and unreliable public Wi-Fi. With Cellesim, you get reliable, high-speed data in over 200 countries, all while keeping your home number active. Join 50,000+ satisfied travelers who trust Cellesim for their global connectivity.
Find Your Perfect eSIM Plan
Conclusion: Travel Smarter, Not Harder
Learning how to use dual SIM on iPhone is more than just a technical exercise; it is about fundamentally changing the way you travel. It removes the friction of finding connectivity and the fear of a massive phone bill. By setting your travel eSIM for iPhone as your primary data source, you empower yourself with affordable, high-speed internet for maps, translations, and sharing your journey. Simultaneously, you keep your home line open for those essential calls and texts, giving you the perfect blend of global connectivity and local accessibility.
You no longer have to choose between being reachable and avoiding debt. With a dual SIM setup and Cellesim, you get the best of both worlds. The next time you land in a new city, from the bustling streets of Madrid to the quiet beaches of the Mediterranean, you can be confident that you are in complete control of your connection. Ready to make seamless connectivity your new travel standard? A world of possibilities awaits with affordable data plans for Europe and beyond.