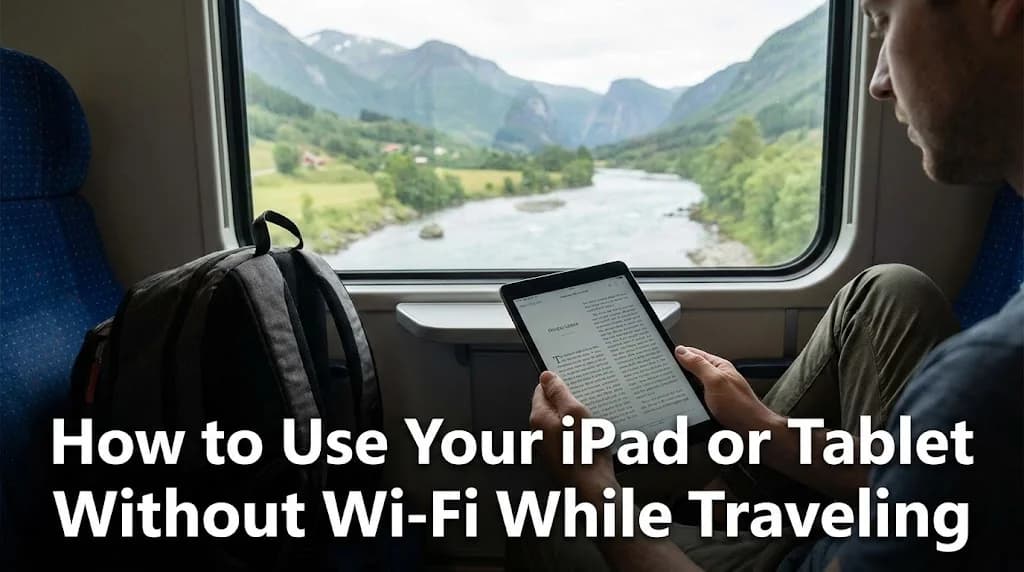
Picture this: you have just landed at Charles de Gaulle after a long flight. Your hotel confirmation and the address for your dinner reservation are buried in an email on your iPad, and the airport’s public Wi-Fi is either overloaded or stubbornly refusing to connect. It is a moment of digital panic that is all too familiar for modern travelers. Your tablet is an incredible travel companion for maps, entertainment, and research, but its power is severely limited when it is offline. This guide will show you exactly how to use your iPad without Wi-Fi, ensuring you have reliable internet from the moment you land. We will explore the game-changing convenience of using an eSIM, a technology built into most modern tablets. Before we dive in, it is worth checking if you have one of the many eSIM compatible devices that make international travel a breeze.
- First, Does Your iPad or Tablet Even Have Cellular?
- The Modern Solution: Using an eSIM for Your iPad
- Other Ways to Get Portable Internet for Travel
- Understanding Network Coverage for Tablets Abroad
- How Much Data Do You Need for Your Tablet on a Trip?
- eSIM vs. Traditional Roaming vs. Portable Wi-Fi: A Cost Comparison for Tablets
- Pro Tips for Managing Tablet Data While Traveling
- Frequently Asked Questions
Stay Connected Across Europe with Cellesim
Get seamless, high-speed data for your tablet in 42 European countries. Instant activation, no hidden fees.
Explore Europe Plans →Trusted by 50,000+ happy customers.

First, Does Your iPad or Tablet Even Have Cellular?
Before exploring your options, you need to answer a fundamental question: is your tablet a "Wi-Fi Only" model or a "Wi-Fi + Cellular" model? This single detail determines which solutions are available to you. It is a common point of confusion, but it is simple to figure out.
How to Check Your Tablet's Model
There are two easy ways to check:
- Look for a SIM Card Tray: On an iPad, the most definitive sign of a cellular model is a small tray on the side of the device. You will see a tiny pinhole next to it, which you would use to eject the tray. If you see this, your iPad has cellular capabilities. Android tablets will have a similar slot. You can also quickly verify device compatibility using the Cellesim eSIM checker online.
- Check Your Settings: On an iPad, go to Settings. If you see a "Cellular Data" or "Mobile Data" option in the main menu (usually below Wi-Fi and Bluetooth), your device is cellular-ready. If that option is missing entirely, you have a Wi-Fi-only model. For Android tablets, this option is typically found under "Network & Internet" or "Connections."
If you discover you have a Wi-Fi-only model, do not worry. You cannot add internal cellular capability to it, but several options discussed later, like tethering and portable hotspots, are designed exactly for your situation. If you have a cellular model, a world of seamless connectivity opens up, especially with eSIM technology. This is crucial for trips where constant connectivity is key, like planning an extensive eSIM for an Australia & New Zealand road trip where you might be navigating between remote locations.
The Modern Solution: Using an eSIM for Your iPad
For travelers with a cellular-enabled iPad or tablet, the eSIM is hands-down the most elegant and efficient way to get online abroad. It eliminates the hassles of old-school travel connectivity and gets you connected in minutes.
What is an eSIM and Why is it Perfect for Tablets?
An eSIM (embedded SIM) is a digital SIM card that is built directly into your device's hardware. Instead of physically swapping a tiny piece of plastic, you simply download a digital data plan onto your tablet. Think of it as software, not hardware. This is why it is the ideal travel data plan solution for a sleek device like an iPad. To learn more about the technology, you can refer to resources from the GSMA, the global association for mobile operators, which standardizes eSIM technology.
The benefits for travelers are immense:
- Instant Activation: You can purchase and install your data plan from your couch before you even leave home. When you land, you just turn it on. No more hunting for a SIM card kiosk at the airport, which can often lead to higher prices and inconvenience.
- No Physical Hassle: You do not have to find a paperclip to eject your home SIM tray, and there is no risk of losing your primary SIM card while you are away. This is particularly advantageous for tablets, which often have less rugged SIM trays compared to phones.
- Global Flexibility: You can store multiple eSIM profiles on your device. This means you can have a plan for Spain, one for Japan, and a regional plan for Southeast Asia all ready to go, and switch between them as needed. Cellesim offers plans covering over 200 countries, providing unparalleled global reach.
- Cost-Effective: eSIM plans are often significantly cheaper than paying for international data roaming from your home carrier, which can lead to shocking bills. This cost-saving aspect is a primary driver for many travelers switching to eSIMs.
How to Activate an eSIM on your iPad for Travel
Getting started is surprisingly simple. The process generally involves three main steps, and our interactive setup guide can walk you through every detail.
- Purchase a Plan: Choose a data plan for your destination from a provider like Cellesim. You will receive a QR code or manual activation details via email almost instantly. Cellesim offers a wide range of plans to suit different data needs and travel durations.
- Install the eSIM: On your iPad, go to Settings > Cellular Data > Add eSIM. You can then scan the QR code with your iPad's camera. Your tablet will guide you through a few simple prompts to label your new plan (e.g., "Europe Travel Data"). For a more detailed walkthrough, refer to our step-by-step installation guide.
- Activate Upon Arrival: Once you land at your destination, simply go back into your Cellular Data settings, select your travel eSIM, and turn on "Data Roaming" for that specific line. Within moments, you will be connected to the local network. Remember to turn off data roaming for your primary physical SIM if you wish to avoid home carrier charges.
Choosing the Right Travel Data Plan
Not all data plans are created equal. To pick the perfect one, consider these factors:
- Destination(s): Are you visiting a single country or hopping between several? Regional eSIMs (like for Europe or Asia) are incredibly convenient and cost-effective for multi-country trips, allowing you to use one plan across many borders.
- Data Amount: Be realistic about your usage. Are you just checking emails and using maps, or will you be streaming videos and attending Zoom calls? If you are unsure, it is helpful to figure out exactly how much data you need to avoid running out mid-trip. Consider activities like video calls, social media, and navigation when estimating.
- Duration: Match the plan's validity period to the length of your stay. Most plans range from 7 to 30 days, but Cellesim also offers longer-term options for extended trips or digital nomads.
Other Ways to Get Portable Internet for Travel
While an eSIM is the top choice for cellular tablets, it is not the only option. These methods work for both cellular and Wi-Fi-only models, making them crucial to understand.
Using Your Phone's Hotspot (Tethering)
Tethering allows you to share your phone's cellular connection with your tablet. You essentially turn your smartphone into a personal Wi-Fi hotspot.
- Pros: It is convenient since you are using a device you already have. No extra hardware is needed. This is a quick fix if your phone already has a robust and affordable international data plan.
- Cons: This is a major battery drain for your phone. More importantly, if you are using your home SIM card abroad, you could be tethering with expensive roaming data. This is how travelers end up with thousand-dollar phone bills. It is essential to understand your carrier's policies and focus on avoiding huge international data roaming bills. Tethering can also be slower or less reliable than a direct connection if your phone's signal is weak.
Portable Wi-Fi Hotspots (MiFi Devices)
A MiFi is a pocket-sized device that houses its own SIM card and broadcasts a private Wi-Fi network that your tablet and other devices can connect to.
- Pros: You can connect multiple devices at once (laptop, phone, tablet) and it has its own dedicated battery, saving your phone's power. It creates a secure, private network, which is often more reliable than public Wi-Fi.
- Cons: It is yet another gadget to buy, carry, and keep charged. You also still need to purchase a data plan or SIM card for the hotspot itself, which adds a layer of complexity. The upfront cost of the device, plus daily rental or data plan fees, can sometimes outweigh the benefits, especially for shorter trips.
Local Physical SIM Cards
The traditional method involves buying a physical SIM card from a local carrier upon arrival. This option is only available for Wi-Fi + Cellular tablet models.
- Pros: Can sometimes be very cheap for large amounts of data, especially in parts of Asia. You get a local phone number, which can be useful for bookings or local contacts.
- Cons: It is a hassle. You have to find a store, navigate potential language barriers, and deal with registration requirements (some countries require passport registration). Plus, you have to physically swap the SIM in your cellular tablet, risking misplacing your home SIM. This method is often less flexible for multi-country trips compared to a regional eSIM. For a deeper comparison, explore our guide on prepaid SIM card vs. eSIM for travelers.
Understanding Network Coverage for Tablets Abroad
Ensuring your tablet has reliable internet access while traveling extends beyond simply choosing a data solution. You also need to consider the quality and availability of the network itself. A Cellesim eSIM connects you to the best local networks, offering strong coverage in your destination.
What to Expect from Mobile Networks
- 4G/LTE: This is the most common standard globally and provides excellent speeds for most tablet activities, including streaming, browsing, and video calls. You can expect widespread 4G coverage in urban and populated areas in most countries.
- 5G: In many developed countries and major cities, 5G networks are rapidly expanding. When available, 5G offers significantly faster speeds and lower latency, enhancing your tablet experience, especially for large downloads or high-quality video conferencing. Cellesim partners with top local providers to ensure you get access to these advanced networks where available.
- Rural vs. Urban Coverage: Just like at home, mobile network coverage can be spotty in remote or mountainous regions. If your travel plans include extensive off-grid exploration, downloading offline maps and content becomes even more critical. Always check general coverage maps for your specific destinations if you anticipate being in less-traveled areas. For an overview of how Cellesim ensures robust connectivity, you can review how our network works.
Understanding these aspects helps manage expectations and allows you to plan your digital activities more effectively during your trip. Knowing you have a reliable network connection is essential for peace of mind, whether you are navigating bustling city streets or exploring tranquil landscapes.

How Much Data Do You Need for Your Tablet on a Trip?
Estimating your data needs for a tablet can be challenging, as usage patterns vary widely. However, optimizing your data consumption is key to avoiding unexpected top-ups or running out of connectivity at a crucial moment. Our Smart Data Calculator can provide a personalized estimate, but here's a general guide:
Typical Tablet Data Consumption Estimates
- Light User (2-5 GB per week): You primarily use your tablet for checking emails, browsing news websites, occasional social media, and light navigation with downloaded maps. You stream very little video or music.
- Moderate User (5-10 GB per week): Your usage includes regular social media, frequent browsing, some online shopping, occasional video streaming (standard definition), and several video calls (e.g., WhatsApp, FaceTime). This is suitable for general tourism and staying in touch.
- Heavy User / Digital Nomad (15-30+ GB per week): You rely heavily on your tablet for work, extensive video streaming (HD), frequent video conferencing, large file downloads, or using your tablet as a primary device for most online activities. If you are using your tablet to tether other devices, your data consumption will be significantly higher.
Keep in mind that these are estimates. Factors like the quality of video streaming (SD vs. HD), frequency of app updates, and background app activity can all impact your actual data usage. For example, if you are on an extended business trip and expect to conduct many video calls, opt for a higher data package. Similarly, for family travel where multiple devices might share a hotspot, a larger plan is a prudent choice. For a quick reference, consider reading our blog post on how much data is needed for a 2-week trip in Europe.
Browse Cellesim eSIM Plans →
eSIM vs. Traditional Roaming vs. Portable Wi-Fi: A Cost Comparison for Tablets
When planning for tablet connectivity abroad, understanding the cost implications of each option is crucial. Here is a comparison to help you make an informed decision:
| Connectivity Method | Pros for Tablets | Cons for Tablets | Estimated Cost (per day/GB) |
|---|---|---|---|
| Cellesim eSIM | Instant setup, no physical SIM, multiple plans, local speeds in 200+ countries. | Requires Wi-Fi + Cellular tablet. | From $0.50/GB or $4.50/day (plan dependent) |
| Carrier Roaming | No new hardware, uses existing phone plan (if tethering). | Extremely expensive, throttled speeds, high risk of bill shock. | $10-$15/day for limited data (e.g., 2GB). |
| Portable Wi-Fi Hotspot | Connect multiple devices, dedicated battery. | Extra device to carry, buy/rent, charge; separate data plan needed. | $8-$20/day (rental + data) + device cost. |
| Local Physical SIM | Can be cheap for large data in some regions, local number. | Hassle of finding store, installation, language barriers, passport registration. | $2-$10/GB (varies widely by country/carrier). |
This comparison clearly illustrates why Cellesim eSIMs often present the most balanced solution for travelers. They offer the convenience of instant, flexible connectivity at a significantly lower cost than traditional roaming, without the added complexity and hardware of a portable Wi-Fi device or local physical SIMs. Using a roaming savings calculator can further highlight the potential financial benefits of choosing an eSIM for your tablet.
Pro Tips for Managing Tablet Data While Traveling
Once you are connected, you want to make that data last. Nothing is more frustrating than running out of your data allowance days before you fly home. Here are some pro tips to stay efficient:
- Download Offline Maps: Before you leave your hotel's Wi-Fi, use Google Maps or Apple Maps to download the entire city map to your device. This way, GPS will work for navigation without using a single megabyte of your cellular data. Many travel apps also offer offline capabilities, which can be invaluable.
- Pre-load Your Entertainment: Download movies from Netflix, playlists from Spotify, and podcasts before you head out for the day. Streaming is one of the biggest data consumers. Even short video clips on social media can quickly deplete your allowance.
- Disable Background Hogs: Go to Settings > General > Background App Refresh and turn it off, or at least disable it for data-hungry apps like Instagram and Facebook. Also, turn off automatic app updates over cellular. This prevents apps from consuming data without your direct interaction.
- Monitor Your Usage: Your iPad's Cellular Data settings menu shows you exactly how much data you have used and which apps are the culprits. Check it every day or two to stay on track. This is especially useful on longer trips, for instance, if you are using an eSIM for the United States for a multi-week cross-country journey, where consistent monitoring helps prevent unexpected data depletion. Many apps also offer data-saving modes within their own settings.
- Utilize Wi-Fi When Available: While the goal is to use your tablet without Wi-Fi, judiciously connecting to secure hotel or cafe Wi-Fi for heavy downloads or updates can extend the life of your eSIM data plan. Always be mindful of public Wi-Fi security, however.
Frequently Asked Questions
Can I use an eSIM on my Wi-Fi Only iPad?
No, Wi-Fi Only iPads do not have the necessary cellular hardware to support an eSIM. eSIMs require a cellular-enabled tablet (Wi-Fi + Cellular model). However, you can still use methods like tethering from a cellular phone or a portable Wi-Fi hotspot to get internet on your Wi-Fi Only device.
How do I know if my iPad is cellular-enabled?
You can check by looking for a physical SIM card tray on the side of your iPad. Alternatively, go to Settings on your iPad. If you see a 'Cellular Data' or 'Mobile Data' option in the main menu, your device supports cellular connectivity and therefore eSIMs.
Is using an eSIM cheaper than international roaming for my tablet?
In most cases, yes. International roaming charges from your home carrier are often very expensive, sometimes costing $10-$15 per day for limited data. Cellesim eSIM plans offer significantly more affordable data rates, particularly for regional or multi-country travel, providing a cost-effective alternative.
How much data do I need for my iPad on a one-week trip?
Data needs vary, but for light use like maps, email, and occasional browsing, 3-5 GB for a week is often sufficient. If you plan to stream video, make frequent video calls, or use your tablet for work, consider 10 GB or more. Cellesim offers a Smart Data Calculator to help estimate your specific needs.
Can I keep my home SIM active while using an eSIM on my tablet?
Yes, if your cellular tablet supports dual SIM (physical SIM + eSIM), you can keep your home physical SIM active for calls and texts while using the eSIM for mobile data abroad. This allows you to receive important calls or messages on your primary number without incurring expensive roaming data charges.
What are the advantages of using Cellesim for tablet connectivity?
Cellesim offers instant digital delivery, eliminating the need for physical SIM cards. You get access to local network speeds in over 200 countries, transparent pricing without hidden roaming fees, and the flexibility to switch between multiple plans. This ensures reliable and affordable internet access for your tablet from the moment you land.

Travel Smarter, Stay Connected
Never struggle with unreliable Wi-Fi again. Get instant, high-speed data for your tablet wherever you go.
Find Your Perfect eSIM PlanJoin 50,000+ travelers enjoying seamless connectivity with Cellesim.
Relying solely on spotty public Wi-Fi is a travel strategy of the past. It is unreliable, often insecure, and limits your ability to be spontaneous. Knowing how to use your iPad without Wi-Fi gives you the freedom to look up a restaurant review on the spot, book a last-minute train ticket, or navigate a confusing city grid with confidence. For those with a cellular-enabled tablet, the choice is clear: an eSIM for your iPad offers an unmatched blend of convenience, control, and cost-effectiveness.
You can set it up before you leave, activate it the moment you land, and enjoy seamless, high-speed data without the fear of roaming charges. Before your next trip, explore a Cellesim travel data plan and discover how simple it is to keep your iPad connected, wherever your adventure takes you.