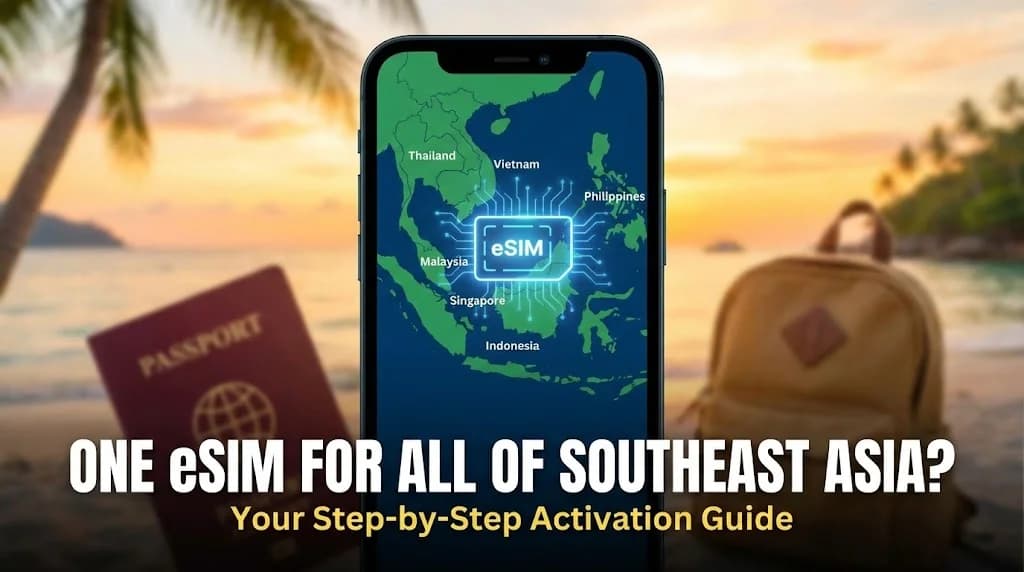
Traveling across the diverse landscapes of Southeast Asia, from Thailand's bustling markets to Vietnam's ancient temples and Indonesia's serene beaches, requires reliable connectivity. The idea of managing multiple local SIM cards for each country can be daunting, but a regional eSIM offers a streamlined solution. This guide explores how a single Cellesim eSIM can simplify your connectivity needs across the region and provides a clear, step-by-step process for activation.
- Exploring the "One eSIM" Solution for Southeast Asia
- Cellesim's Asia Regional eSIM: Your Gateway to Seamless SEA Travel
- Ensuring Your Device is Ready for a Southeast Asia eSIM
- Selecting the Ideal Data Plan for Your Southeast Asian Itinerary
- A Step-by-Step Guide to Activating Your Cellesim eSIM for Southeast Asia
- Navigating Southeast Asia: How Your Regional eSIM Keeps You Connected
- Smart Connectivity: Tips for Maximizing Your eSIM Experience in SEA
- Comparing Connectivity Options for Southeast Asia: eSIM vs. Alternatives
- Frequently Asked Questions
Southeast Asia eSIM Plans from $6.99
Connect across 20+ countries with one plan. Join 50,000+ travelers who connect instantly with Cellesim.
View Asia eSIM PlansExploring the "One eSIM" Solution for Southeast Asia
Southeast Asia is a popular destination for backpackers, families, and business travelers alike. The region encompasses a diverse range of countries, each with its unique culture, cuisine, and landscapes. Traditionally, staying connected while hopping between countries like Thailand, Vietnam, Malaysia, and Singapore meant buying a new physical SIM card in each destination or incurring expensive roaming charges. This process was often time-consuming, involved registration hurdles, and led to collecting a stack of expired plastic SIMs.
The advent of eSIM technology has simplified this considerably, especially with regional plans. A regional eSIM allows you to purchase a single data package that works across multiple countries within a specified geographic area. For Southeast Asia, this means you can land in Bangkok, travel to Hanoi, then fly to Kuala Lumpur, all while maintaining consistent internet access without needing to swap SIMs or change phone numbers. This provides a level of convenience previously unattainable for international travelers.
Cellesim's Asia Regional eSIM: Your Gateway to Seamless SEA Travel
Cellesim offers regional eSIM plans specifically designed for travelers exploring Asia. Our Asia eSIM covers over 20 countries, including key Southeast Asian destinations such as Thailand, Vietnam, Cambodia, Malaysia, Singapore, Indonesia, and the Philippines. This comprehensive coverage ensures you remain connected whether you are exploring ancient temples, navigating bustling city streets, or relaxing on island paradises.
With a Cellesim regional eSIM, you benefit from transparent pricing, high-speed 4G/5G data where available, and the flexibility to choose a plan that matches your travel duration and data needs. Activating your eSIM before you even depart means you land with immediate connectivity, allowing you to book rides, navigate to your hotel, and share your adventures from the moment you arrive. Cellesim is trusted by over 50,000 happy customers worldwide for its reliable service and extensive network partnerships.
"Using a regional eSIM for my month-long Southeast Asia trip was a game-changer. I didn't waste a single moment searching for local SIMs and always had data for maps and essential communication."
Ensuring Your Device is Ready for a Southeast Asia eSIM
Before purchasing any eSIM plan, it is crucial to confirm your smartphone's compatibility. Most modern smartphones released since 2018, including recent iPhone, Google Pixel, and Samsung Galaxy models, are eSIM-capable. Older devices or certain models sold in specific regions (like some in mainland China) might not support eSIM technology.
To check if your device supports eSIM, you can often look in your phone's settings under "Cellular" or "Mobile Data" for an option to "Add eSIM" or "Add Data Plan." For a definitive answer, refer to your device manufacturer's specifications or visit Cellesim's dedicated page on eSIM compatible devices. It takes just a few moments to verify and prevents any connectivity issues later.
Selecting the Ideal Data Plan for Your Southeast Asian Itinerary
Choosing the right data plan involves considering your travel duration, expected data usage, and the number of countries you plan to visit. Cellesim offers a range of Asia regional plans, varying in data allowance and validity periods. For instance, a casual traveler might need 5 GB for 15 days, while someone working remotely or frequently streaming might opt for 20 GB over 30 days.
Consider your typical daily usage:
- Light user (email, maps, messaging): 1-2 GB per week.
- Moderate user (social media, light browsing, occasional streaming): 3-5 GB per week.
- Heavy user (video calls, streaming, tethering): 7-10+ GB per week.
If you are unsure about your data needs, use a smart data calculator to estimate your consumption based on your planned activities. It is often more cost-effective to purchase a slightly larger plan upfront than to frequently top up, though Cellesim makes topping up simple if you run out.
A Step-by-Step Guide to Activating Your Cellesim eSIM for Southeast Asia
Activating your Cellesim regional eSIM is a straightforward process, designed for travelers' convenience. You can complete the activation either before you leave home or once you have arrived at your first destination in Southeast Asia, provided you have a Wi-Fi connection.
Here is a general step-by-step guide:
- Purchase Your eSIM: Visit cellesim.com and select your desired Asia regional eSIM plan. Complete the purchase.
- Receive QR Code/Activation Details: After purchase, you will receive an email containing a QR code or manual installation details. Keep this email accessible.
- Add eSIM to Your Device:
- iPhone: Go to Settings > Cellular/Mobile Data > Add eSIM. Scan the QR code or enter details manually.
- Android: Go to Settings > Network & Internet > SIMs > Add more. Scan the QR code or enter details manually.
- Label Your eSIM: For easy identification, label your new eSIM profile (e.g., "Cellesim Asia" or "Travel Data"). This helps distinguish it from your primary SIM.
- Set for Data Roaming: Once installed, ensure that your Cellesim eSIM is selected for mobile data. You must also enable "Data Roaming" for this eSIM profile. This is crucial for connecting to local networks in Southeast Asia and will not incur extra charges from your home carrier when applied to the Cellesim eSIM.
- Activate and Connect: Upon arrival in any covered Southeast Asian country, your device will automatically connect to a partner network, providing instant data access.
For more detailed instructions specific to your device, consult our complete eSIM setup guide or the interactive setup guide.
Find Your Perfect Asia eSIM Plan
Navigating Southeast Asia: How Your Regional eSIM Keeps You Connected
Once your Cellesim Asia regional eSIM is active, maintaining connectivity throughout your journey across Southeast Asia becomes effortless. The eSIM automatically switches between partner networks as you cross borders within the covered 20+ countries. This means seamless transition from Thailand to Laos, or from Vietnam to Cambodia, without any manual intervention or additional setup steps.
Network coverage across Southeast Asia is generally robust in urban areas and popular tourist destinations. Major cities like Bangkok, Singapore, Kuala Lumpur, Hanoi, and Jakarta typically offer strong 4G and increasingly 5G connectivity. In more remote or rural areas, coverage might be limited to 3G or even 2G, similar to local physical SIM cards. Cellesim partners with leading local carriers in each country to ensure the best possible signal and speed available.
For detailed information on network availability in specific regions, you might consult resources like OpenSignal or the official tourism boards of the countries you plan to visit, such as the Tourism Authority of Thailand.
Smart Connectivity: Tips for Maximizing Your eSIM Experience in SEA
To make the most of your regional eSIM during your Southeast Asian adventure, consider these practical tips:
- Monitor Data Usage: Regularly check your data consumption through your phone's settings or the Cellesim portal. This helps you avoid unexpected depletion and plan for top-ups if necessary.
- Utilize Wi-Fi When Available: Connect to hotel, cafe, or public Wi-Fi whenever possible. This conserves your eSIM data for when you truly need it on the go.
- Download Offline Maps: Before venturing into new cities or remote areas, download offline maps (e.g., Google Maps) to navigate without constant data reliance.
- Keep Your Primary Number Active: Your home SIM remains active for calls and SMS while your eSIM handles data. Set your home SIM as primary for calls if you need to receive texts or calls, ensuring you do not miss important communications. Read our guide on keeping your number with an eSIM for more details.
- Personal Hotspot: Cellesim eSIMs generally support tethering, allowing you to share your data connection with other devices like laptops or tablets. This is useful for group travel or when you need to work on the go. Learn more about eSIM tethering.
Comparing Connectivity Options for Southeast Asia: eSIM vs. Alternatives
When planning connectivity for Southeast Asia, travelers typically weigh three main options: using their home provider's international roaming, purchasing local physical SIM cards in each country, or opting for a regional eSIM. Here is a comparison to help you make an informed decision:
| Option | Coverage in SEA | Price (per GB) | Setup Effort | Convenience |
|---|---|---|---|---|
| Cellesim Asia eSIM | 20+ countries | Low (from $6.99) | Instant, remote | Seamless, single plan |
| International Roaming | Depends on provider | Very High ($10-15/day or more) | Automatic | High (if cost is not an issue) |
| Local Physical SIM | Single country | Low-Medium | Airport/Store visit, registration | Requires swapping, multiple purchases |
While local SIM cards might seem slightly cheaper per GB in a single country, the cumulative cost and hassle of purchasing one in every new destination quickly add up. Roaming is convenient but prohibitively expensive for most. The regional eSIM strikes an optimal balance, offering broad coverage and ease of use at a competitive price. To understand potential savings, explore our roaming savings calculator.
Ready for Seamless Connectivity Across Southeast Asia?
Unlock instant data in 20+ countries. Join 50,000+ happy travelers with Cellesim.
Get Your Asia eSIM NowTrusted by travelers worldwide. 24/7 Support.
Frequently Asked Questions
Can I use my Cellesim eSIM in every country in Southeast Asia?
Cellesim offers regional plans that cover over 20 countries in Asia, including most popular Southeast Asian destinations like Thailand, Vietnam, Cambodia, Malaysia, Singapore, Indonesia, and the Philippines. Always check the specific country list for your chosen plan to ensure all your destinations are included.
What if I need more data during my trip to Southeast Asia?
If you find yourself running low on data while traveling in Southeast Asia, Cellesim makes it easy to top up your plan instantly through our website. You can purchase additional data packages that will be added to your existing eSIM profile, ensuring uninterrupted connectivity without needing a new eSIM.
Will my phone number still work with an eSIM in Southeast Asia?
Yes, your primary phone number from your home country remains active on your physical SIM card. When you install an eSIM, your phone essentially becomes dual-SIM capable. You can set your home SIM for calls and SMS, and the Cellesim eSIM for mobile data, allowing you to receive calls and texts on your original number while enjoying affordable data abroad.
Is my phone compatible with an eSIM for travel in Southeast Asia?
Most modern smartphones released since 2018 support eSIM technology, including recent iPhone, Google Pixel, and Samsung Galaxy models. However, it is essential to verify your specific device model. You can find a comprehensive list of eSIM compatible devices on the Cellesim website.
Do I need to enable data roaming for my Cellesim eSIM in Southeast Asia?
Yes, you must enable data roaming for your Cellesim eSIM to connect to our partner networks in the countries you visit. This action activates your Cellesim data plan and does not incur additional charges from your home carrier. It is a necessary step for your regional eSIM to function across multiple countries.
Can I share my Cellesim eSIM data with other devices while traveling in Southeast Asia?
Yes, Cellesim eSIMs generally support tethering (personal hotspot). This means you can share your eSIM's data connection with other devices like laptops or tablets, which is particularly useful for group travel or when working remotely in Southeast Asia.