Embarking on a multi-country Eurotrip promises a tapestry of experiences, from historic cities to scenic landscapes. For the savvy traveler, seamless connectivity is paramount, and managing multiple eSIMs offers an unparalleled solution. Rather than juggling physical SIM cards or incurring exorbitant roaming fees, understanding how to effectively utilise eSIM technology can transform your journey. This guide delves into the practicalities of managing several eSIM profiles, ensuring you stay connected and in control across every European border.
- Why Multiple eSIMs are Smart for a Multi-Country Eurotrip
- Understanding eSIM Profiles and Your Device
- Choosing the Right Cellesim Strategy for Your European Adventure
- Activating and Managing Multiple eSIM Profiles on Your Device
- Optimizing Connectivity: Data Usage and Network Handoffs Across Europe
- Cost Efficiency: eSIMs vs. Traditional Roaming for European Journeys
- Essential Tips for a Seamless Multi-Country eSIM Experience
- Frequently Asked Questions
Get Your Europe eSIM Plans from Cellesim
Connect across 40+ European countries with ease. Join 50,000+ happy customers who trust Cellesim for global connectivity.
View All Europe eSIM PlansWhy Multiple eSIMs are Smart for a Multi-Country Eurotrip
The traditional approach to international travel often involves either expensive roaming packages or the hassle of purchasing local SIM cards in each new country. For a multi-country Eurotrip, these methods become cumbersome and costly. Imagine arriving in France, buying a SIM, then repeating the process in Italy, and again in Germany. This consumes valuable travel time and often leads to unused data plans from previous stops.
Multiple eSIMs offer a more elegant solution. An eSIM, or embedded SIM, is a digital SIM that allows you to activate a cellular plan from a carrier without needing a physical SIM card. Modern smartphones can store multiple eSIM profiles, enabling you to switch between them as you cross borders. This means you can have a France eSIM active for your initial days, then seamlessly switch to an Italy eSIM as you move south, all from your phone's settings.
This flexibility is particularly beneficial for European travel, where country borders are often crossed frequently. Instead of being locked into a single regional plan that might not offer the best value for every specific country, you can tailor your connectivity, purchasing smaller, more focused plans as needed. It provides granular control over your data usage and spending, aligning perfectly with the ethos of a savvy traveler.
Understanding eSIM Profiles and Your Device
Before diving into managing multiple eSIMs, it's crucial to understand how they function with your device. Most modern smartphones, including recent iPhone models (iPhone XR/XS and newer), Google Pixel phones (Pixel 3 and newer), and many Samsung Galaxy devices, support eSIM technology. These devices allow you to store several eSIM profiles simultaneously, typically up to 5-10, though only one or two can be active for data at any given time (depending on the phone's dual SIM capabilities).
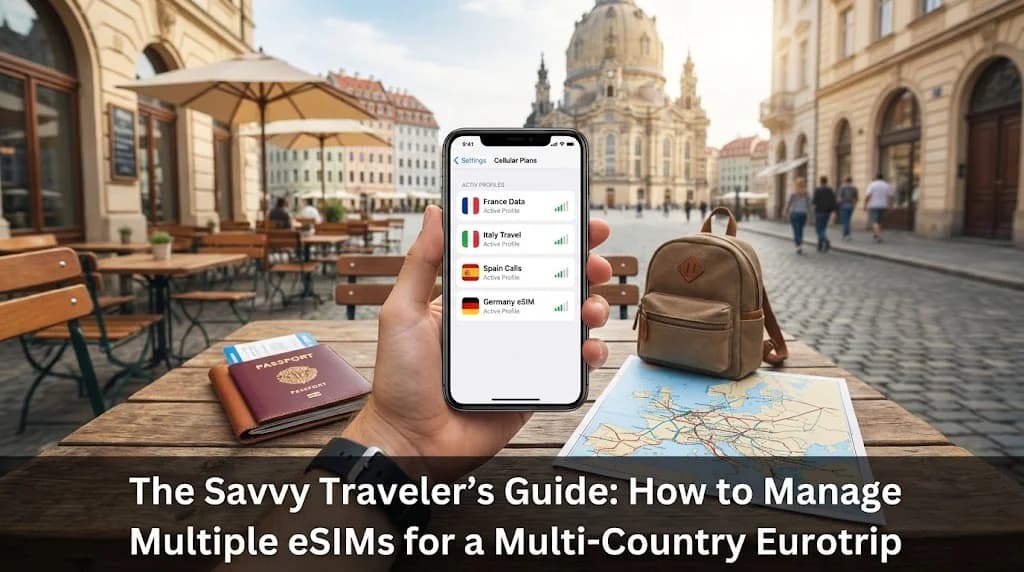
Each eSIM profile is essentially a digital representation of a SIM card from a specific carrier in a specific region. When you purchase an eSIM from Cellesim, you receive a QR code or manual activation details. Scanning this QR code installs the eSIM profile onto your device. You can then name these profiles (e.g., "France Data," "Italy Data") for easy identification.
The ability to store multiple profiles means you can pre-purchase eSIMs for your entire Eurotrip itinerary. For example, you could buy an eSIM for Germany, another for Austria, and one for Switzerland before you even leave home. This preparation saves time and ensures you are ready to connect the moment you land, without scrambling for Wi-Fi or local SIM shops. Your primary physical SIM can remain in your phone, allowing you to continue receiving calls and texts to your home number while using the eSIM for data abroad.
Choosing the Right Cellesim Strategy for Your European Adventure
When planning a multi-country Eurotrip, selecting the right eSIM strategy is key to both connectivity and cost control. Cellesim offers various options that can be combined for optimal flexibility:
- Country-Specific eSIMs: Ideal if your itinerary involves distinct periods in individual countries, or if you require very specific local data packages not covered by regional plans. For example, a dedicated Cellesim Italy eSIM might offer better value if you're spending a full week in Rome and Florence.
- Regional Europe eSIMs: For broader coverage, Cellesim provides Europe-wide eSIM plans that cover numerous countries under a single data package. This simplifies management, as you don't need to switch profiles when crossing borders within the covered region. This is often the most straightforward choice for extensive European travel.
- Combining Strategies: The savvy traveler might combine these. Use a Cellesim Europe eSIM for general travel across many countries, then supplement it with a country-specific eSIM for destinations where you need more data or a longer duration than your regional plan offers, or for countries not included in the broader package.
"The true advantage of eSIMs for a multi-country Eurotrip lies in their adaptability. You can tailor your connectivity to each stage of your journey, ensuring you always have the best coverage and value."
Consider your itinerary duration, data needs in each country, and the overall cost. For example, if you plan to visit France, Germany, and the Netherlands for a week each, a single Cellesim Europe eSIM covering these countries might be simplest. However, if you then spend another two weeks exclusively in Switzerland, a specific Switzerland eSIM could be more economical than extending a broader European plan. Cellesim offers plans available in over 200+ countries, providing extensive options for your European travels.
Activating and Managing Multiple eSIM Profiles on Your Device
The beauty of managing multiple eSIMs lies in the simplicity of activation and switching. Here's a general step-by-step guide:
1. Purchasing Your eSIMs
Browse Cellesim's available plans for the countries or regions on your Eurotrip itinerary. Purchase the required eSIMs well in advance of your departure. You will receive QR codes via email for each purchase.
2. Installing eSIM Profiles
Before you leave home or once you have a stable Wi-Fi connection:
- Open your phone's Settings.
- Navigate to 'Cellular' or 'Mobile Data' options.
- Select 'Add eSIM' or 'Add Data Plan'.
- Scan the QR code provided by Cellesim for each eSIM. Your phone will guide you through naming each profile (e.g., "Cellesim France," "Cellesim Italy").
- Install all your planned eSIMs onto your device. They will remain dormant until activated.
3. Activating and Switching
When you cross a border:
- Go back to 'Cellular' or 'Mobile Data' settings.
- Select 'Cellular Data' (or 'Mobile Data').
- Choose the eSIM profile corresponding to your current country (e.g., "Cellesim Germany" when in Germany).
- Ensure 'Data Roaming' is enabled for the selected eSIM if it's a regional plan or a plan with roaming included.
Your phone will automatically connect to the local partner network. Remember, your primary physical SIM can remain active for calls and texts, with the eSIM handling all data. For a more detailed walkthrough, refer to Cellesim's complete eSIM setup guide or the interactive setup guide.
Find Your Perfect eSIM Plan
Optimizing Connectivity: Data Usage and Network Handoffs Across Europe
For a seamless multi-country Eurotrip, strategic data management is as important as having the right eSIMs. Each European country has its own network infrastructure, but as you cross borders, your eSIM will automatically seek out partner networks.
Monitoring Data Usage
Regularly check your data consumption within your phone's settings. This helps you understand your usage patterns and anticipate when a top-up or a new eSIM might be needed. Cellesim also provides tools like the Smart Data Calculator to estimate your data needs based on typical travel activities.
Network Prioritization
On devices supporting dual SIM (physical SIM + eSIM or dual eSIM), you can designate which SIM is used for mobile data. When using multiple eSIMs for different countries, ensure you switch your 'Mobile Data' source to the correct eSIM profile for the country you are currently in. Your phone will usually default to the previously active data plan, so manual switching is crucial to avoid unexpected charges or lack of connectivity.
Dealing with Connection Issues
Occasionally, you might encounter minor connectivity glitches when crossing borders or in remote areas. A simple troubleshooting step is to toggle Airplane Mode on and off. This forces your phone to re-establish network connections. If issues persist, verify that 'Data Roaming' is enabled for your active eSIM (if applicable) and check your phone's network selection settings (often set to 'Automatic' by default, which is usually best).
Staying informed about network coverage is also beneficial. While Cellesim partners with leading networks, checking a country's main mobile operators (e.g., Orange in France, Vodafone in Italy, Deutsche Telekom in Germany) can give you an idea of typical 4G/5G availability in major cities and rural areas.
Cost Efficiency: eSIMs vs. Traditional Roaming for European Journeys
The financial aspect of staying connected is a significant consideration for any savvy traveler. Let's compare the cost-effectiveness of Cellesim eSIMs against traditional roaming and local physical SIMs for a multi-country Eurotrip.
| Option | Cost (Example 7-day trip) | Setup Difficulty | Flexibility for Multiple Countries |
|---|---|---|---|
| Cellesim eSIM | From $5 - $20/country | Instant (Online) | High (Switch profiles) |
| Carrier Roaming | $10-$15/day (often more) | Automatic (Expensive) | Seamless (Very Expensive) |
| Local Physical SIM | $15-$30/country + purchase time | Moderate (Store visit, swap) | Low (Requires new SIM per country) |
Why Cellesim eSIMs Win for Eurotrips
- Predictable Costs: You buy a data package upfront, so there are no surprise charges. For example, a Cellesim Europe 10GB plan for 30 days might cost around $25-$35, covering multiple countries. Compared to $10-$15 per day for carrier roaming, the savings are substantial. Use our Roaming Savings Calculator to see how much you can save.
- Flexibility: The ability to install multiple eSIMs and switch between them as needed provides unparalleled control. You can purchase specific country plans for deeper dives into a destination or opt for a regional plan for broader coverage.
- Convenience: No hunting for local SIM shops, no language barriers, and no fumbling with tiny physical cards. The entire process, from purchase to activation, is digital and happens remotely. This is especially valuable at busy airports like Paris CDG or Milan Malpensa.
- Keeping Your Number: With an eSIM for data, your primary physical SIM remains active for calls and texts to your home number, ensuring you stay reachable without data roaming costs. Learn more about keeping your number with a travel eSIM.
For a multi-country Eurotrip, the cost efficiency and convenience of managing multiple eSIMs with Cellesim significantly outweigh the alternatives. It empowers you to be a truly savvy traveler, making informed choices about your connectivity.
Ready for Seamless European Connectivity?
Explore Europe without interruption. Connect instantly across borders with Cellesim eSIMs.
Start Your Connected JourneyTrusted by 50,000+ travelers worldwide. 24/7 Support: [email protected]
Essential Tips for a Seamless Multi-Country eSIM Experience
Maximise your multi-country Eurotrip connectivity with these expert tips:
- Plan Ahead: Purchase and install your eSIMs before you depart. This allows you to troubleshoot any activation issues while you still have your home network or reliable Wi-Fi.
- Label Your eSIMs Clearly: When installing, rename each eSIM profile on your phone with clear, descriptive names like "Cellesim France Data" or "Cellesim Europe Plan." This prevents confusion when switching.
- Monitor Data Usage: Regularly check your data consumption in your phone settings or via the Cellesim portal. This helps avoid running out of data unexpectedly, especially if you're streaming or video calling.
- Disable Auto-Switching: If your phone has an option to automatically switch to the "best" data plan, disable it. Manual switching gives you control and prevents accidental usage on an unintended eSIM, which could incur costs.
- Understand Activation Timings: Cellesim eSIMs typically activate when they first connect to a supported network in the destination country. Purchase your eSIMs when ready, but install them anytime. Some plans have validity periods that start upon activation, so be mindful of this for longer trips.
- Keep Your Home SIM Active (for calls/texts): If you want to receive calls and texts to your original number, keep your primary physical SIM active and set the eSIM as your data-only line. Make sure to turn off data roaming for your physical SIM to avoid charges.
- Emergency Contacts: Ensure your emergency contacts and essential travel apps are accessible even without data. Save critical information offline.
- Customer Support: Familiarise yourself with Cellesim's support channels ([email protected]) in case you need assistance while abroad.
By following these guidelines, you can navigate your European adventure with confidence, always connected and fully in control of your mobile data. This approach allows you to focus on the wonders of your Eurotrip, knowing your connectivity is handled efficiently.
Frequently Asked Questions
Can I use my primary phone number for calls while using a Cellesim eSIM for data during my Eurotrip?
Yes, absolutely. One of the major benefits of using a Cellesim eSIM is that you can keep your primary physical SIM card active in your phone. This allows you to continue receiving calls and texts to your home number while using the eSIM for all your data needs. Just ensure your physical SIM's data roaming is turned off to avoid unexpected charges, and set the Cellesim eSIM as your primary data line.
How many eSIM profiles can I store on my smartphone for a multi-country Eurotrip?
Most modern eSIM-compatible smartphones can store multiple eSIM profiles, typically ranging from 5 to 10. You can install all your Cellesim eSIMs for different European countries before you even leave home. However, only one or two can be actively used for data at any given time, depending on your device's dual SIM capabilities.
When should I activate my Cellesim eSIMs for my Eurotrip?
It is recommended to install your eSIMs before you travel, while you have a reliable internet connection. Most Cellesim data plans activate only when they connect to a supported network in the destination country. This means you can install them early, but the validity period will typically only begin when you land and turn on the eSIM's data roaming.
Are Cellesim's Europe-wide eSIM plans suitable for all my Eurotrip destinations?
Cellesim offers regional Europe eSIM plans that cover a wide range of countries, often more than 40. These are excellent for general travel across multiple European borders. However, for specific countries or if you need more data than a regional plan provides, a country-specific Cellesim eSIM might offer better value or more tailored coverage. Always check the specific country list for any regional plan you consider.
What if I run out of data on my Cellesim eSIM during my Eurotrip?
If you deplete your data allowance, you can usually top up your existing Cellesim eSIM plan directly through the Cellesim website or by purchasing a new eSIM for that region or country. It's advisable to monitor your usage and plan for top-ups, especially if your itinerary involves heavy data consumption activities. You can use our Smart Data Calculator to estimate your needs.
Can I share my eSIM data with other devices while traveling in Europe (tethering)?
Many Cellesim eSIM plans support mobile hotspot or tethering functionality, allowing you to share your data connection with other devices like laptops or tablets. However, it is always best to verify this feature for your specific Cellesim plan before purchase, as policies can vary. This can be very useful for connecting multiple devices on the go.
See also: Netherlands eSIM